2005 Dodge Magnum


Daily Driver Does it All


One of the regular features we hope to share on the site are vehicle biographies.  We have a number of them planned starting with the greater Frontseat Driving family and eventually encompassing our reader’s ride too.  Some of them are even written, unfortunately a busy schedule and uncooperative weather this past Autumn delayed the necessary photo shoots.  No one wants to read about vehicles without pretty pictures to look at.  Rather than delay this feature any longer we decided to start with the cars that sit in Frontseat Driving’s F-Bomb Studio.  Yes it’s a garage, but the by volume more swearing occurs than actual work, hence the moniker.  Meant to be funny?  Yes.  Absolutely true?  Also yes.


While the Frontseat Driving lineup has always been eclectic, it’s tough to deny that our automotive interests usually center on vintage vehicles. That said the need for a modern daily driver especially in the rust belt is a cold hard reality.  By modern, really we only mean something that doesn’t leak when it rains, and starts every time.  Another way we might differentiate our classics from our modern cars is that we’d jump into the modern car without forethought and drive to the opposite side of the continent without even packing tools or spares.  


When we last shopped for a daily driver, the need for utility led us to pickups.  However with a ‘76 K5 Blazer in the fleet as well as a beater Toyota, another truck really seemed excessive.  Given our long lasting love affair with ‘long roofs’, wagons seemed the next best contender.


If a wagon was going to be the body style of choice, it had to at least be something special.  Decent motivation, rear wheel drive and ideally three pedals. Unfortunately at the time the list was short.  The North American market doesn’t support the wagon market like some of us wish it would, often we are left salivating over ROW (rest of world) offerings that don’t make it to our shores.  Passionately and patiently waiting for the 25 year rule (20 in Canada) to come into play allowing these cars into the country is rarely a realistic option.


At the time the CTS-V wagon had not yet been released, and while we liked the idea of the Volvo V70R and enjoyed a couple spirited test drives, long term cost of operation seemed a risk.  Perhaps the biggest problem with the Volvo however, was… me. Being a single guy in his (at the time) 30s, driving a Volvo station wagon (even an R) seemed… well about 10 years or two kids premature.


It was on our way home from one of those test drives that I passed a Dodge dealership and while eyeing the Ram pickups once again, spotted a Dodge Magnum on the lot nearest the road.  While the Magnum had completely slipped my mind while shopping vehicles, I quickly recalled the witty commercial “Dude what do you got in that thing?”


It didn’t hurt that the ‘chopped roof’ hinted of hot rods and customs a genre we had lusted over but had (and have) yet to experience first hand.  While a Volvo station wagon may have brought ups images of tweed jackets with elbow patches, baby seats or Combat Auto Theft stickers, the Magnum was more my style.  As Dan Neil of the LA Times said,

“…the Magnum’s ideal demographic: a middle-finger-waving anti-establishmentarian, bad-beer connoisseur…The Magnum puts the “blunt” in “blunt-force trauma.”

Okay, to be fair it might be have been more the style I WANTED than the one I actually portrayed but that’s just about the same thing right?

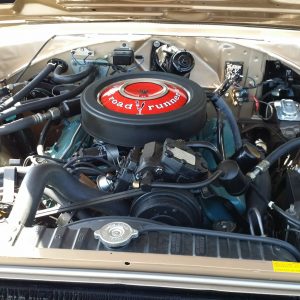
The first test drive of the 6 cylinder model was surprisingly enjoyable, and that car got out of it’s own way quite easily.  Moving up the food chain I next drove the 5.7 V8 Hemi and was truly impressed, the sound alone was smile inducing. Logically the next test drive needed to be the 6.1 SRT however by that time the Magnum’s short tenure had already come to an end, forced off the line by the newly introduced Challenger. Magnum SRTs, already produced in limited numbers were nearly impossible to find for sale.


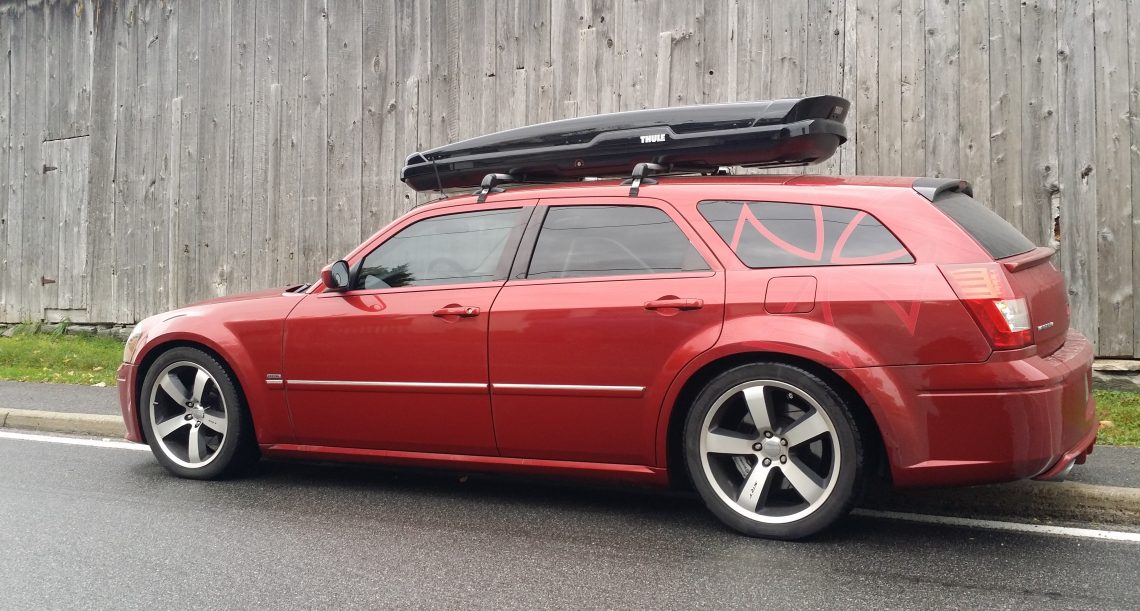
By that point I had become smitten with the Magnum’s signature paint, Inferno Red which appeared in every commercial, pamphlet and advertisement making the search even more difficult.  As the car was only meant as a daily driver I ended up sacrificing engine displacement for paint colour. Arguably not my most validating ‘car guy’ moment, but a decision I never regretted.

It wasn’t long before I had found a great virtual Modern Mopar clubhouse in the form of theLX forumsand became intrigued by the culture and the many, many modifications that other members were doing to their cars.  LX is the internal designation given to the platform shared by the Charger, 300, Magnum and Challenger. Those in the know will point out that officially the latter is an LC, but we’ll ignore that for the sake of this article.


In the early days, Hemi computer tuning wasn’t available, and aftermarket support was minimal.  The early days were a truly grassroots endeavour with enthusiasts having developed many of the best parts, and electronic work arounds right out of their own basements and garages.  While some of us got those parts cheap or free in return for being guinea pigs and helping to work out any kinks in the products.  It truly was a community effort.  Many of those parts, are today still the best available and some even have even been formally adopted by Dodge.


Without question the modern Mopar experience has been incredibly rewarding. The average owner is a mature, grounded middle class enthusiast, correspondingly the forums reflect a warm welcoming atmosphere with little drama and few online scams.  No one is pretentious, owners enthusiastically lend each other help and resources and actively travel together to races, and meets. We have a strong contingent of local enthusiasts, many of whom congregate on Facebook at the Ontario Mopar Owners Network and I have many Mopar acquaintances that although I only know them from the forums I truly consider them friends.

Dodge/Chrysler itself is incredibly receptive to it’s fans.  If it isn’t evident just by the absurdly high horsepower cars they continue to sell in a climate of self driving, rainbow powered, econo appliances – the SRT engineers have, many years in a row made it a point to drop by the guest hotel at events just to sit around the parking lot to shoot-the-shit over a few beers and answer technical questions, and perhaps drop the odd tantalizing hint on future product development.


The engineering team has also regularly participated in live online chats on LX forums for hour plus Q&A sessions.  All on their own time, with the only tangible reward being a couple pizzas to share during the session.


Many of us have personally met members of the hierarchy who have made appearance at some of the most unlikely venues in order to take part, shake hands, check out our rides and maybe share a yet to be released model in order to gauge interest.

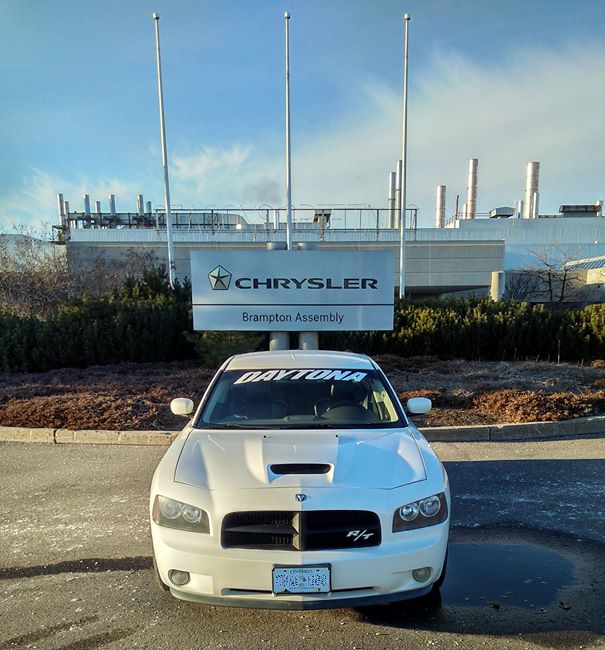
The factory in Brampton has over the years opened its doors to us several times for tours and to expose the plant employees to the enthusiastic and appreciative customers.  Observing first hand how owners have pampered and personalized their cars after they left the factory surely instills a sense of pride in those that build them. The hallways of the factory are literally lined with photos of OUR cars.

The Magnum was supposed to be my appliance car, a tool not a toy. However the enthusiasm of fellow owners was contagious and it became evident that I was clearly going to be spending money on more than gas and insurance.   In order to retain some level of responsibility, I self imposed a rule on my spending; all parts must be bolt on (easily removable) and purchased used.  There were other cars in the garage that needed cash influx.  Oh and a house to renovate.  To my credit I’ve held true to that rule, although initially I only gave myself leave to alter the cars aesthetics making it fairly easy.


The aesthetic mods included some very pretty anodized billet parts under the hood, and a rear window wiper delete, the hole covered by a massaged and paint matched 300 SRT trunk lip.  Black pocket five spokes from a 392 Challenger came at some point. I love any wheel that harkens back to my days piloting Hot Wheels under the kitchen table. My love affair with Porsche Fuchs surely stems from the same place.  


Of course the wheels looked odd at factory height so the car was dropped via BCR coilovers.  At that point a case of while-you’re-in-there struck and it only made sense to add the stiffer front and rear Hotchkis sway bars that I had found for sale.  Out the window with the aesthetics only clause.

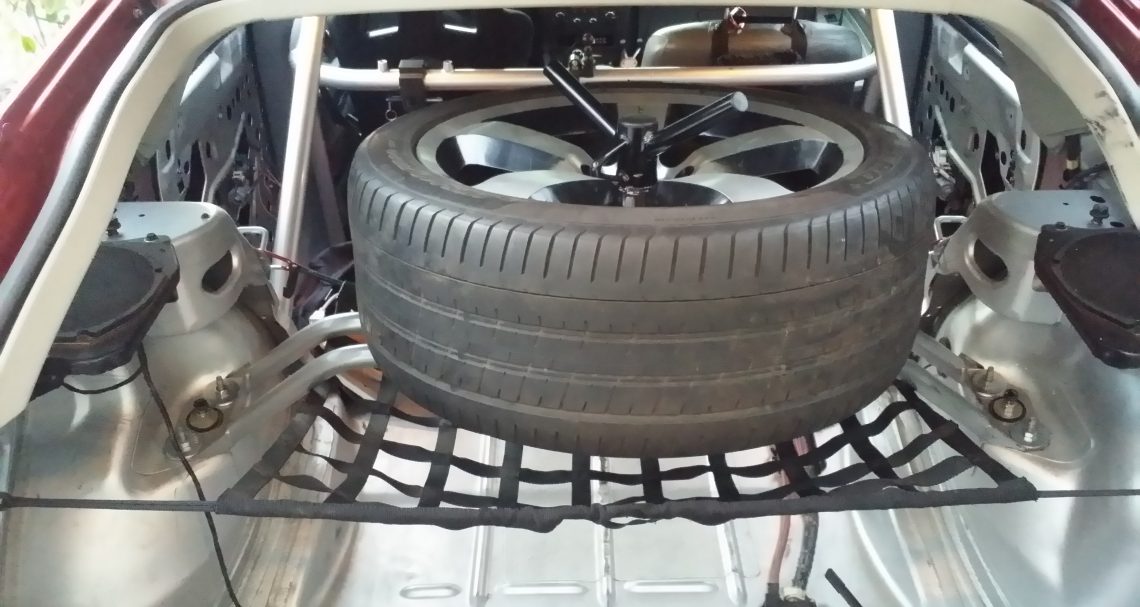
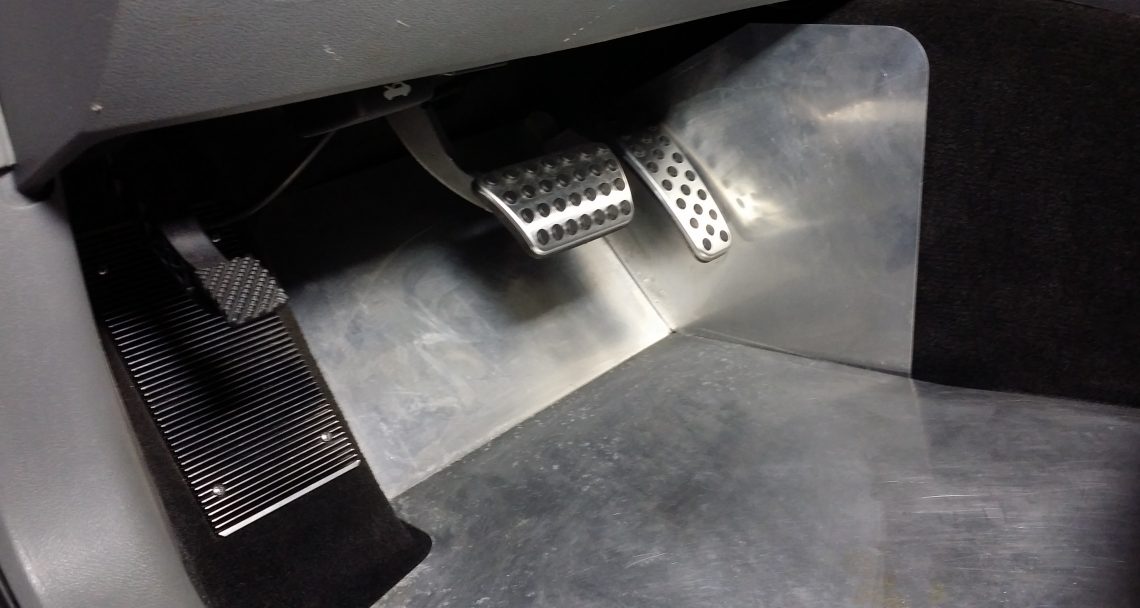
Slowly the car evolved; cold air intake, custom computer tuning, electronic transmission control (allowing engine braking and crisp manual gear shifts), electronic traction control override, Wilwood brakes up front, Brembos out back, exhaust (headers to tail pipe), Getrag rear end with LSD,  a two way radio for chatting with club members on the longer trips, and a CB radio – still the best ‘radar’ detector going on US roads and a full sized spare was added.  No point in driving thousands of kilometers to drive the worlds best driving roads to end up on a doughnut spare.    


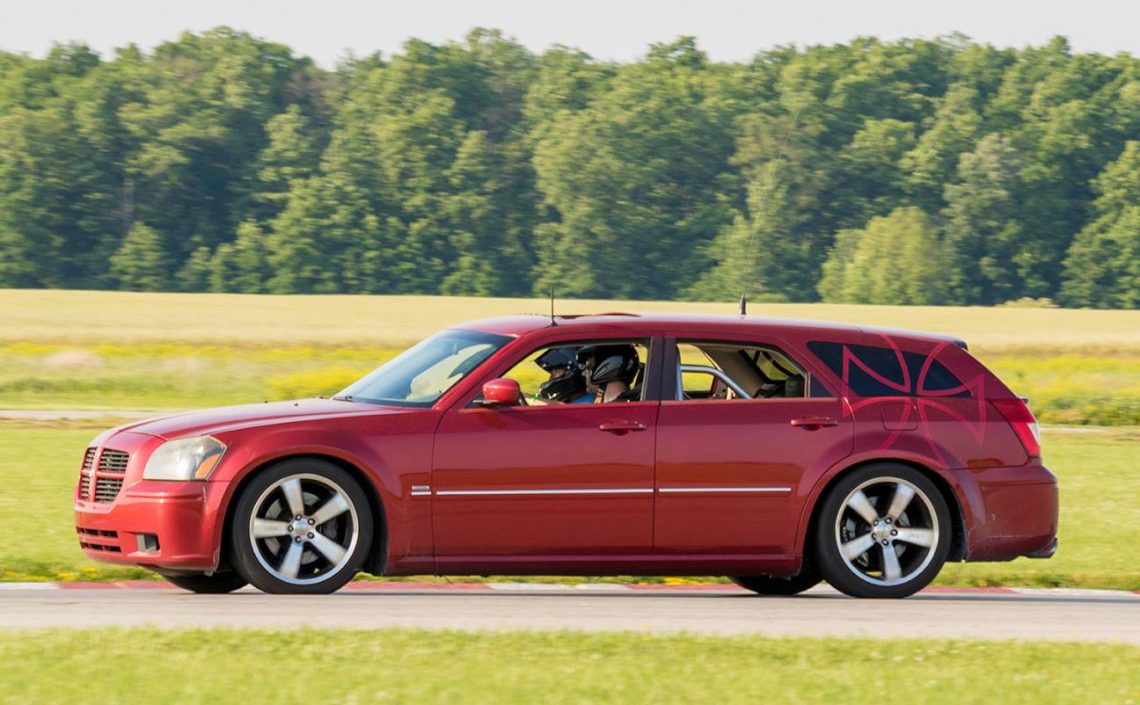
Not only were the modifications adding up, but my need for utility, and to cart 3 or 4 employees or clients around changed.  When the opportunity to use the car in a less responsible manner finally presented itself, I jumped on it.  By this time the car was attending the drag strip less often.  I had discovered the road course and while many laugh at the thought of such a large car on the road course it isn’t as uncommon as most think.  With a 49/51 weight distribution, and braking and skid pad numbers matching cars MUCH sportier, the Magnum holds its own out there.  So the driver’s seat was replaced with a racing seat, the rear seats were deleted altogether as was the interior in the rear of the cabin.  A bolt in roll cage, and rear shock tower support was installed.  The result was something any child, monkey, or car guy would appreciate.  I don’t think the similarities of the three groups end there.

While a full supercharger kit – fuel pump to injectors – was purchased (yes still sticking to the used only rule) it has remained sitting in boxes in the F-Bomb garage for a few years now.  While the desire for more horsepower is always creeping around in the shadows, on the road course the only performance improvement needed is a driver mod.

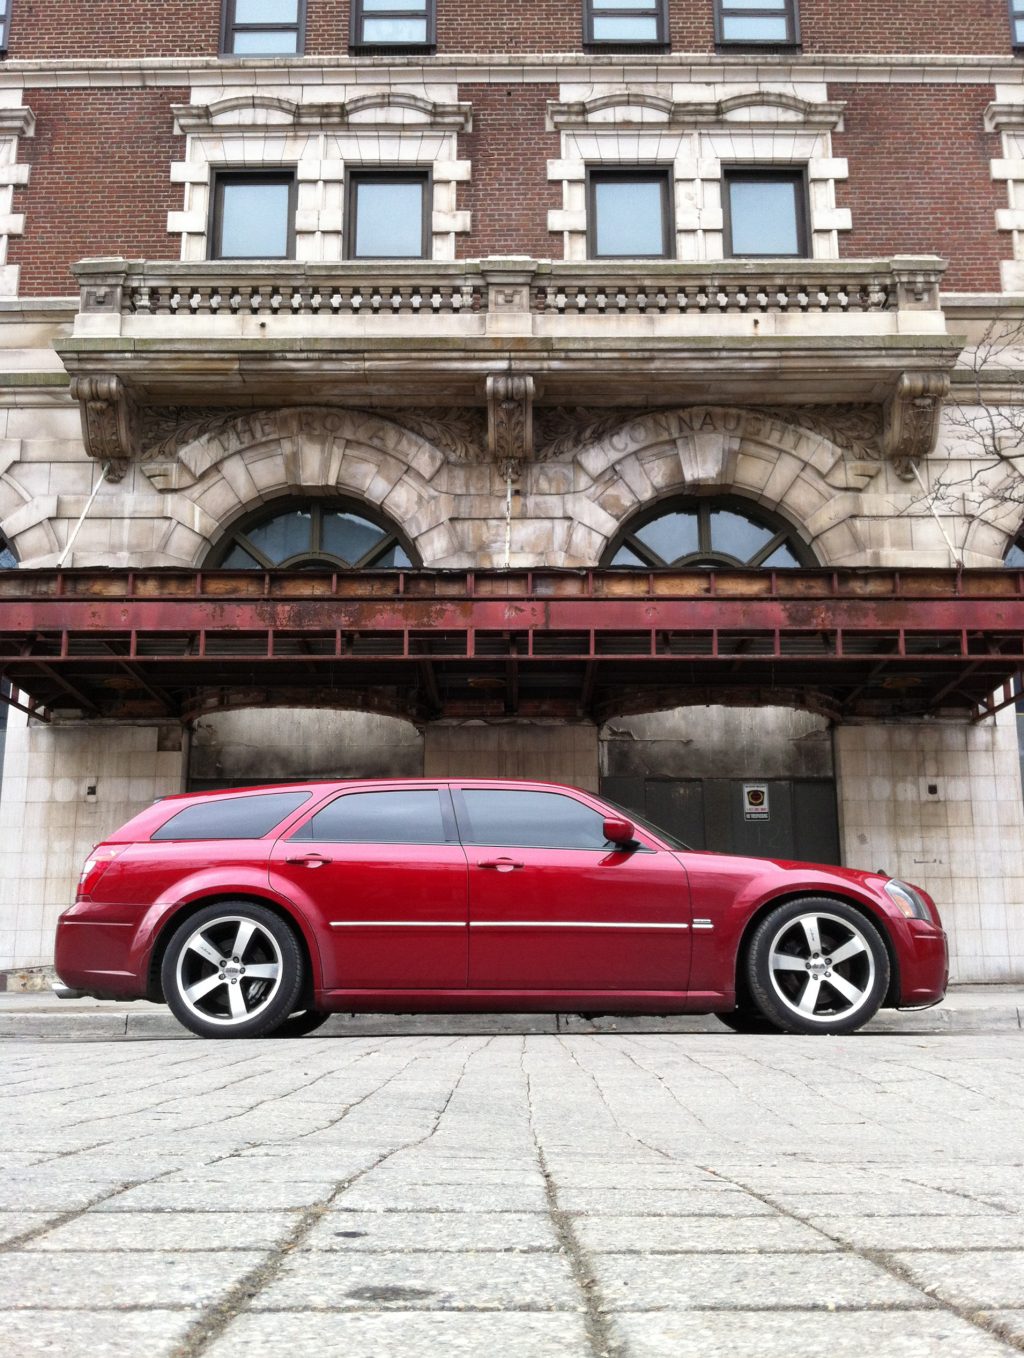
Sadly the Magnum’s story is growing long – both this article and in reality. As the odometer creeps ever closer to 300 000 I am forced to come to terms with how the next chapter may unfold.  The car has been incredibly reliable, easy and affordable to work on and to keep running, and a great performer. This car as been driven hard, and fast from the quarter mile, to the road course, navigational rallies, extensive road tripping and spirited driving from Tail of the Dragon to Mount Washington.   The Dodge Magnum does it all – daily driver and race car.  All while looking damn good.


So what’s next?  Well a wrecked and rebuilt 2012 Porsche Cayman may take over some duties.  Clearly it’s the better car on the road course.  But the Porsche will certainly cost more to repair, and the Magnum is better than than the driver around the course so why move up the performance ladder?  Long distance road tripping will surely be taken over by the newer car, but maybe not daily driving, and probably not during the winter. Perhaps the motor will finally be cracked open and bored out to a 392 and topped with the supercharger that’s collecting dust in the garage.  Time will tell, in the meantime these discussions take place quietly and away from my beloved long roof for fear of breaking her heart.


If you liked this article please check out the others found to the right, and like and follow us on Facebook not only is it good for our motivation but you’ll know when new posts are released and what driving events we have planned for the future.  

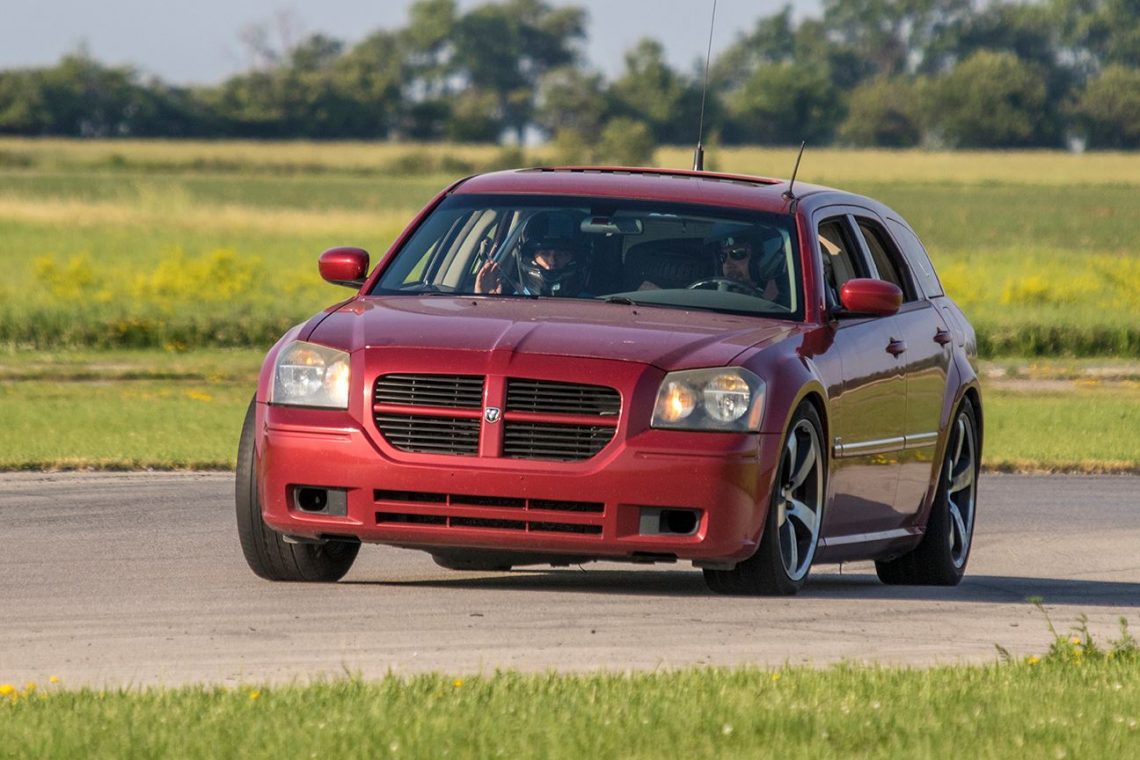
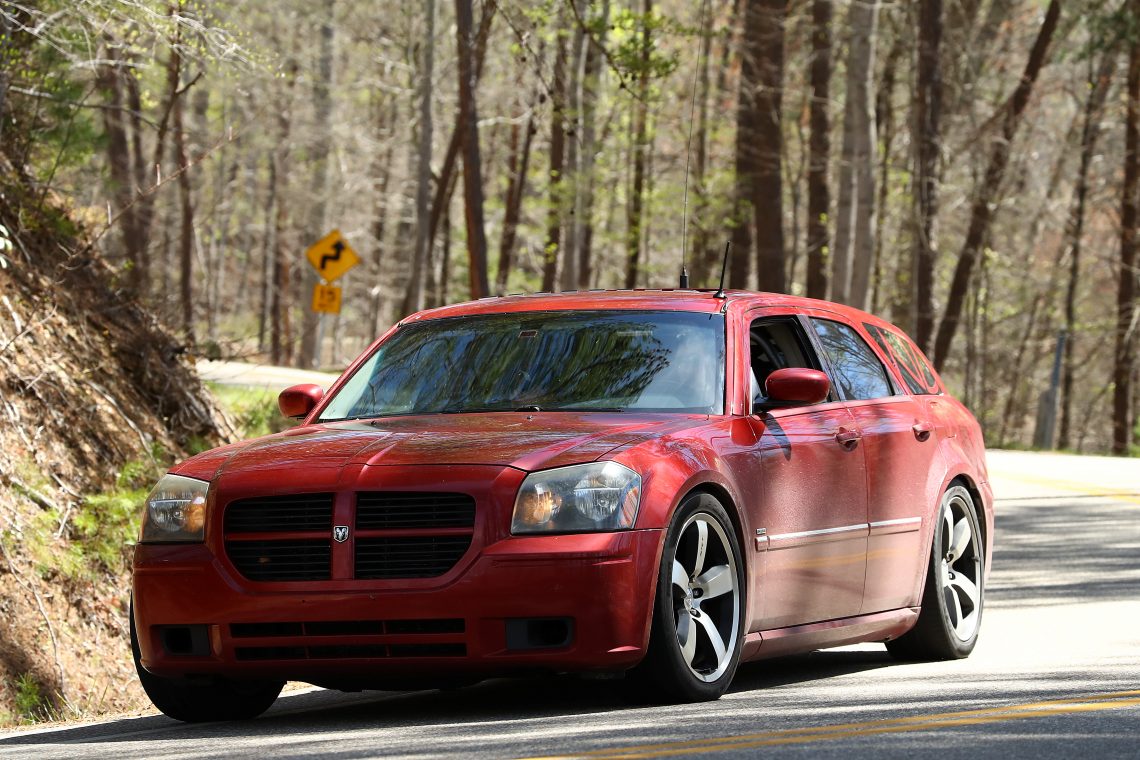
A big thanks to Al Roberts for the photo of his Daytona at the Brampton plant, and to Alex Sears for the road course photos of our Magnum.


Helphos Spotlights 


As many of you will know, our current love affair is a 1967 Mercedes W111, better known as the Heckflosse or Fintail in English.  As a rarely seen model it undoubtedly garners a lot of attention.

In period the Teutonic design was quite reserved, but these days the Mercedes star sitting atop the huge chrome grill, the flowing chrome adorned tail fins, and the vertical ribbon speedometer all attract a lot of interest.

It doesn’t take long though before the inquiring eyes fall upon the car’s greenhouse, and in short order the question always comes, “what’s that on the windshield?”


The Helphos “Eye of the Car” or “The Car Eye” is a German designed spotlight sold through the 50s and 60s that mounts directly to the windshield.  The above photos show the evolution of the packaging during that time.  The Helphos design was also rebranded under the names Polimatic, Polco (seen below), Les Leston, Marchal, and probably others.

Many cars as early as the 1920s sported spotlights, as road illumination was far less common and most signage didn’t use reflective materials.  These spotlights were often attached to the A pillar or the front wing (fender) and required reaching outside the car to operate.  While many were strictly spotlights, combination units with a spotlight facing forwards and a mirror facing rearwards were a common accessory for decades right into the 60s.  Eventually however, spotlights mounted on and through the A pillar made it to the market. These were controlled from within the cabin via a handle and linkage and while quite common on police and fire vehicles were less common with the average car owner as few owners warmed up to the idea of drilling through the A pillar.

While the infamous British automotive electrics company Lucas had their own solution to reaching outside the cabin, it was not nearly so elegantly devised.  Lucas sold a roof mounted light that looked and operated much like a submarine periscope.  The light was unsightly and (with a large handle invading the cabin) intrusive.  Perhaps the biggest drawback was that it required drilling a hole in the roof of the car.  As such it really was only popular with the most dedicated British rally teams, and was never adopted by the general public as the Helphos was.

The Helphos spotlight was novel as not only could their design be used from within the cabin, the light itself was inside the cabin.  Not only was the user protected from the elements while directing and focusing it but the light was protected from damage from flying road debris.  All this was accomplished without alteration to the vehicle. Not only could the end user install the light themselves, with installation being non-invasive the light could be switched from car to car in an instant.

While popular for many recent years with the aircooled Volkswagen folks (who adore their period accessories) the Helphos spotlight is really otherwise unknown these days but for a niche group of period endurance or navigational rally enthusiasts.  While the Helphos light was used by many rally teams, Mercedes was especially fond of them. In fact it is rare to find a period photograph of a Fintail rally car where the vehicle is without one. 

As we always envisioned building the Fintail into a ‘period’ rally car, it was practically essential to install one to complete the look.  We actually owned the light before taking possession of the car itself.  


The light is actually comprised of two main parts, a metal mounting ring with embedded glass that attaches to the windshield and the light body itself that hangs from the mounting ring.  The early version of the mounting ring seen above was a simple design as the flat windshield screens of the time posed little challenge to adhesion.  However as curved glass became common the mounting design (seen below) necessarily became more complex.

The later mounting ring is actually two separate hinged rings, with a rubber seal that is placed against the glass.   Numbered levers along the circumference of the ring are swung in consecutive order while the rubber seal (smeared with a dab of included glycerin) is pressed against the windshield.  A thin wire is included that is placed under the edge of the rubber gasket.   

The wire allows the air trapped between the windshield and the mount to escape as the glass of the mounting ring is pressed towards the windshield.  The ventilation wire is removed and the levers are thrown pulling the two halves of the ring apart.  The result is an incredibly effective vacuum mount.

The main body of the lamp hangs from this ring and can be removed independent of the ring.  With the freedom provided by the included generous length of electrical wire,  the Helphos is effectively used as a handlamp for roadside repairs. Clearly this was another added bonus over most other available spotlights of the time.

While mounted on the windshield the light beam can be used to illuminate street signs, markers or roadside features.  The Helphos had another design advantage over most other spotlights as the beam itself could be focussed from narrow to wide beam simply by rotating the main body in a clockwise fashion.  Directing the chosen beam to the target was as simple as moving the handle.


While generally uncommon, the Helphos lights are still readily available in enthusiast circles, and eBay, even NOS (new old stock) lights are fairly common.  For the best prices, avoid any Volkswagen enthusiast sites, and German specific parts houses which tend to soak the eager enthusiast. Using some creativity in search terms and locations (these lights are far more common in Europe) along with some patience can save you enormously.  Ours came from England and even with the added cost of shipping we came a hundred or more dollars under the price of most North American sources.


While it’s best to confirm the electrical operation before purchase these are simple in construction, and easy to rewire if necessary.  While many Helphos lights now have male cigarette plug adaptors, in period they were sold with bare wire to install as the customer saw fit.  


Any potential buyer needs to ensure that the reflector and especially the rubber gasket are in good order.  A dried, torn gasket will absolutely prevent the light from adhering to the windshield, while a peeling or tarnished reflector will greatly reduce the light output.  


The bulbs, while still available, aren’t common and tend to range greatly in price.  Confirm that a bulb is included and working and consider combining the cost of shipping with a spare if the seller has them available.  The least expensive bulbs, lack the blackout painted end however this is easily replicated with some spray enamel.

The following are the Helphos installation instructions, explaining the mounting of the ring to the windshield, basic operations, and bulb replacement.

This article requires a couple acknowledgements.  First to Elliot Alder for the lead photo of our Fintail, one of our absolute favourites. 

Second a special thank you to Mercedes Benz that permits access to and use of the historic racing photography you see in the article.  

© Daimler AG.
All data and content are protected by copyright. Use of the data and content requires the source to be stated.
The global copyright remains the property of Daimler AG.

As always, comments and questions are welcomed.  We strive to provide accurate info however if you have spotted a mistake, or simply have more to add please let us know.  All our articles are perpetually updated and revised as needed.  

We’ll leave you with another historic Fintail rally photo – cars complete of course with Helphos lights.

Today we return with part two of Fire Safety for the Automotive Enthusiast.

In Part One we covered the requisite building blocks of fire protection including the types of fires, and the many fire hazards associated with the hobby both in the garage and the car.   In this installment we will cover fire detection and suppression, including the choosing and use of fire extinguishers. 

Parts one and two were written at the same time, and initially the intent was to release the two parts only a week apart.   With the release of part one we had as many of you know, been made aware of a new type of fire extinguisher.  While we were able to contact the company to learn more in short order, our busy driving schedule conflicted with the need to further investigate and apply that new info to part two.   In the meantime however we decided to cover this new extinguisher in an article of it’s own.  Watch for that article coming soon.

Fire Detection


Smoke Detectors 


We’d like to think everyone has smoke detectors in their homes already. If not, be aware that in all likelihood you live in an area where they are required by law.  We simply cannot stress enough the importance of smoke detectors in the home.

Unfortunately completely covering the topic of smoke detectors would be an article of its own.  Here we will simply outline a few considerations as they uniquely apply to hobbyists.

Fire detection in the garage is invaluable.  Assuming a fire would only occur while you were present and hard at work would be a mistake. However there is a real challenge in providing appropriate protection while avoiding nuisance false alarms.

Unfortunately much of the work we perform in our garages can confuse the simple technology found in smoke detectors.  Exhaust, aerosols, spray paint, dust, welding fumes, particles from grinding wheels and many others contaminants can set off a detector.  While using a detector that has a ‘hush’ feature that temporarily silences alarms while you perform your work is strongly advisable that alone may not be effective at reducing nuisance alarms.

There are two basic technologies utilized;  photoelectric and ionization. The first is best at detecting smoldering fires, while the latter is best at detecting fast flaming fires.  As one could never anticipate the type of fire they might suffer experts generally recommend the use of a combination unit. However combination units may not be the best choice for the garage if it is used as a workshop.

While placing a detector right above your work bench, or above the cardboard box you use as a makeshift paint booth (we aren’t alone in this are we?) is probably pretty obvious it may take more effort than that.

Each type of technology is more sensitive to certain contaminants than the other so for the auto enthusiast using only one type, or both types placed separately may be a more effective approach. By experimenting with the two types, and their placement in relation to the type of work you perform you may find that false alarms can be eliminated. 

If you find that you simply cannot avoid false alarms, smoke detector dust caps are available.  These are coloured bright red to remind you that they are in place. While not ideal, they are a better solution than pulling the batteries which you WILL forget about when you leave the garage.  Remember while these caps are in place you have no fire protection in that area.

If the garage is attached to the home another solution though offering far less fire protection, could be placing the detector immediately outside the door connecting to the house.  Of course the best solution though pricey is to have a professional install a heat detector.

Whether or not the garage is detached from the home, the detectors should be connected to those inside the home so that if one goes off, they all alarm.  These are available in both hardwired as well as wireless forms.

While it’s a going joke that no one reads instructions, this is a case where we really need to resist that cliché.  Read and keep the instructions that came with your detector they will describe how and where to mount the detector.  Take note of the description of the various alerts such as the low battery alert which is distinctly different from the alarm.  Knowing the difference will avoid unnecessary calls to the fire department, especially in the case of carbon monoxide alarms with no obvious outward signs to confirm the alarm.  Most detectors have a limited lifespan and some batteries now last up to ten years.  The instructions will outline these timelines.

Some basic maintenance will extend the life of your detector including avoiding subjecting them to unnecessary humidity and contaminants, and periodically giving them a light vacuuming with a brush attachment. And remember to replace the backup battery twice a year when you change the clocks for daylight savings.  You did that this weekend riiiight?


While on the topic of detectors, and since it is Carbon Monoxide Awareness Week we’d be remiss if we didn’t address the risks of carbon monoxide (CO) poisoning and the appropriate use of CO detectors. 

CO or carbon monoxide is a colourless, tasteless, odourless gas that comes from incomplete combustion of fuels (liquid, gas, or wood, coal etc).  Carbon monoxide replaces the oxygen in blood and can result in death. Early signs can include dizziness, headaches, nausea and flu like symptoms.  While high doses can kill in very short order, CO is accumulative, meaning regular moderate doses can build up in the bloodstream over time and symptoms may take days or weeks to appear.

Again, like smoke detectors, we’d like to think you all have at least one CO detector in the home.  Generally most sources advise that carbon monoxide detectors are best left out of the garage.  Even brief exposure from pulling into or out of the garage is enough to set most detectors into alarm. Such frequent exposure will shorten a detector’s lifespan.  That advise is directed at those that keep their daily driver inside the garage, but likely don’t spend much time in the garage.  That generalization may not apply to we enthusiasts.  

We trust you know better than to run a combustion engine in an enclosed area such as a garage.  If during inclement weather an engine must be run inside the garage, it should be for brief periods, the exhaust should be vented outside the structure, and plenty of fresh air available. If your garage is heated any sources of heat, that use combustion should be properly vented and installed following local codes. These codes were designed over time and sadly after many deaths to keep you safe, abide by them.  For the record an open garage door does not necessarily equate to appropriate ventilation. Depending on the direction of the wind, and without a cross breeze fumes are just as likely to accumulate within the garage as not.  

Different jurisdictions will have different laws dictating the use of CO detectors so it is best to consult your local fire department for advice. That said, most put priority on placing them outside sleeping areas rather than near the CO sources themselves (gas furnaces, fireplaces, garages etc.).  While having an additional CO detector in the garage may offer some security it is NOT a replacement for one or more within the home.

The F-Bomb Garage – Frontseat Driving HQ, is as much a club house as it is a workshop.  With a TV, couch and beers close at hand, it’s not uncommon to spend long hours in the garage. With a gas furnace running in the corner, a carbon monoxide detector was a must-have. The odd false alarm, or higher rate of replacement is a fair trade off for our safety.   For great information, tips and downloadable resources please visit this site, or contact your local fire prevention department.


While the preceding was certainly far more info on fire detection than you had anticipated there simply is no more important link in the fire safety chain than that of early detection.  Early detection allows you and your loved ones to escape safely and that is our primary goal.  


Fire Suppression


Fire Extinguishers

Everyone should have at least one extinguisher in the garage. And more inside the house!

Referring to the fire classifications in can help you   In general for most people a class ABC extinguisher is an adequate choice.

As mentioned extinguishers are rated by the type of fires they most effectively extinguish.  The same nomenclature (A, B, C) used to describe the types of fire is used for extinguishers. For a recap of the types of fire refer again toPart One.  Choosing the appropriate extinguishing agent is essential to safe and effective operation.

An AB extinguisher is only for use on type A and B fires.  An ABC extinguisher can be used on type A, B, and C fires. While uncommon a water extinguisher would only be rated as A as it would be unsafe to use for burning liquids or energized electrical equipment.

Additionally a numerical rating is used to designate the potential size of type A and B fires that the extinguisher can be expected to suppress.  This system is not employed for type C fires.  While there is meaning behind the numbers used, for simplicity sake understand that the larger the number, the larger the fire load (of that type) that the extinguisher can potentially extinguish.  Following is an example of both systems in use; 5-A 10-B C.

The most common extinguishing agents can be grouped into three categories: clean agent, dry chemical, and water.  A forth though generally less common in portable form is actually fairly common in the automotive world.  Most race car plumbed fire systems employ foam.

Selection of an effective extinguisher is not limited simply by the type of fire being extinguished.  Numerous factors specific to your situation can come into play, especially any motorsport governing regulations.  Professional consultation can be a real asset here.  Reaching out to your fire department, race scrutineers, and even fellow hobbyists can be great sources of information. There are however a few general considerations that we can cover here.  Let’s look at each of the agents and their respective advantages or disadvantages.

Carbon dioxide, Halon, or Halotron type extinguishers work fully or in part by displacing oxygen, which of course we need to live so discharging one in the occupied enclosed cabin of a car can be extremely dangerous.  Even a brief lack of oxygen can cause unconsciousness or death.  While realistically, our first course of action would be to evacuate the car this is still worth consideration.

That said, used safely from outside the car they can be very effective at extinguishing cabin fires without the terrible mess of dry chemical extinguishers.  For this reason they are often referred to as clean agent extinguishers. 

While these same agents are effective for energized electrical fires and especially useful with sensitive electronics their effectiveness in a deeply routed Class A fire is limited as they have little ability to cool the fire.  The risk here is that extinguishment is only temporary as the retained heat can quickly cause a rekindle.  As such they may not be the best choice for a typical garage fire and is why they are often only rated BC.

Carbon dioxide extinguishers are built of thick steel and the contents are liquefied thus these extinguishers are quite heavy, and generally only available in larger sizes not conducive to automobiles or hanging on a garage wall.

Water extinguishers aren’t terribly practical.  The first drawback is that while they are very effective, they are limited to Class A fires.  To be of any real use the water is generally combined with a source of pressurization, without which you are left with the option of a manual pump.  That brings us to the second draw back – the weight and the size needed for effective fire extinguishment just isn’t suited to a vehicle, nor are they easy to source. 

While a water extinguisher isn’t easy to find, a garden hose in the garage certainly is so let’s quickly discuss using water for fighting fires.  While water as an extinguishing agent can be effective on class A fires, using water to extinguish an energized electrical fire, or a fire involving liquids (gas, oil etc.) is terribly dangerous. 

While the danger of mixing electricity and water should need no explanation, many fail to understand that water can spread a flaming liquid not only driving the fire into contact with other combustibles but even dividing the fire into multiples.  NEVER use water to fight an electrical or flammable liquid fire.

In general ABC rated dry chemical extinguishers are the best all around compromise for car fires.  However while they are effective in the cabin, you may want to keep in mind that they create a terrible mess that will linger for months in the crevices of your vehicle and many agents are corrosive to metals especially the delicate metal electrical connectors.  While a lingering sprinkling of powder on your legs from under the dash while driving is preferable to a torched car you may want to consider one of the clean agent alternatives mentioned earlier for use inside the cabin. 

Dry chemical extinguishers are a great option for fires in the engine compartment.  Not only are they usually appropriately rated ABC there are sizes and weights available for the car.  An engine fire, builds heat quickly,  while ideally dissipating that heat would be part of the suppression technique that isn’t always possible.  While dry chemical extinguishers don’t reduce heat they can leave a lasting layer of powder that cuts the oxygen chain hopefully until the engine cools down.  If this connection isn’t immediately clear please consider reading Part One again to review the brief description on fire science. 

A disadvantage of dry chemical extinguishers is that to be most effective they require a direct line of sight to the fire, which can be tricky in the case of an engine fire where the hood is too hot to lift. 

The ranges of sizes and weights and (usually) ABC rating make dry chemical extinguishers an appropriate choice for use in the garage as well.


2 – 2.5 – 5 – 10 – 20 lb extinguishers(duct tape for size reference)

As mentioned earlier the effective fire load that an extinguisher can potentially extinguish is denoted with a number as in this example (5-A 10-B C) and is too technical to appropriately cover in this article.  To effectively address this issue, one should consult their local fire prevention department.  However – given the appropriate choice of agent – there is generally a correlation between size and effectiveness.  Generally the safest fallback is to choose the largest physical size that remains practical. 

It is common to see extinguishers described by the weight of the extinguishing agent contained therein.  Over time these weights, have unofficially become somewhat of a standard method of denoting the SIZE of the extinguisher more so even than the actual amount of agent within.  The photo above depicts the various common sizes in comparison to each other.  While using this weight terminology to determine the size you need is far from technical, it will assist us in discussing practical sizes for the average enthusiast.

Though common a 2.5 lb extinguisher is the very smallest size that should be used.

For automotive use, nothing below a 2.5 lb extinguisher is likely to be effective.  In practice an engine fire would likely dictate at LEAST a 5 lb extinguisher.  Our practice at Frontseat Driving is to run a 2.5 pound clean agent BC extinguisher for cabin use, and in the trunk a 5 lb dry chemical ABC extinguisher.  Both extinguishers are very securely mounted to avoid accidental discharge and to keep secure in case of a collision. 

In the home or garage our opinion is that a 5  lb extinguisher is the bare minimum.  It’s moderate size means ease in portability and use, and it is easily mounted on the wall beside your exits.  That said the 10 pound extinguishers that you see on the walls of offices and the halls of high-rise buildings were enforced by experts for a reason and taking their lead is recommended. 

The F – Bomb Garage is equipped an odd assortment only because of how they were acquired.  One 2.5 lb, and one 5 lb dry chemical ABC extinguisher is found at each door.  A couple 5 lb extinguishers or a single 10 lb extinguisher would be a more typical arrangement.

Extinguishers should be mounted near exits.


Ideally extinguishers should be located at the doors of the home or garage.  Mistakenly people often mount their fire extinguishers close to the stove, or tucked away in a nearby cupboard, while they should be located AWAY from the fire.

In the case of a fire your FIRST reaction should ALWAYS be to escape. ALWAYS!

Once you and any other occupants are safely out of the structure (or away from the car), you can safely call the fire department.

Calling the fire department is number two after evacuation. Fire grows and spreads far quicker than most imagine.  Extinguishers have limited capacity and without training, attempts at extinguishment often fail and can actually spread the fire.  The size of a fire is never used to determine whether or not to call 911.  ANY fire is reason to call.

AFTER calling the fire department you can take the time to better evaluate from a distance whether you feel comfortable in attempting to extinguish the fire.

Hopefully now the placement of fire extinguishers makes better sense.  Having them at the exits, not only promotes safe evacuation, it provides a safer place to evaluate.  Furthermore if the decision is made to attempt to extinguish the fire, the individual is automatically establishing a safe route of retreat.


NEVER ALLOW THE FIRE TO GET BETWEEN YOU AND THE EXIT.


Remember your priorities are ESCAPE and CALLING 911.


There are often some other options available when a fire does start. Referring above to the science of fire, removing one or more of Heat, Oxygen, or Fuel will extinguish a fire.


Pot on the stove or garbage can on fire?  Protect hands, place the lid on.


Puddle of fuel on fire? Smother in kitty litter, or soil.


Electrical appliance on fire?  Unplug or cut the power at the breaker.


Carburetor fire?  Starting the car often extinguishes the fire.  A wet rag tossed over the carb is also effective.


NEVER USE WATER TO EXTINGUISH A BURNING LIQUID OR AN ENERGIZED ELECTRIC APPLIANCE!!!


Never turn your back to a fire, even after the fire is extinguished there is a strong likelihood that the fire will retain enough heat to reignite.

Even if you successfully extinguish the fire, it is best to let the fire department confirm extinguishment and ensure that there hasn’t been any fire spread.

Do NOT be embarrassed to call the fire department.  Calling them as soon as possible keeps you, your family, your neighbours, your property, and THEM safer!

Car Fires


Okay, so what if you suffer a car fire on the road?

Just like in the house or garage the first priority is escape. 

To do that you first have to remain calm.  Observe traffic and signal as you would in the case of a flat tire and pull safely over to the side of the road.

Remain calm. Unlike on TV the odds of your vehicle exploding are slim to none, especially with modern vehicles with plastic fuel tanks.  For interest sake any ‘explosions’ heard at car fires are usually the tires popping.

After safely pulling over to the side of the road (away from other cars and buildings) place the car into gear, or park, and set the parking brake.  Turn the ignition off, and quickly remove your family.  If you really have your wits about you, pop the hood release.  Make sure you take your clothing if it is cold and or raining, and keep yourselves as far from the roadway as possible. Your greatest risk is no longer the fire but an ensuing collision.

Keep upwind of the vehicle. The plastics, and upholstery release EXTREMELY dangerous smoke.

Keep uphill of the vehicle, often the gas tank will melt, and if it does flaming fuel will run downhill.

Once you and your family are safely distanced from the vehicle, uphill and upwind, just as before the second priority is to call 911.

If you are driving along and discover that you have a fire under the hood the chances are that by the time you safely pull over the fire ,fueled by the rush of air the fire will have grown beyond the ability of a handheld extinguisher. 

Additionally there is a very good chance of burning your hands and face as you attempt to open the hood.  As mentioned you need to approach from upwind, and uphill.  If the flames are escaping the engine compartment or have spread from the engine to the cabin the fire is beyond your abilities, and the danger has grown substantially.  Keep these facts and the roadside dangers in mind as you decide whether or not to attempt to extinguish the fire. 

If you drive a vehicle from the early 80s to in some cases the early 90s a significant additional risk is posed by the compressed gas safety bumpers.   It is certainly worth knowing if your vehicle is equipped with these frightful devices before being thrust into the situation.

An under dash fire caught early is most effectively dealt with by closing all the doors and windows but the one you fight the fire from.  Direct the extinguisher as best as possible under the dash, discharge the extinguisher then close the door.  The closed doors and windows contain the agent within the car.  This is especially important if using a clean agent and on a windy day.

Once again, while we hope to present an informative, and educational article, brevity has to play a significant role.  If you feel that more information or greater detail would be beneficial we’d appreciate that feedback as well.

If you have any need for additional information or have any questions please don’t hesitate to ask.  If we don’t know the answer we WILL find it for you, or at the least direct you to an appropriate resource.  The article has been directed to fire safety for the automotive enthusiast which necessarily neglects most of the home.  As we have mentioned many times, your local fire department (usually the fire prevention division) is the first ‘go to’ resource.  Not only is the information reliable, but it is specific to your local laws and regulations.

Please take the time to talk to your family about the risks and danger of fire.  Plan routes of escape, and agree on a safe meeting spot away from the house for all to meet.  When the fire department shows up the first thing they need to know is that everyone is out of the home.  Please consider the tools at your disposaland again more are available through your fire department.

While we have taken great care in gathering and presenting the information, mistakes happen, and editing can be faulty.  If anything in this article seems off to you, or you simply disagree, we want to hear from you.  

Finally, let’s be clear, this is the internet.  NOTHING in this article or anywhere on the interwebs replaces professional consultation or training.  Conduct yourself within the limits of your own knowledge and skill.


Fires happen every day.  In significant urban settings they are happening all over the city every day.  It may seem unlikely but it is absolutely true.


Right now, you may be scrunching your brow, pursing your lips and thinking, “Okay if that’s true why don’t I see or hear about them?  


Well for one, heavy population density and shift work mean fires are being spotted sooner at all hours of the day.  Add electronic fire detection and protection systems, fire resistant construction, and quick fire department response to the mix and most urban fires these days are more effectively contained than in years past.


While most fires of yesteryear resulted in a fully involved house fire, often today’s fires are restricted to a single room (kitchen, bedroom, garage), a single part of the structure (chimney, porch), or even reduced to a single item (oven, mattress).  


Another reason that you aren’t hearing about these fires is that in large urban centers all these fires become commonplace to the media outlets. Only the multiple alarm fires with devastating scenes of billowing smoke and balls of fire make for good news.


So why are we bringing this up?  Well it seems in general, people have become complacent. Not only do most people doubt the likelihood of a fire, they fail to recognize the hazards, and truly have no idea of the true destructive potential of fire.  While fires can and do happen to anyone, the average auto enthusiast often engages in activities or habits that put them at significant risk, often unknowingly.  Read on for some tips on fire safety for the auto enthusiast.


Even a fire detected early, and contained to a single room, is going to result in terrible property loss.  Smoke infiltrates entire structures ruining clothes, carpeting, and window treatments, and causes staining of walls and ceilings.  Water damage ruins electronics, flooring, drywall, books, and artwork not only in the location of the fire but often the floor below and rooms adjacent to the fire.  Of course fire itself consumes nearly everything in its path.  Cleanup and repair will almost certainly displace you and your family for days to weeks, even longer if a structure fire is suffered. 


So now that we’ve hopefully convinced you that fire is a real risk, how about we talk about some fire prevention and suppression strategies, as they pertain to us as auto enthusiasts; the garage, and your car itself.

There is a LOT of info to cover, and it’s a challenge to appropriately cover this topic and keep it as concise as contemporary attention spans demand.  We have divided the topic into four main sections in the order that they should be addressed;  Background Info, Fire Prevention, Fire Detection, and finally Fire Suppression.  Part One that you have in front of you will cover the first two.  We’ll cover detection and suppression in Part Two, coming soon.  Grab a beverage, get comfortable and hit it in one go, or perhaps take a section at a time.


The photo above reflects the beauty of a flickering flame that the results (below) don’t.

Science (just a bit)…


Likely you have heard of the fire triangle. This is the concept of the three requirements of fire;

Heat (or ignition source)

Oxygen (found in the air we breath)

Fuel (what is burning)

Removing any one of these elements will extinguish the fire. And yes you keeners out there will be muttering something about the Fire Tetrahedron to your computer screen, but let’s not unnecessarily complicate matters.  Instead let’s look at how we can remove each of these elements.


Heat is most often controlled by adding water.  It works well, it’s cheap, and it’s plentiful.  Heat in the form of ignition sources can be controlled through prevention.


Oxygen is most often controlled by displacing it with another non flammable gas such as carbon dioxide (CO2) or Halotron.  Another method is to separate the oxygen from the fuel with a blanket of fire fighting foam used by firefighters or a powder as found in most commercially available ABC handheld extinguishers.  Of course the most common example that many have probably experienced, is simply putting the lid back on the pot.


Fuel can be taken out of the equation as easily as pinching the fuel line, or as we see most summers, cutting swaths through forests ahead of the windswept forest fires.


Fires are classified into types reflected by the materials that are burning.  This classification is important in order to match the best extinguishing agent to the material burning.   


Class A

Ordinary combustibles such as wood, paper, cartons, textiles, and PVC.


Class B

Flammable liquids and gases such as, gasoline, oil, paints and propane.


Class C

Energized electrical equipment such as motors, appliances, electrical outlets and fuse panels.


The keeners will again point out a fourth type of fire.  Class D fires are rare as they involve exotic metals that are rarely found in a hobbyist’s garage, however you may see it referenced while researching extinguishers so to satisfy any curiosity we’ll include it.


Class D

Combustible metals, such as sodium, magnesium and titanium.

You’ll notice that fire extinguishers are rated using the same nomenclature, symbols and often colour coding.  Certain extinguishers will most effectively extinguish certain types of fires.  More on that later.

Fire Protection


Fire Hazards

Countless hazards exist in every garage. The key is eliminating as many as possible.

Most of us aren’t lucky enough to have a dedicated workshop. This space is often just as likely to be the wood shop, as it is the auto garage, paint booth, games room or even a holiday craft and scrap booking studio.

Without a doubt your garage pulls double duty as the default storage area.

Our garages are home to plastic kids’ toys, and lawn furniture, out of season clothes, cardboard boxes of ‘who knows what’ that never managed to get unpacked from the last move, lumber, sports equipment, lawn mowers, BBQ’s, winter tires, the list is exhaustive and much of it highly flammable. 

Vapours from gasoline, gas/oil mix, natural gas, propane, acetylene, paints, varnishes and many cleaners, degreasers, and aerosols are all highly flammable/explosive.  In terms of the fire triangle the fuel load in a typical garage is tremendous.

Many homes often have the hot water heater, and clothes dryer (often with piloted ignitions) in the garage.   Many hobbyists have a source of heat such as a furnace, space heater, or a wood or oil stove.  Again referring to the fire triangle the fore-mentioned are all sources of heat or ignition.

So we have already identified a ton of common fuels, and a few sources of ignition found in the average garage and we haven’t even addressed, any heat produced by the vehicles or the work you are doing, within the garage.  Heat from the engine and exhaust, sparks from grinding or cutting metal, welding, soldering are all common sources of ignition.

To make all this even worse, most newer homes are built with the garage attached which adds significant risk to the entire structure and your family both from the vapours of stored chemicals, and Carbon Monoxide, but also the spread of smoke and fire.

Let’s look at some of the more common hazards a little closer.

Rags and Spontaneous Combustion


Spontaneous combustion is a significant concern for many hobbyists not only because of the high risk but because of the lack of knowledge.  Spontaneous combustion occurs as certain types of oils naturally decompose, in turn creating heat.  If the heat can’t effectively dissipate it can build to the point of self ignition.

Rags, with these oils, paints, or wood stains (even cooking oil) on them are perfect combustibles and when piled together, can provide not only the fuel but the ignition source.  Safe storage and disposal is imperative. 

While gasoline, and automotive oil aren’t at risk of spontaneous combustion they are only an errant spark away from catching fire.

A good method of dealing with used rags, is to hang or lie your rags flat to dry outside the garage followed by storage in a metal can such as an unused paint can. This is particularly practical with volatiles that evaporate quickly and less so for oil saturated rags. 

A couple rags here and there quickly disposed of according to your local regulations is easy to manage however if you are accumulating rags at a steady rate, using a specifically designed metal rag bucket with a gravity-closing lid is a good idea.  These cans are built sturdy with integral ventilation below the can to prevent heat build up however they are quite expensive as they are tailored to industries forced to follow health and safety policies. 

Watch your favorite classifieds, junk stores, and the such for good deals. Ours was generously gifted to the F-Bomb Garage by a good friend’s mother looking to clean out her own garage.  Before we acquired ours we used an old galvanized steel water cooler.  Any metal can with a tight fitting lid can work as a decent substitute, a steel waste can with a self closing lid is ideal.  

Dispose of the rags according to local procedures and frequently so the collection is kept to a minimum and keep the can away from sources of heat.

On a related note, NEVER throw work clothes that have been in contact with oil, fuel, etc, into the clothes drier EVEN after washing. NO washer can take all traces out of the clothing and the heat from the drier can ignite a fire.

Flammable Liquids


Obviously storing chemicals and gases is a common issue in any shop or garage. Gasoline, two stroke fuel, camp fuel, oil, lubricants, propane, degreasers, cleaners, paints, stains, epoxies, glues, and resins are all just a few of an exhaustive list of common flammable products kept in the average garage.

The first step of safely storing them is to keep them in approved containers, whenever possible the same container it was sold in, with the lid tightly affixed.

An approved flammable liquids cabinet is a slick piece of gear that is designed to insulate the contents from fire while venting vapours outside the storage area. Unfortunately these cabinets are cost prohibitive for most of us.  However a good source of more affordable cabinets is government auctions.  For deeper cost savings there are some clever ideas for DIY cabinets online.

While not insulated or vapour proof, a salvaged metal locker is spark resistant and can make for decent storage.  At the very least ensure that the storage area is placed away from ignition sources, and any areas that you may find yourself doing any hot work such as cutting, grinding or welding.

Keeping containers clean of over-spill, and keeping them well labelled is another good course of action.  Gasoline should never be stored indoors.  Surely everyone has seen a bulging plastic gas can due to heat fluctuations.  Gasoline vapours are far more flammable than even the gas itself.  Should any leak out of the can they can easily be ignited.

The most common single source of flammable liquid in the average garage is a parts cleaner.  Resist the temptation to use a makeshift parts cleaner.  A decent parts cleaner is very affordable and readily available used for even more savings.  Most importantly a good parts washer has a fusible link that automatically drops the cover should a fire start.   

If you have a parts washer keep the lid closed when not in use and avoid use of it (and any chemicals) without appropriate ventilation especially if an ignition source is present. Don’t forget any pilot lights! 

While we have yet to experiment with it ourselves there are now non flammable cleaning solvents on the market.  Try one of those and report back to us!

Hot Work


Hot work is any work that can create a flame, heat, or even sparks.  Welding, brazing, soldering, grinding, cutting of ferrous metals and many alloys, even striking steel with steel (hammering) can cause a spark capable of igniting a fire.

The first defensive action against ignition is to keep a tidy work area.  Ensuring that there are no combustibles (paper, boxes, rags, dust, wood, etc.) in the vicinity is essential.  Common sense  here plays a big role.  The direction of sparks will change with the required  

cuts.  Anticipate the direction of those sparks and contain and direct them using physical barriers such as a fire blanket, welding screen or an appropriate makeshift barrier, such as sheets of metal or drywall. 

Wear the proper attire while performing hot work.  Frayed jeans, go up in flames in an instant, synthetics melt to the skin just as fast.  Cuffed pants, and open boots catch and trap sparks.  Finally plan any hot work to end well before leaving the work area.  That increases the likelihood of being present should any unseen smoldering material burst into flame.  Be aware a smoldering nearly undetectable fire can last for many hours before finally igniting.  

Other Hazards


Some hazards unsurprisingly revolve around the vehicle itself.  The two biggest hazards are the electrical and fuel systems.  

Ensure that your battery is mounted securely, and both positive and ground connections are tight, and in good condition. 

While most people are afraid of electricity and few would consider rewiring their own homes, it seems their vehicles are a free-for-all.

If you plan on doing any wiring on your vehicle, make sure you truly know what you are doing.  Start by disconnecting the battery. 

Switches can often be negatively or positively switched.  Know the difference and when each should be employed.  All switches should be used with an appropriate relay if you don’t know why, you probably shouldn’t be doing your own wiring. 

Circuits should be appropriately fused and rarely need to be ‘hot’.  The appropriate gauge wire should be used.  If you don’t know how to choose the correct fuse or wire gauge once again, you probably shouldn’t be doing your own wiring.  Seek assistance. 

Tidy and secure connections free of loose strands, and bare wire should be ensured.  Whenever possible protect wire from abrasion and the elements.  Any added devices should be mounted securely and connections prevented from inadvertently shorting or grounding. 

Before welding on the car, disconnect the battery.

Before working on the fuel system, disconnect the battery.

Never place your tools on the top of the battery, one slip can result in a short capable of starting a fire or causing you to jump and strike your head on the car’s hood.  Don’t bother asking how we came up with that scenario.  

Fuel filters should should be metal, perhaps glass, but not plastic.  They should be located in a manner that prevents any leaks from falling onto a hot engine or exhaust components.  

All fuel lines should be made of approved fuel line, routed away from hot surfaces whenever possible and connections should be appropriately secured and protected from abrasion.

If you are going to work on your vehicle’s fuel system, ideally pull it out of the garage first.  If things go awry, losing a car, and not the garage or house is clearly preferable.

Finally never cut or drill into your vehicle without knowing for certain what is on the other side of the work surface.  Compromising hidden fuel and brake lines, fuel tanks, wires, or compressed gas cylinders (bumpers, seat belts, air curtains, hatch struts, fire extinguishers – you know who you are LOL) will result in a dangerous situation at worse and a bad day at best.

We could never appropriately cover all possible hazards you may encounter so we will move on from fire protection to fire detection and suppression in Part Two.  If you have some hazards you think we should have included here please let us know, we’ll do our best to address them quickly.  

While the utmost care has been taken in compiling this post, mistakes may have slipped through editing.  If something doesn’t seem right bring it to our attention, or ask a competent expert. 

For the sake of brevity much detail has necessarily been reduced to generalizations,  however for more info on anything covered in this post ask in the comments below or on our Facebook page Frontseat Driving.

This article specifically addresses fire safety for the auto enthusiast while leaving many home fire risks uncovered.  Your local fire prevention department is always happy to provide resources and answer any of your questions, and is the single best resource for info regarding your local codes and best practices.


Click here for more info on Oily rag safety

Click here for a Home Fire Safety Plan


Repairing a W111 Mercedes Fintail Fuel Pump


Returning home to Frontseat Driving HQ in the daily driver, we were surprised to see a puddle under our Fintail Mercedes that had been sitting idle overnight.  The bigger surprise was that it turned out to be fuel not coolant.

It isn’t often a vehicle is generous enough to break down in the driveway.   Perhaps it was her way of thanking us for the fun, and doting she’s enjoyed so far.

Driving a vintage car can be a unique experience, maintaining one a challenge, and finding parts to repair one nearly impossible.  So far we’ve been shocked at the availability of parts for the Fintail.  In fact Mercedes Classics carries nearly every part we’ve inquired about – nearly every part.  

While our immediate assumption was that a line had ruptured it quickly became evident that the pump itself was leaking from the weep holes, a sure sign that the diaphragm was damaged.

In normal operation the fuel enters and leaves from the same side of the pump.  The holes worn through the diaphragm however were allowing the fuel to spill out the backside of the pump casing and out the weep holes and onto the hot engine clearly a dangerous situation.

The entire pump splits into three pieces.  The part circled in red remains bolted to the engine block.

The part circled in blue is still attached to the fuel lines and is left hanging in the engine bay.

The diaphragm that needs to be repaired is found but not shown in the section of the pump highlighted in yellow. 


Mercedes exploded diagram of the pump.


Weep holes on backside of pump body (yellow in above diagram).


Pump housing (yellow in above diagram) showing diaphragm.


A hole through both layers of the diaphragm proves to be the culprit.

Okay so the problem had been found, now came the time to find the replacement diaphragm.  Unfortunately unlike many fuel pump diaphragms our unit doesn’t disassemble any further than pictured, so the spring, seal, rod, and diaphragm must be replaced as an entire unit.  Not only is it not offered by Mercedes Classics, it doesn’t even appear on the exploded Mercedes fuel pump diagram.  

While a new replacement pump is available it isn’t cheap, and it’s shiny.  Ideally we want this car to retain as much of it’s dirty original parts and patina as possible. 

A couple years ago, before the Fintail was even purchased we came across a forum post claiming that Fiat part number 0009918453N was a suitable replacement and that factoid was filed away for future reference.  Going with that vague info, we found and ordered the part from C. Obert & Company in Santa Cruz, California.

The Fiat diaphragm is a more typical example of a replacement part in that it disassembles to it’s component parts which can be individually changed out.  That said, the Fiat part is by no means a suitable replacement as can be seen in the following photos.  


Here the similarities of the Fiat part, on the left are obvious.


Here the differences, again Fiat part on the left are obvious.


Length of the Mercedes pump rod vs…


…the Fiat pump rod.


Here the diameter of the Mercedes pump rod is compared to…


…the diameter of the Fiat pump rod.

Initially it occurred to us that perhaps with a bit of minor surgery we could adapt the Fiat pump rod to the Mercedes.  It quickly became clear that the required alterations would be much more than minor surgery.  For now the idea of altering the rod has been shelved while we investigate an easier approach.  

Our revised approach involves disassembling the Fiat part, and using the diaphragm material on the Fintail pump.  At this point you might be saying, “But wait, didn’t you say the Mercedes part didn’t disassemble?”

Yes we did.  


The Fiat diaphragm disassembled.


Socket used to carefully cut the diaphragm.


Fiat diaphragm with hole carefully cut.

While the diaphragm material looked to be about the same size and the bolt hole pattern the same, it really was tough to tell.  We took one of the layers of the Fiat diaphragm and using a hobby knife and an appropriate sized socket as a cutting guide we cut a hole in the material big enough for it to fit around the Mercedes’ spring.

Fitting the newly cut Fiat diaphragm over the spring and between the two layers of the Mercedes diaphragms it proved to be a near perfect match.

By now the secondary plan of attack is probably becoming clear.   While the new layer of diaphragm fit well, it alone wouldn’t be capable of preventing fuel from travelling to the other side of the pump because it isn’t sealed along the inner diameter.  The next step then was to try gluing the old diaphragm to the new diaphragm.  While the diaphragms looked like butyl rubber and smelled like it too, were they?  An experiment with a couple of scraps, seemed to confirm it.


Near perfect match.


Sticking together but will fuel dissolve the glue?

The result, as suspected that the glue did not hold up to the effects of gasoline.  Tomorrow, we will try a glue known to be gasoline resistant.  We will update this post as soon as we have results.  Rather than wait to post this blog entry until the project was completed (successfully or not) we thought we’d publish it now to solicit some input.  Perhaps with the above details you might imagine a good approach.  Maybe you have repaired one yourself, or better yet you have a lead on a replacement.  Feel free to comment below with any ideas, or questions, and stay tuned for the update!


This cement is fuel resistant, and currently curing.


Both surfaces were scored.


Glued and clamped

After a couple days of glue, clamp, and repeat the finicky job of gluing the two diaphragms together was complete.   It looks promising folks!  That said, we have a new mechanical pump in transit.  While we aren’t thrilled with the replacement (more on that when it shows up) we found it much cheaper than that we first sourced.  If nothing else the replacement will serve as good research. 


Time now to reassemble the OEM pump;  


  • the spring plate slips into the actuator lever.
  • the open spring end fits over a post in the pump body.
  • the pump seal is fit into place on the pump body.
  • the spring is compressed while the pump rod is extended.
  • the rod mates to the actuator simultaneously. 


From left to right the parts are assembled.


The yellow circle shows the placement of the spring.


In the center of the pump the fork of the actuator lever is visible.


This shows how the diaphragm rod mates to the actuator fork.

So our repair worked!  For a week.  While we would have liked to continue the experimenting with glues our schedule of events was just to busy to continue.  By the time the repair failed we already had the replacement pump in hand.

As mentioned we resisted replacing the pump as we really would prefer to repair or renew old parts rather than simply replacing them with new.  Not only was a new pump against our philosophy, strictly speaking it wasn’t a direct replacement with the OEM part.  Yes it worked, and was nearly a bolt on replacement but it clearly was of a newer design.  The new pump is still non-rebuildable as it doesn’t even disassemble. 


Visually the replacement pump design is different enough that it was only with the full assurance of Mercedes Classics that we ordered it.  The new pump does away with the intermediate mount as seen in the exploded diagram above circled in red and numbered ’60’.  The new pump bolts directly to the engine block thus the plunger of the diaphragm is activated directly without the rocker mechanism seen highlighted in yellow and numbered ’20’.  The following photo shows the significant differences.   


As mentioned the new pump is ‘nearly’ a bolt on replacement.  The pump base seen below shiny and still attached to the engine block needs to be removed along with the rod, which is a straight forward task.  


Additionally the new pump doesn’t use a threaded fitting for the pressure line as seen below.  A few options are available here.  The entire line can be replaced which means significantly altering the look of the engine and requires finding the appropriate hardware to mate back up to the Zeniths.  This option was deemed as too much trouble and sacrifice for us.  Another option would be to cut the line at the end nearest the pump.   Not a bad option but we wanted a flared end for safety.  Likely the line could have been flared easily enough however we thought we could skip a step, and we were right.  We cut the OEM captured threaded fitting off of the line itself, leaving behind the factory flare.


After that, it was truly simply a matter of bolting the new pump, still using the original bolts, directly to the engine block.  The new pump has been working flawlessly for many, many thousands of miles since.  

As always if you have any comments leave them below.  We are still searching for the correct diaphragm replacement, if for no other reason than to have a spare pump on hand.  If you have any leads we’d appreciate hearing about them.


The F-Bomb Studio Presents


Adding a Fire Extinguisher and Driving Lights to the Mercedes Fintail

You have entered the F-Bomb Studio, where the craftsmanship applies as much to unique combinations of curses, as it does the cars we work on.  We recommend all children and sensitive types don ear protection until work completion.

Truthfully there wasn’t a lot of swearing on this small collection of projects, some very straight forward brackets to mount a fire extinguisher and driving lights to a Mercedes Fintail.

The Mercedes W111 Fintails have a rich history in Rally competition especially going back to the early 60s. The intention with this car was always to present it as a survivor car of some local rally competitor that modeled their car after those of the big boys in Europe that they read about in “Canada Track & Traffic”.  Probably some proud owner with one car, that drove it to work during the week and flogged it in competition on the weekends.  Perhaps it was retired when, finally it just wasn’t competitive any longer, or perhaps a new addition to the family showed up and racing weekends just weren’t practical any longer.  Either way our story sees the car relegated to more pedestrian use maybe even right up to the point that the ‘new addition’ inherited it as their first car on their 16th birthday.  Eventually as happens the car is finally carefully stored away in the garage, left to slumber until we stumbled upon it decades later.

“Fintails have a rich history in rally competition especially going back to the early 60s.”

The car itself is pretty solid, and running well, so most of the effort is being directed at adding period rally equipment that will still be functional and serve our modern campaigning needs.

While we invested grueling months researching the actual competition cars and searching for the correct vintage equipment, the actual garage time is thankfully, pretty simple and rewarding. 

We searched long and hard for the right car when shopping for the Fintail, and an important trait of this particular car is its solid but bumped and bruised appearance adding to that aura of a life of competition. With that in mind the last thing we want is to bolt on a bunch of fresh shiny parts.


While authentic vintage fire extinguishers can be found easily enough, no respectable shop will refill them as their safety expiry will have long passed.  While we could have opted for a vintage extinguisher for the car shows, and a modern one for regular use, the thought of suffering a fire with the wrong extinguisher at hand was sobering. Instead we opted for an extinguisher with a vintage chrome appearance and modern effectiveness.  The extinguisher and extinguishing agent were carefully chosen but we will cover that in detail at another time.  With the extinguisher finally chosen the next task was mounting it securely.


The transmission tunnel was chosen as a mounting location for it’s accessibility to both driver and co-driver alike.   Using the seat belt attachment points rather than drilling new holes was a no-brainer.

First a cardboard mock up was made to accurately locate the seatbelt threads, and bracket holes, then it was transferred to aluminum sheet.

Cardboard, especially press board like that cereal boxes are made of is a great tool for templates.  The cardboard is stiff enough to keep shape but unlike the corrugated version, bends easily, and cut edges are clean and accurate.

Some templates for projects coming soon to the F-Bomb Studio

A large washer was used to form a radius on the ends both to protect the carpet, and for a cleaner appearance.  The aluminium was cut with a fine blade jig saw, and cleaned up with a drum sander on a die grinder.  

A step drill makes drilling various sizes quick and simple

While simple rivets connect the mounting strap to the extinguisher mount, we felt that the connection needed to be more secure for occupant safety so the strap was placed over the bracket.  While this is perhaps less attractive it is hidden once the extinguisher is in place, regardless function first on a ‘race’ car.

The stickers were peeled off the extinguisher as they were too painfully modern.  They may even be replaced by faux vintage stickers at a later date.  Both the extinguisher and the bracket were subjected to some forced weathering – a close look at the bracket will reveal some peeling paint and rust on it despite being brand new. Efforts to dull the bright white strap ends are planned, or they may be replaced altogether.


No vintage rally car is complete without some auxiliary driving lights.

For the Finnie we went with some vintage well used Cibie Super Oscars that were sourced after lengthy research.  Finding these locally, already with a convincing patina helped the decision making. As a big plus they were sold as a set of 4, so we have spares if needed (every minute the car sits in a parking lot is sheer anguish).  

As we did with the extinguisher mount, we wanted to avoid drilling any holes to mount these lights.  Using the existing bumper mounts was a no brainer here however a cardboard template had serious limitations. As such the first one made was truly a test run.

A chop saw was used to cut four lengths of steel.  Each was cut the same length for simplicity, and if a mistake was made at any point, the bracket could be flipped in hopes of salvaging the bracket.

Like we did for the extinguisher mount, a large washer was used to mark a radius – a curved end just makes for a cleaner look.   The radius was rough cut with an angle grinder and finished with a flappy wheel replacing the cutting disk.  

A couple of quick beads, and flat stock becomes a bracket.

Again with redundancy in mind each piece was rounded even though one end is hidden from view when installed.  We have been known to make mistakes…there IS after all a reason the garage is called  the        F-Bomb Studio.


Granted adding some very straight forward brackets to mount a fire extinguisher and driving lights to a Mercedes Fintail is by no means a big project , but with safety AND appearance covered, it is one with a big impact.

Here the large 7 inch driving lights can be seen in place but still awaiting support rods, and wiring.  Stay tuned to the F-Bomb Studio for more on that project.


© Daimler AG.

The global copyright remains the property of Daimler AG.

I want to thank Daimler AG for making the historic photos available to all enthusiasts, visit their archives for some spectacular views into their competitive past.

Taking Your Hobby Car Out of Winter Storage


It’s that time of year, well for most of us anyway.  The days are longer, and while in reality the weather is unpredictable at best, we wake most mornings expecting sun, not snow.  Time to crack open that garage door, dust off the cobwebs and crank over our hobby cars, for the first time in months.  For those of you that live in locales that allow you to drive your hobby car year round, we hate you.  For the rest, follow along as we share some tips on taking your hobby car out of winter storage the safe way.


Of course, through the winter the battery was hooked up to a battery tender, a car cover was carefully draped over freshly polished and waxed paint, the car lifted onto jack stands, and a dose of fuel stabilizer poured into the gas tank-riiiight?


“Even with best intentions it’s easy to forget our summer romances, come the long dark nights of winter”


Ya right!  If you are like us, you drive your hobby car every chance you get until the first snow.  By that point the garage is too cold to work in. Even with best intentions it’s easy to forget our summer romances, come the long dark nights of winter.  It happens, but don’t let any minor neglect turn worse by not taking some precautions before starting and driving your hobby car after winter storage.


What’s Under the Hood?


Opening the hood seems like a simple and obvious first step, but don’t skip it.  Over the winter critters could have made a cozy home in your engine bay, worse yet the intake.  Check that the filter is intact and make sure no nest material or baby critters can get sucked into the engine.


Opening that hood would likely have scared away any creatures, but keep in mind for the next while that this might have been home for wayward animals and vermin for the past few months and they won’t give it up easily.  If there was any evidence of interlopers, for the next few weeks pop the hood for a visual before starting the car so no animals are about to get entangled in the belts.


Speaking of belts, check them and wires for signs of having been chewed and any natural wear you may have neglected during those cold fall days before tucking your baby away.


Life Blood


Before starting the car, check the oil.  If you haven’t had a chance to run the car over the winter, it might be a good idea to pull the plugs, and squirt a few drops of oil into each cylinder.  Disconnecting the plugs from power (usually by pulling the main coil lead) will allow you to rotate the engine in a controlled manner using the starter to build up oil pressure.  You could opt to turn the engine over by hand too . Turning the starter for about 10 secs two or three times should provide sufficient oil circulation. If you have an oil pressure gauge watch to see what it reports.


With oil pressure built up, and the ignition system back into play start the engine.  Once the engine is running, let it idle to warm up, I know you are dying to hear the engine at full song but don’t rev it.  Once the car is at operating temperature, observe the other gauges and idiot lights to see if any problems have come to light (see what I did there?).  Take a look under the car for any leaks. Now is a great time to change the oil.


If you are really diligent you’ll check all the fluids, but if you aren’t terribly diligent at least check the brake fluid level, and look for leaks at each wheel along before setting off on your first cruise of the season.  While you’re at it make sure windows and mirrors are clean, and brake lights are working, and tires are properly inflated, safety first!


Speaking of the first cruise, it would be wise to keep the first few short and sweet to flush out any mechanical issues while you are still close to home.  Don’t forget to bring along your cellphone and auto club membership.


Of course there are many more checks you should be doing but we perform those checks before every outing right?  Maybe you’ve spotted some glaring omissions, if so please let us know.


If you have a spring routine of your own worth sharing, let’s hear it.  We’d especially like to hear about any surprise engine bay encounters! Those are always good for chuckle or two!