The World’s Longest Auto Race


Around the World in 80 Days Motor Challenge


In 1908 a group of automotive pioneers set out on the grandest of adventures, and record setting exploits a 22 000 mile race around the world from New York City to Paris France in a machine that had only been invented 23 years earlier.  The race, envisioned by a Paris newspaper, was co-sponsored by the New York Times. So daunting was this undertaking that only four national teams in six cars mustered the courage to compete, USA, Germany, Italy, and France.  Even Henry Ford doubted it could be done.  He was half right as only three cars made it to the finish line.


Only 4 years earlier the 1350 mile race from NYC to St. Louis, Missouri took 18 days and saw 11 of the 77 cars drop out.  A year earlier the Paris to Peking race (route actually reversed) took the leader 60 days to complete, while the second place finisher came across the line three weeks later!  Nearly any length of race was an endurance race if it wasn’t on a race track, and the adversities faced were rigorous.  Racing around the globe was simply ludicrous.

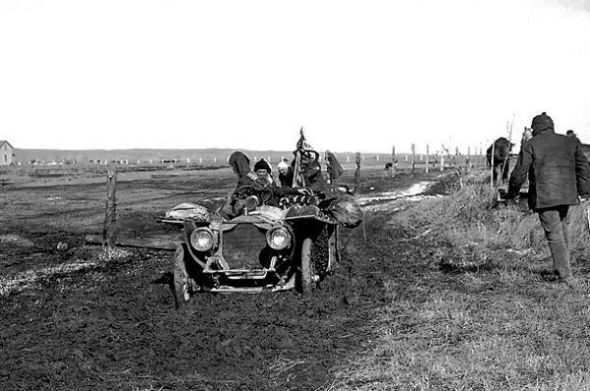
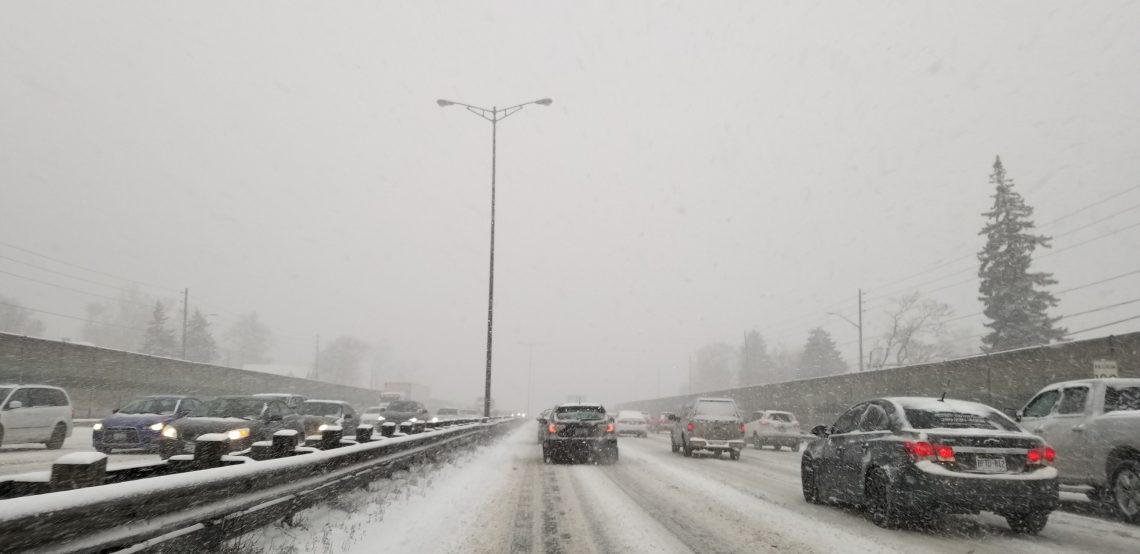
To better understand the challenges, it should be kept in mind that there were no gasoline stations then, no dealerships stocked with parts, in fact really there were no roads.  The best you could hope for in most cases was a rutted wagon track.  Worse yet, since the 1908 race left NYC in February bound for Alaska that meant encountering snow.  As it turns out, a lot of snow.  Outside Chicago the teams met with six foot snow drifts that they fought with everything from shovels, to hauling the cars with teams of horses.  Eventually the American team took to the plowed railway tracks.  Progress was miserably slow, it took them 8 days to travel just 256 miles.  The original course had the contestants following dog sled routes and driving across the frozen Bering Strait to Russia.  However once in Alaska the leading US team knew immediately that plan would never play out.


Ours was the first car ever seen there, and the inhabitants welcomed us with a band and parade.  But the snow was so deep…and a sleigh ride of a few miles…convinced (us) of the impossibility of driving through Alaska.  Some drifts were higher than houses…


The organizers agreed and the route was amended.  The teams were rerouted to Seattle where a Steamship would take the cars to Russia where the worst was yet to come!


As great a tale as it is, this post is about a different race, though inspired by the 1908 New York to Paris race this one occurred nearly a hundred years later.

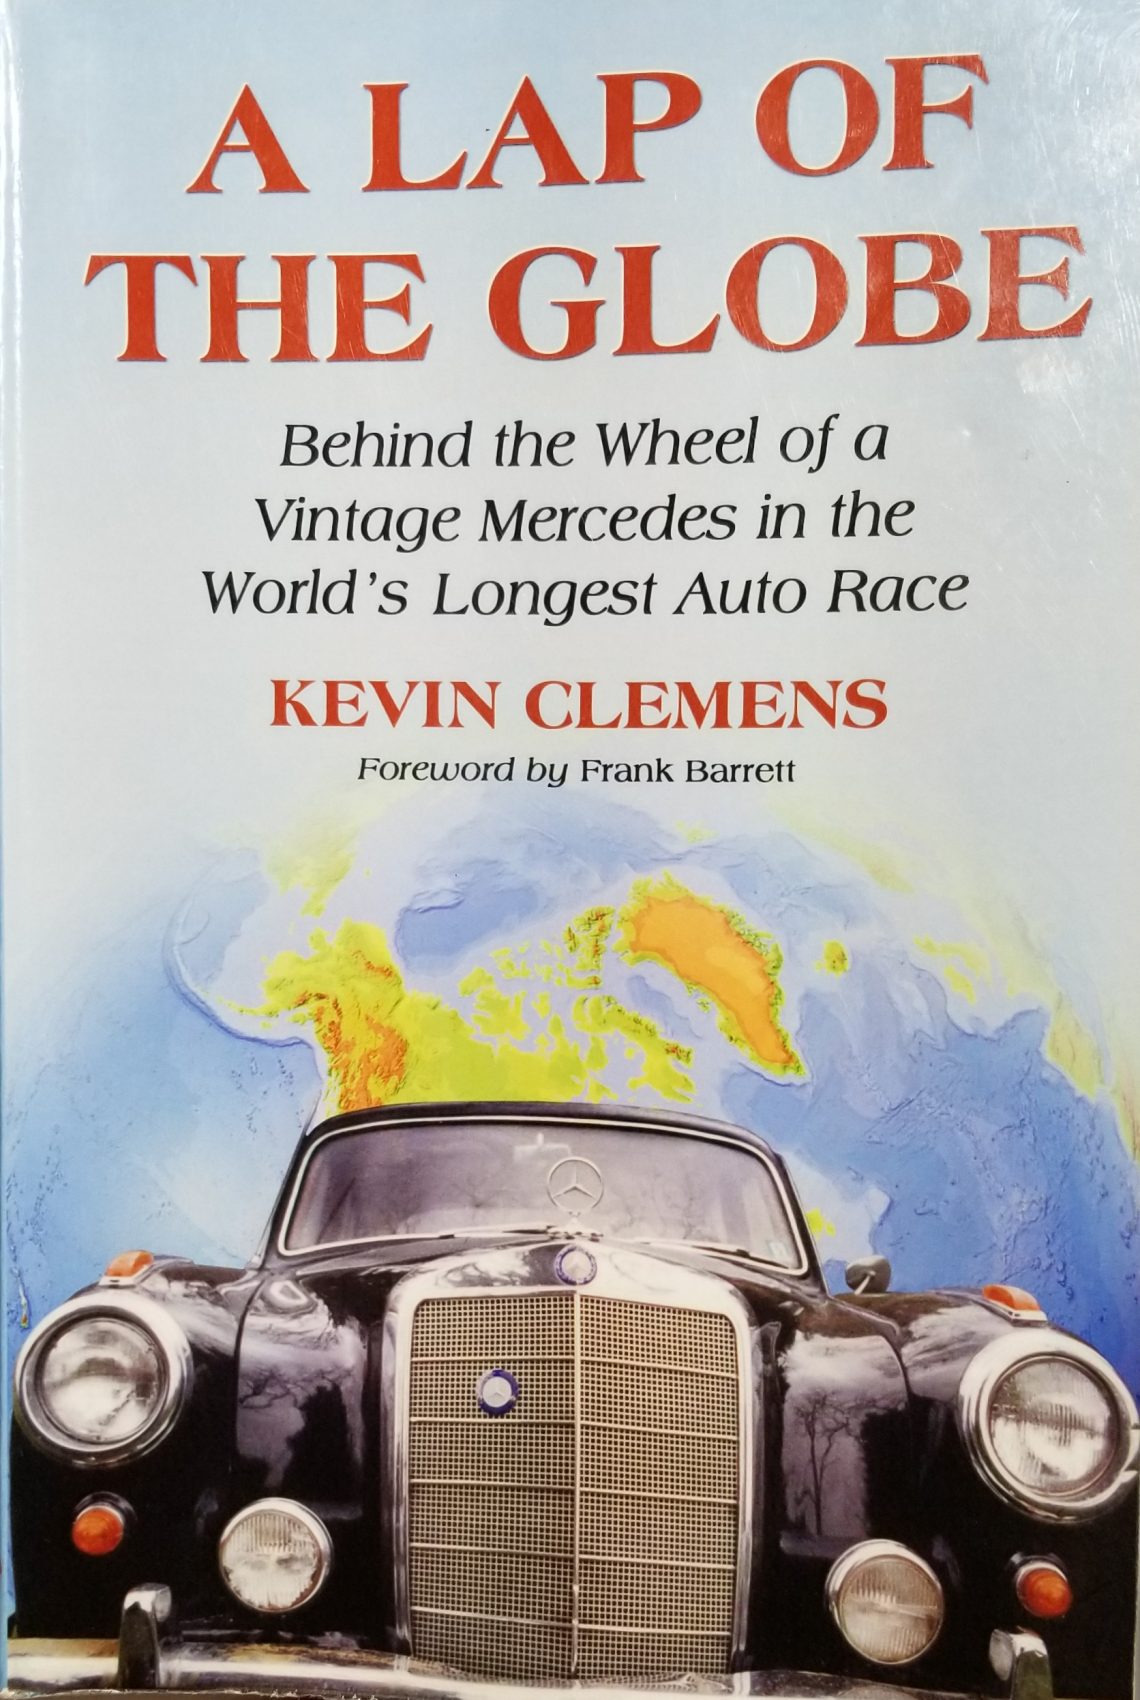
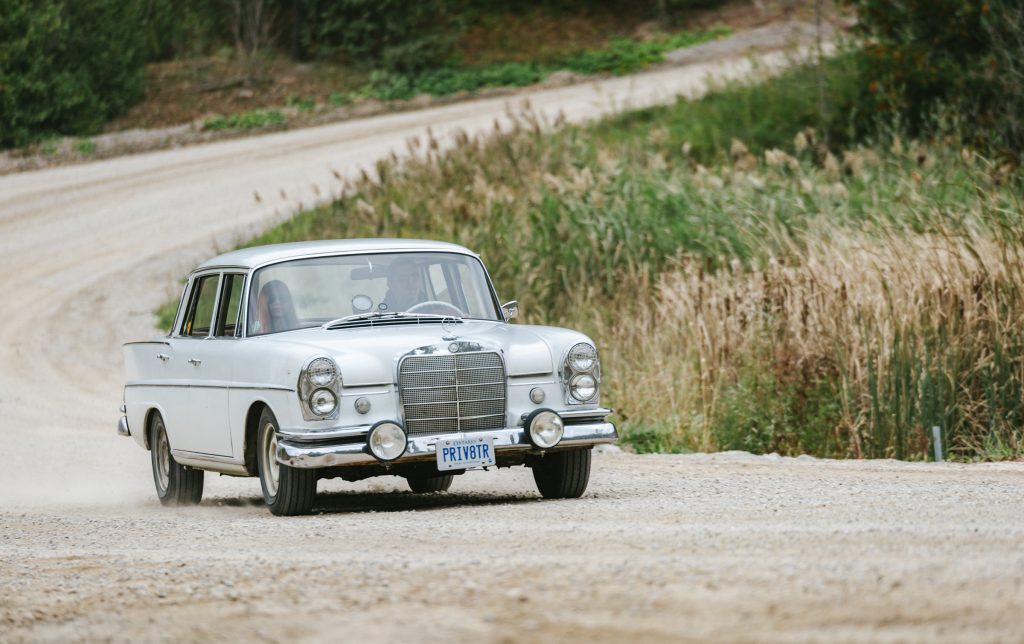
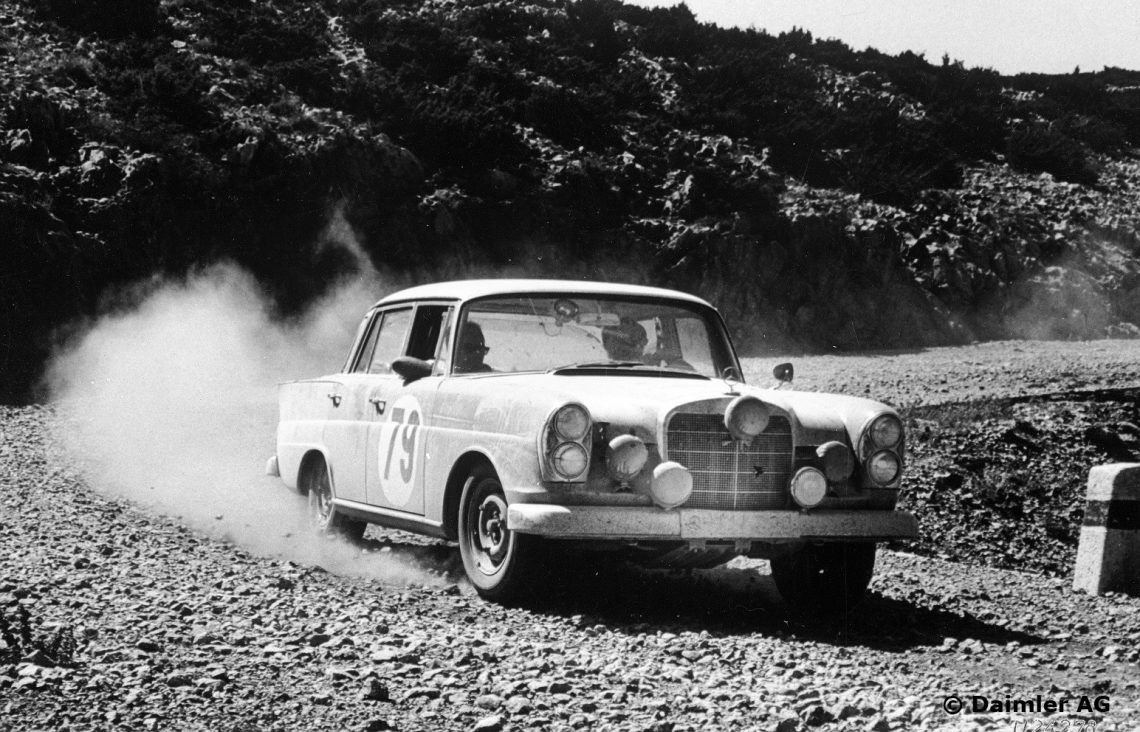
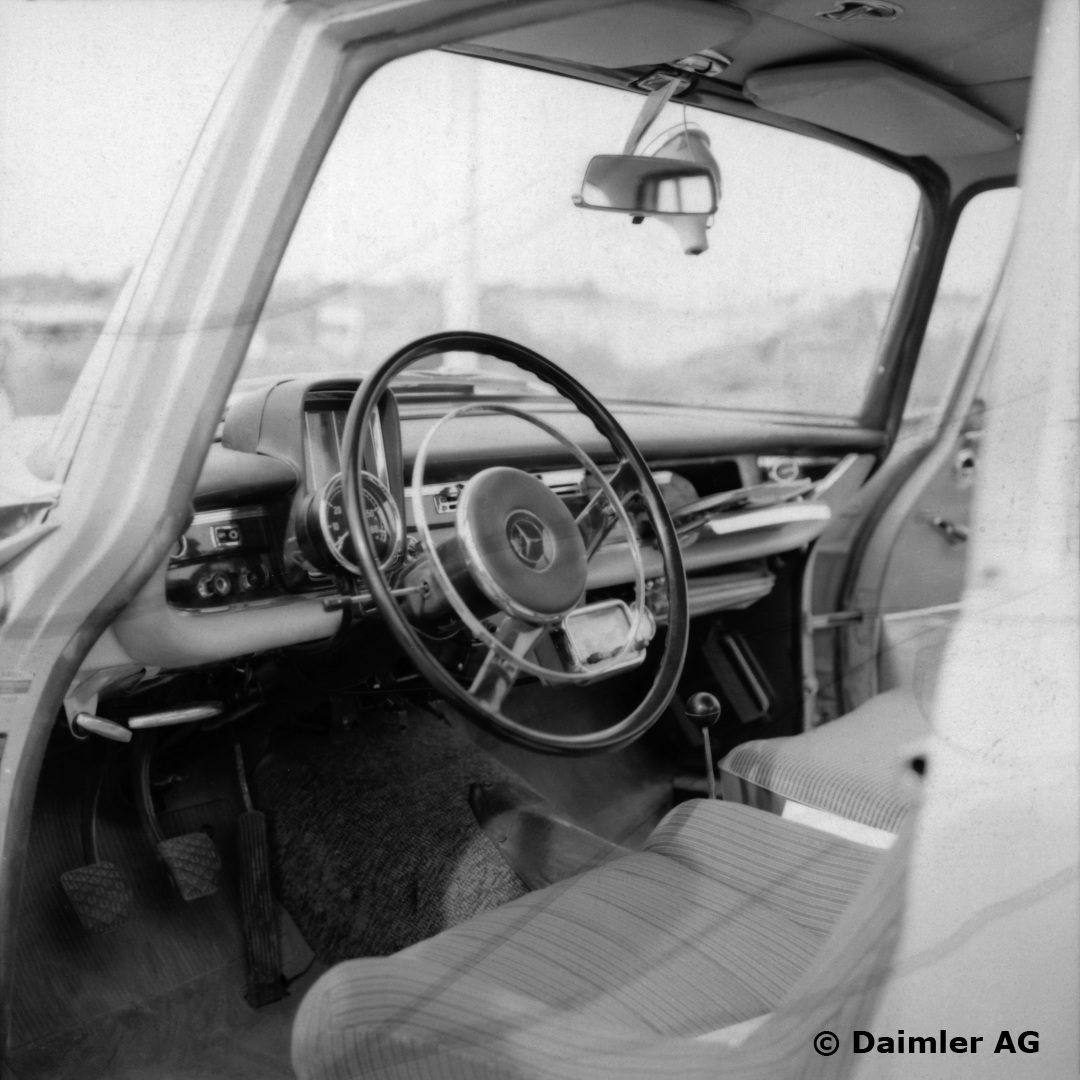
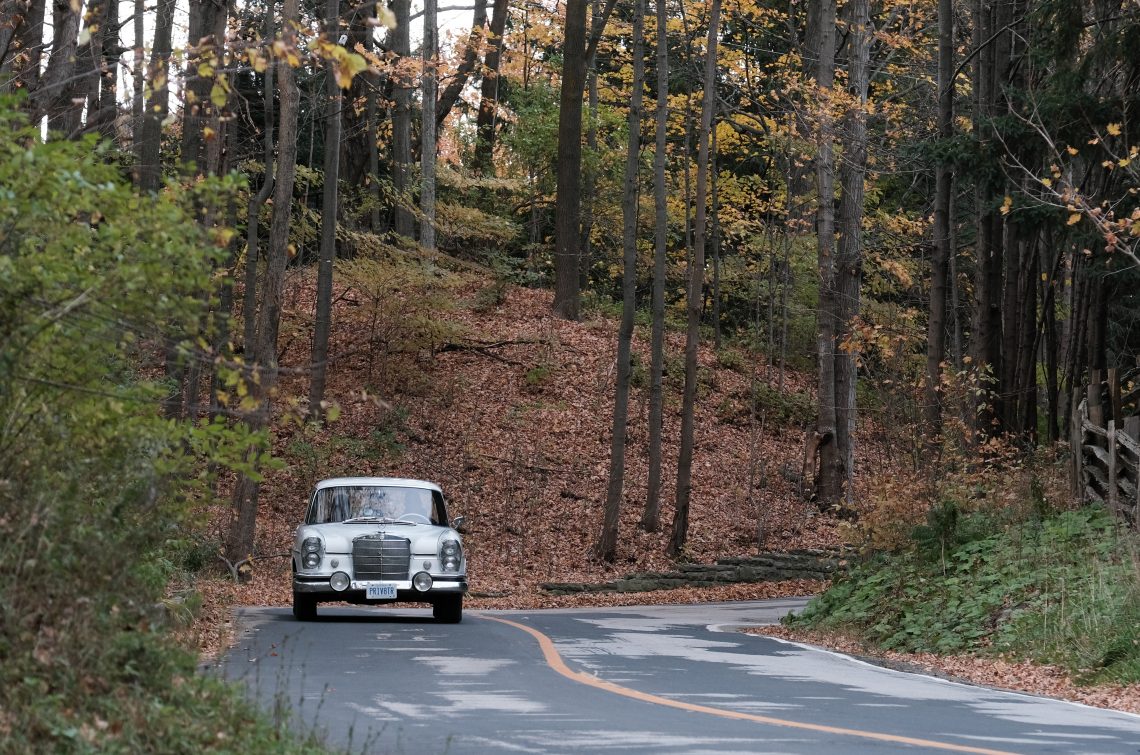
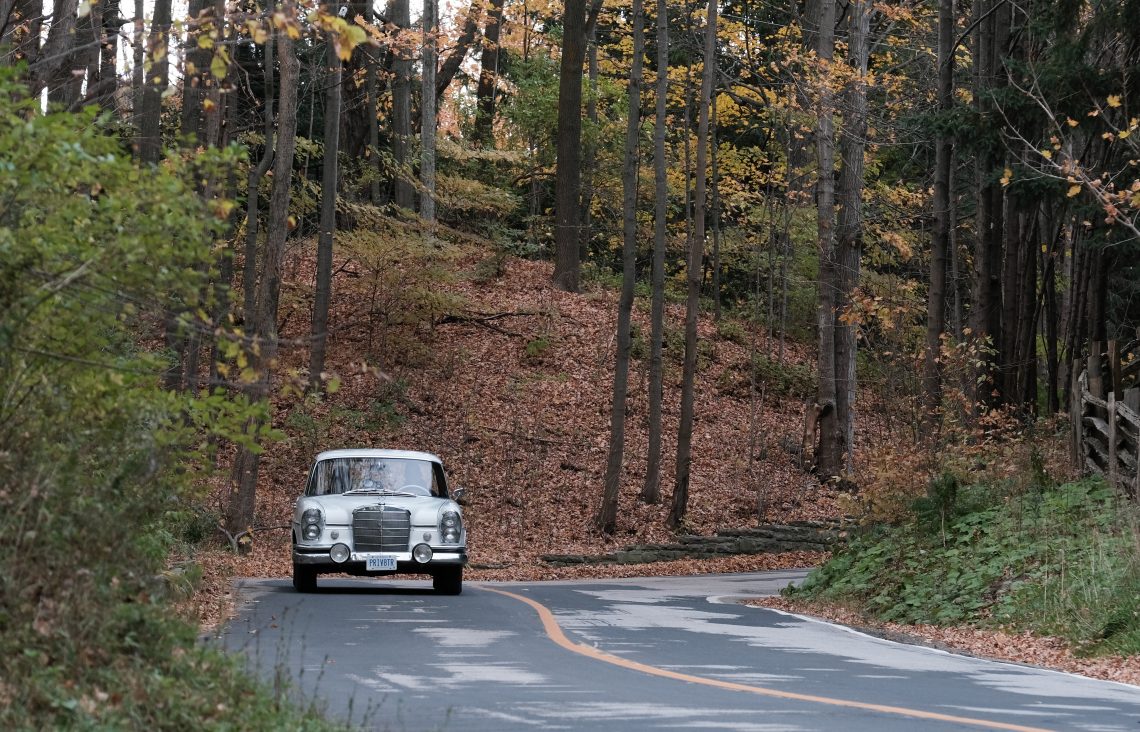
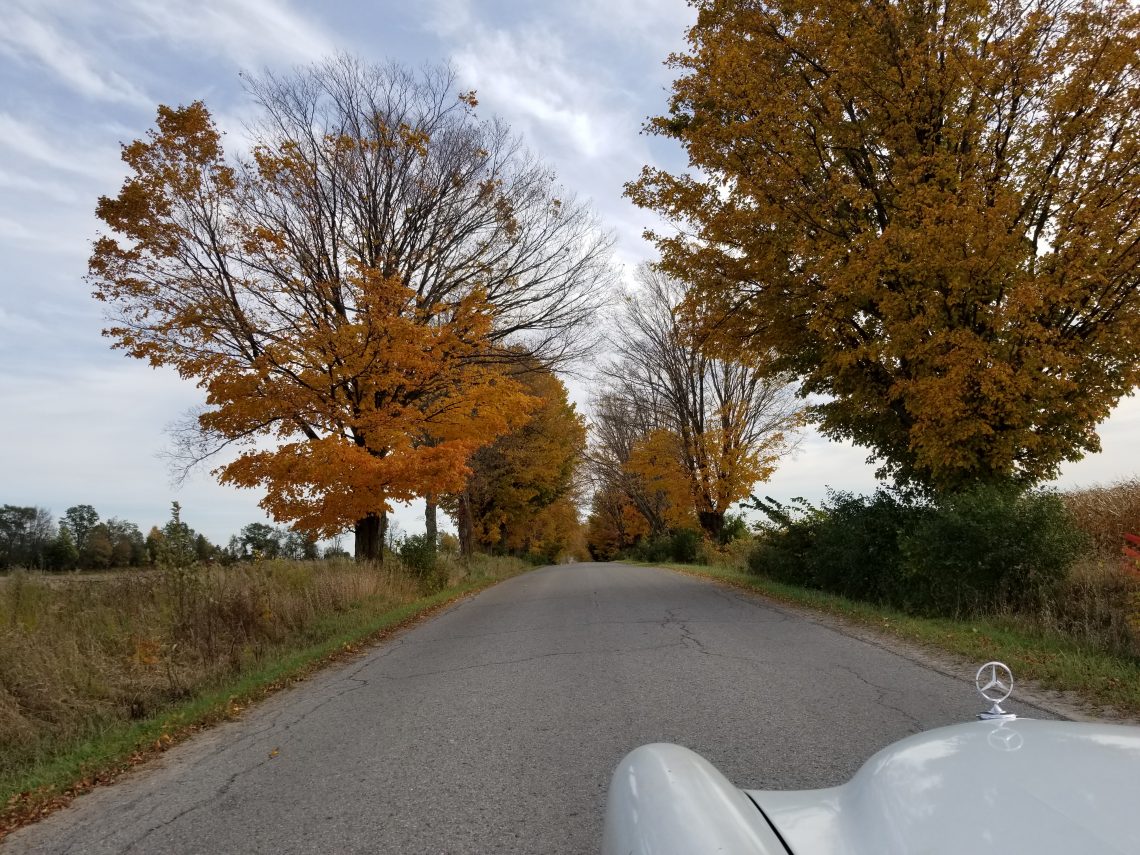
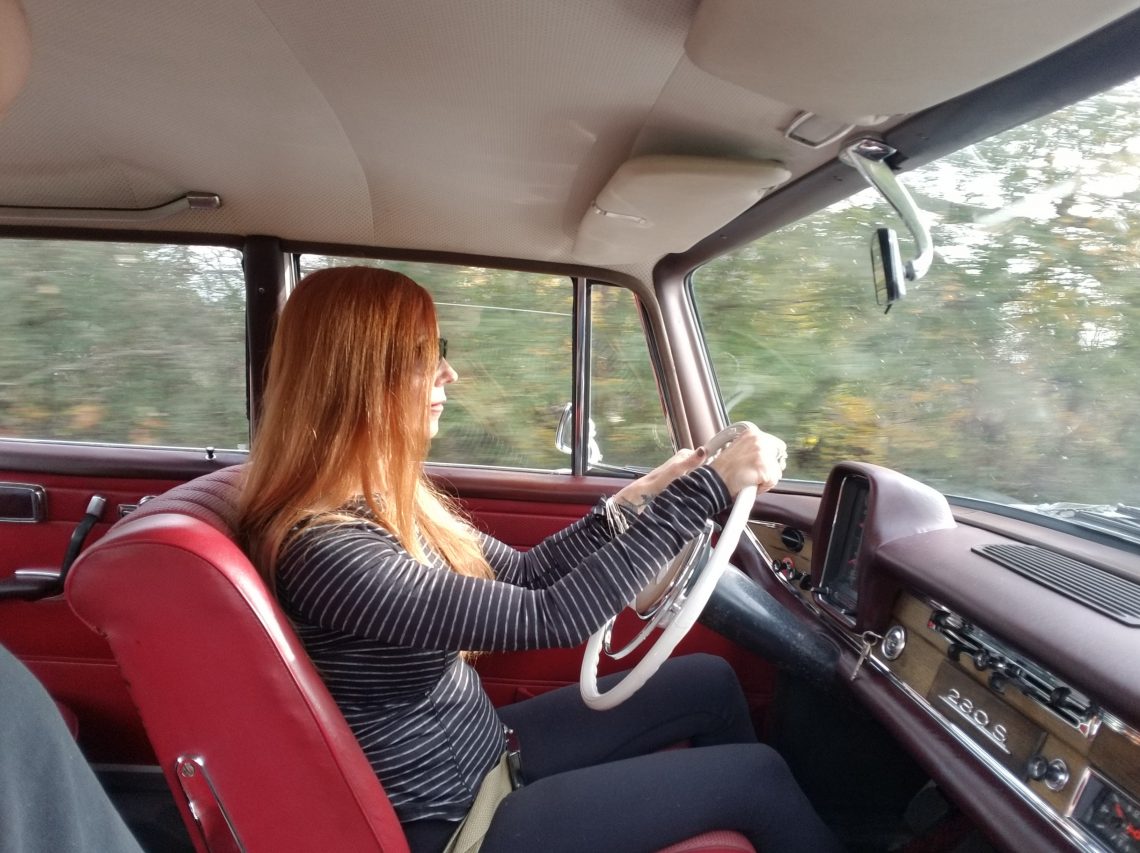
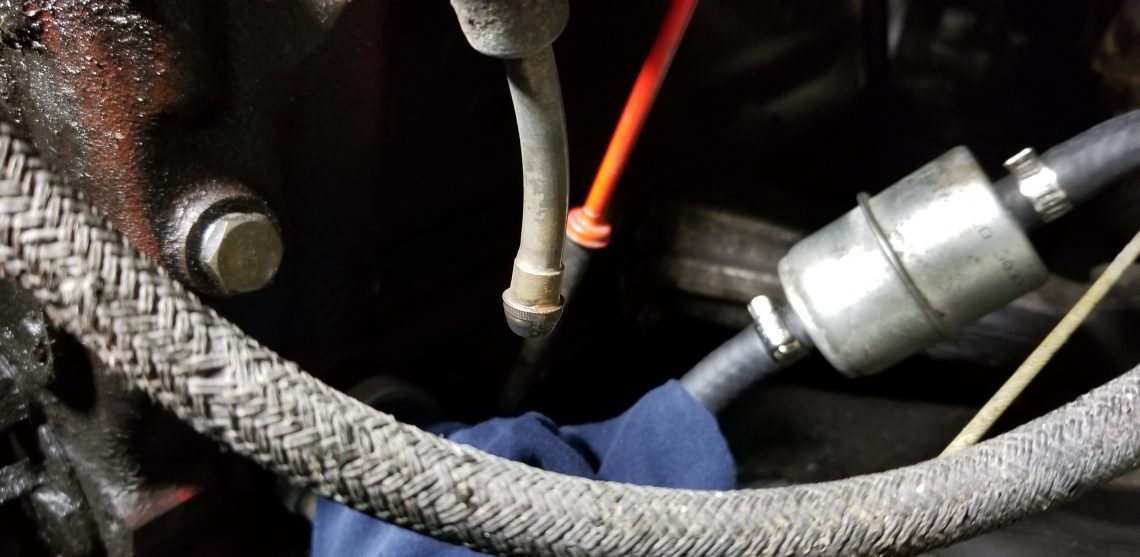
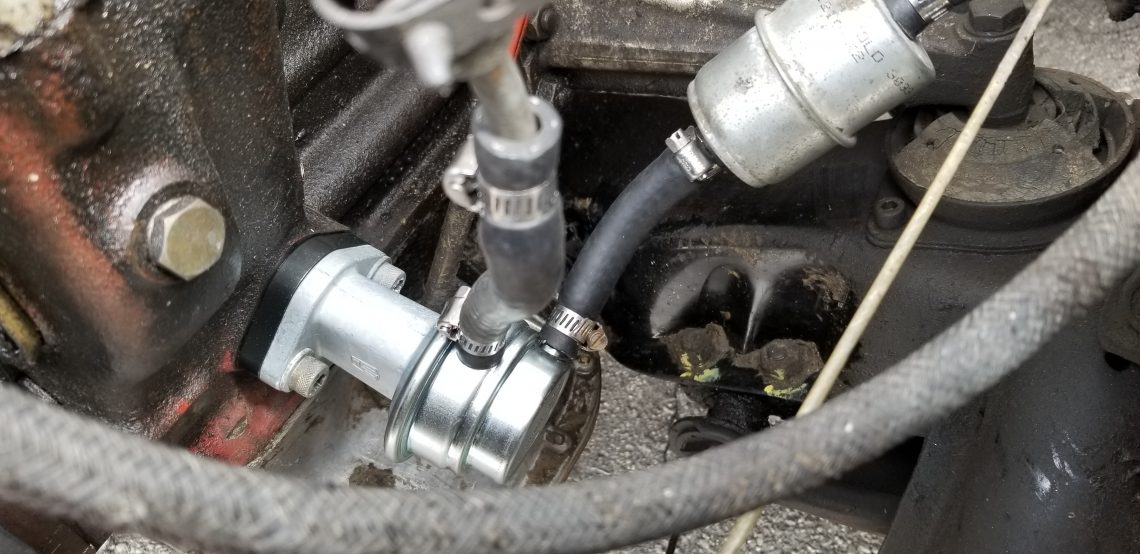
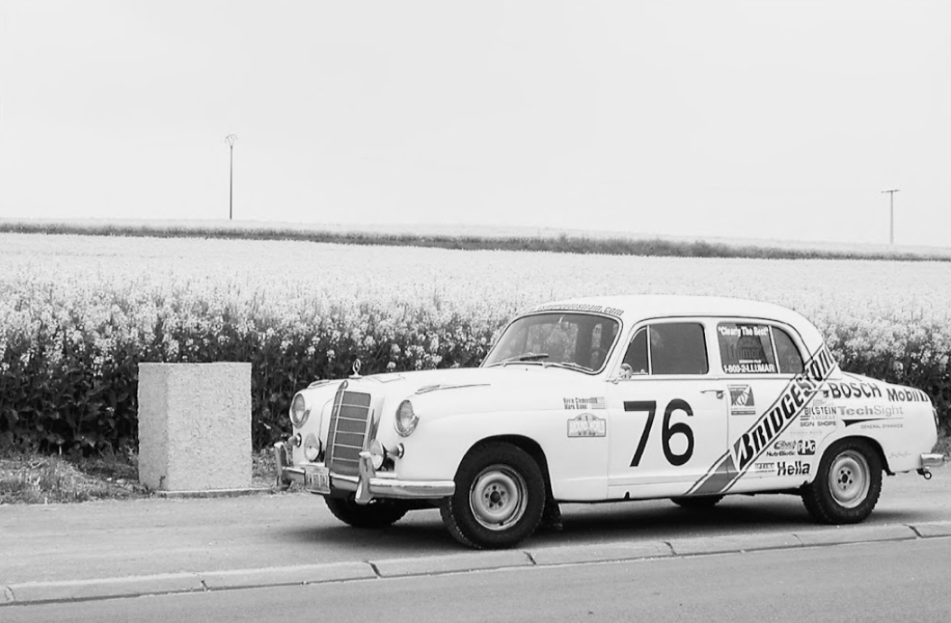
Upon picking the Fintail up at the shipping company for the first time, we were met with a few surprises.  While most of those will be saved for another time you can probably guess that they weren’t good surprises.  There was however one little surprise that was, the previous owner of the Fintail had stashed a copy of A Lap of the Globe in the glove compartment.  The subtitle “Behind the wheel of a Vintage Mercedes in the World’s Longest Auto Race” should explain the connection.  The book covers the Around the World in 80 Days Motor Challenge that took place in 2000. It was to be the first such race to entirely circumvent the globe returning to its starting point.  Despite a strong interest in endurance motoring, rally, and vintage Mercedes, the book sat on the back burner for over a year. Knowing the reality of these types of modern events is probably what turned me off reading the book.  Unlike the race of 1908 , today’s events are simply paid excursions for the ultra wealthy. With paved roads, gas stations every 20 miles, a sweep crew of mechanics, and luxury hotels awaiting your scheduled arrival, there is little romance and little to test the merit of man or machine.  The blue collar in me simply had no interest in reading about some rich…dudes playing make believe rally.

So what changed my mind?  Well the reading list is long and I needed to bang some off, and since the Fintail is in winter development mode, I thought maybe, just maybe the book might have some valuable tidbits buried within.  As it turns out, if a vague lead pans out, it just may result in something pretty great, more on that as it pans out.  Really though, what probably changed my mind was a brief moment of self realization.


While the greater Frontseat Driving family truly lives the middle class ethos we purport and while we are tentatively cautious of the monetization of the hobby, the truth is wealth is on a sliding scale and to many in this world, heck this country we ARE the wealthy.  While others are scraping by like little boys we are still playing cars, but with the real things.  What really knocked the chip of my shoulder was reflecting on our own experience this past driving season.  Sure enough we spent a fair amount of money to navigate our own cars for a three day ‘rally adventure’ followed by a sweep vehicle offering mechanical support and with (you guessed it) hotels and warm meals awaiting us. 


There is no question that we had an exceptionally fun time on that event.  And it was clear that that was the general consensus among the other attendees.   It was a great, and value filled weekend.  Like financial wealth let’s be honest, adventure is on a sliding scale. Breaking down on the side of a cold rainy, two lane, a thousand kilometers isn’t from home life changing.  But when it’s on a sparsely populated island, late on Sunday afternoon it is more than an inconvenience.  And when it means missing the last ferry to the mainland, well that straight up sucks.  While it might not compare to breaking down in the middle of the Sahara, or rolling down a cliff in Siberia, the chances are yours will be the story being told at the water cooler on Monday morning (if you make it to work).  So if we ARE ‘rich’ and we DID have an adventure, who am I to say the entrants of the Around the World in 80 Days event didn’t?  Perhaps it was time to open my mind – and the cover of the book.

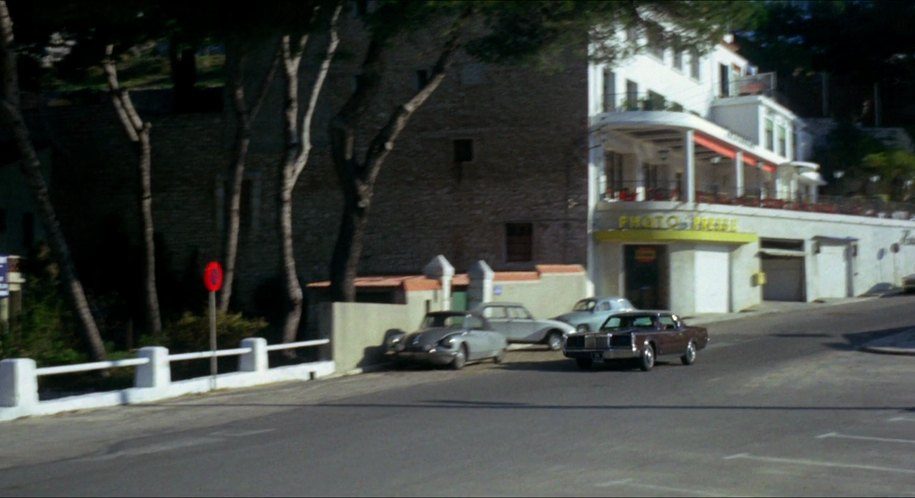
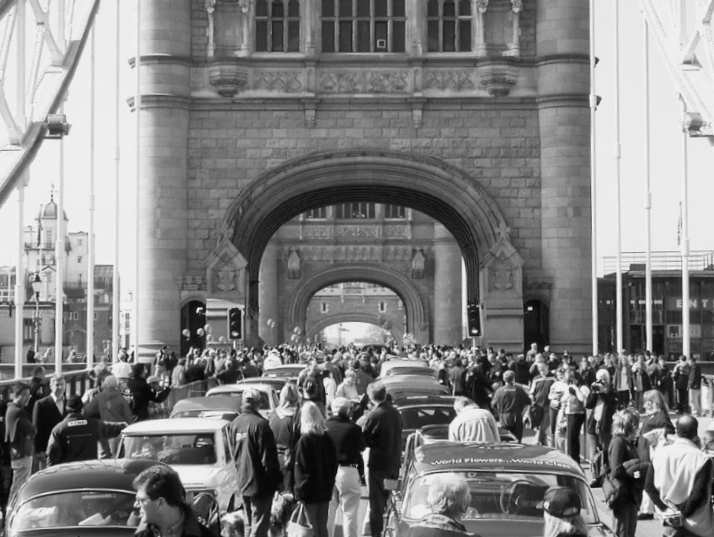
The Around the World in 80 Days event started in London England, travelled through Europe by way of France, Italy, Greece, and into Asia via Turkey.  The rally was actually three races in one.  The first was London to Istanbul contested by 19 teams.  For those continuing on the route crossed Asia visiting Georgia, Turkmenistan, Uzbekistan, Kyrgyzstan, and across the expanse of China.  For nearly half of the remaining contestants Beijing marked the finish line in the London to Beijing Rally, certainly an accomplishment in itself.  The remaining 40 contestants had chosen to circumvent the globe.  The cars continuing on, travelled by air to Alaska where the contestants picked up the race driving south across Canada via the Yukon, British Columbia, and Alberta. Crossing the northern states back through Canada via Ontario to Niagara Falls, across the border into New York, and New Jersey where again the cars boarded a plane this time bound for Morocco.  The final leg of the rally returned to London via Spain and France.  The vehicles were restricted to 1968 and older and divided into pre and post war categories.  The oldest car to compete was a 1912 Locomobile, the oldest car to successfully circumvent the globe was a 1929 Bentley.  


Author Kevin Clemens presents an oddly candid account of the race that is both refreshing and at times awkward as he manages to insult fellow entrants, the organizer (Philip Young), and even his own navigator.  While the preface thanks and acknowledges the latter parties, he may have chosen to repeat those kinder words a few times throughout the narrative as confirmation.  It was at times hard to shake that uncomfortable feeling like you get when a couple starts arguing at a dinner party.  That said the opportunity to see the reality of organizational conflicts, and interpersonal challenges involved in such a long and arduous trek, is rare and welcomed.


Clemens begins the story of this grand event from even before his own involvement starting with its inception in the late 90s.  The reader is taken back in time to review the highlights of the rejuvenation of endurance rally sport driven by the three main promoters at the time. This was an interesting and informative aside that helped to illustrate the immensity of the organizational challenges.  While Clemens has little to say in favour of the man he does at least point out that while at the time no one in the industry thought he could successfully put together an event of such magnitude, if anyone could, it would have been Philip Young.  I found this behind-the-scenes coverage to be especially interesting.  In a surprising move Clemens goes on to describe the finances involved.

The first thing we learned was that we would need to have map books, and that they would cost $500.  It’s hard to imagine how you could put on a rally with a route book that provides the specific instructions to tell competitors where to go and how to get there, and then turn around and charge them for a set of the necessary maps, but there you are.  Next, we learned that a special service to obtain travel visas would be available for a fifty percent surcharge over the usual visa rates. Because you don’t want to be caught going int Azerbaijan with the wrong papers, there wasn’t much of a choice but to pay.  Then came the heaviest hit. The two airlifts would cost 5000 pounds sterling. Each. That meant an additional $16 000…A package of hotel rooms (which was mandatory) would be another $8000. Some reached for their checkbooks. Others nodded their heads in resignation.  I panicked quietly at my seat…The entry costs to be paid to the organizers now totaled more than $100 000.


The entry fees necessitated financial assistance and Clemens even details his search for sponsorship and how that influenced the make and model of car they raced.  In fact in the appendix he even shares how each sponsor contributed.  As an aside, considering only the contestants going the entire distance the promoter collected 4 million dollars!  Keep that in mind as you read about the hotels, and meals along the way.  The book proceeds to describe how Clemens found and settled on his navigator/co-driver and spends a great deal of time describing in detail how the car was modified.

While I really enjoyed the lead up to the race I began to wonder how the book was going to unfold given that at nearly a third of the way through the race hadn’t even started.  In some respects I think that concern was justified as the grand adventure was at times reduced to a whirlwind of country names with few details about these exotic locales.


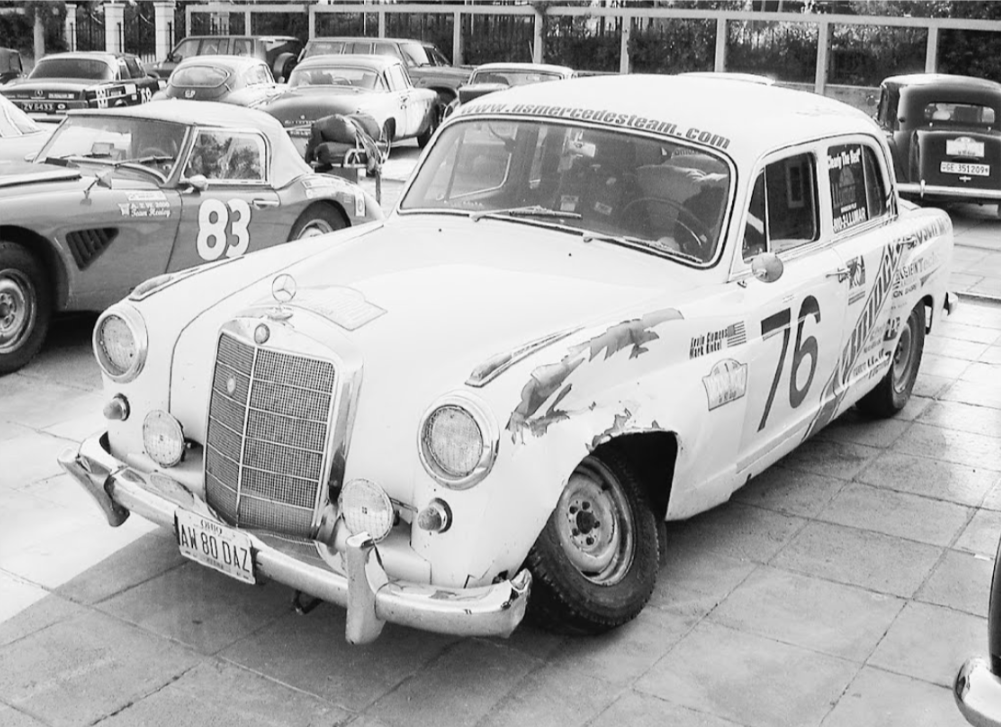
Often that could be explained by the need to cover the teams frequent mechanical problems.  A number of times the team is faced with dropping out of the race only to squeak through often by sheer luck alone.  Not only was there a need to cover the details of these emergency repairs,  but in several cases I think Clemens himself may have missed some of what the countries had to offer as he was spending much of the time wrenching on the car.  Often though he sacrificed sightseeing in order to satiate his fierce competitive spirit by going over the car ‘one more time’.  While he explains that many approached the race as a grand tour, an adventure vacation, he approached it strictly as a competitive event only taking in the sites or slowing to share a meal with fellow entrants when absolutely nothing else needed being done.


I went to Walmart and bought a jumbo-sized package of adult diapers.  I felt a bit embarrassed about buying these and made loud comments in the checkout line about how they were for my grandfather.  The reality was , if Mark or I got a bad case of the runs the rally wouldn’t wait for us, and we would have to keep driving.


From what he shares of his fellow competitors and some of their car preparation, we can be fairly certain none of them packed diapers.  I found myself terribly curious what Mark Rinkel his navigator thought when he spotted those in the pile of gear.  Regardless it shows this was no vacation for Kevin.

All in all the book is a good and quick read, that I believe many fans of automobile racing, rally, touring, or even those like myself that live for the epic road trip will appreciate.  However I think too much of the book covers the technical and organizational preparation and too little of the details of the exotic lands visited to interest the reader simply looking for tales of world adventure and travel.


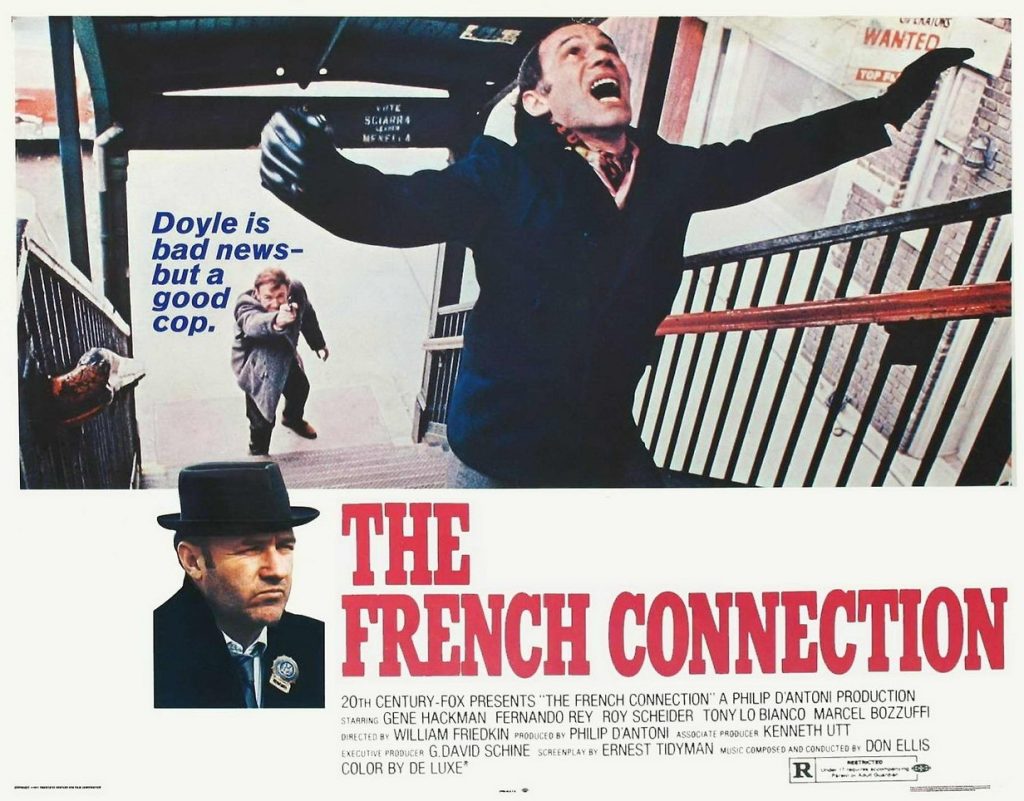
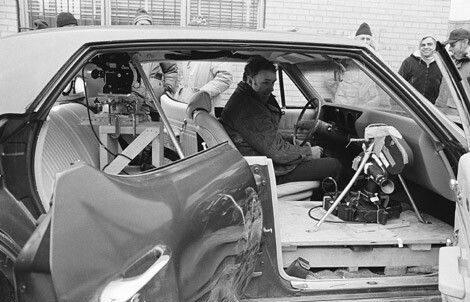
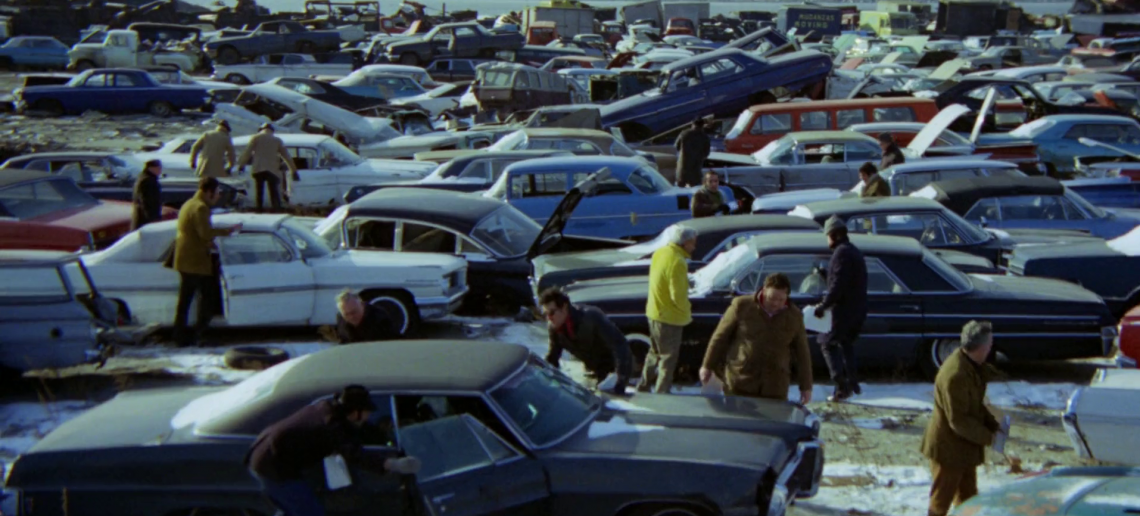
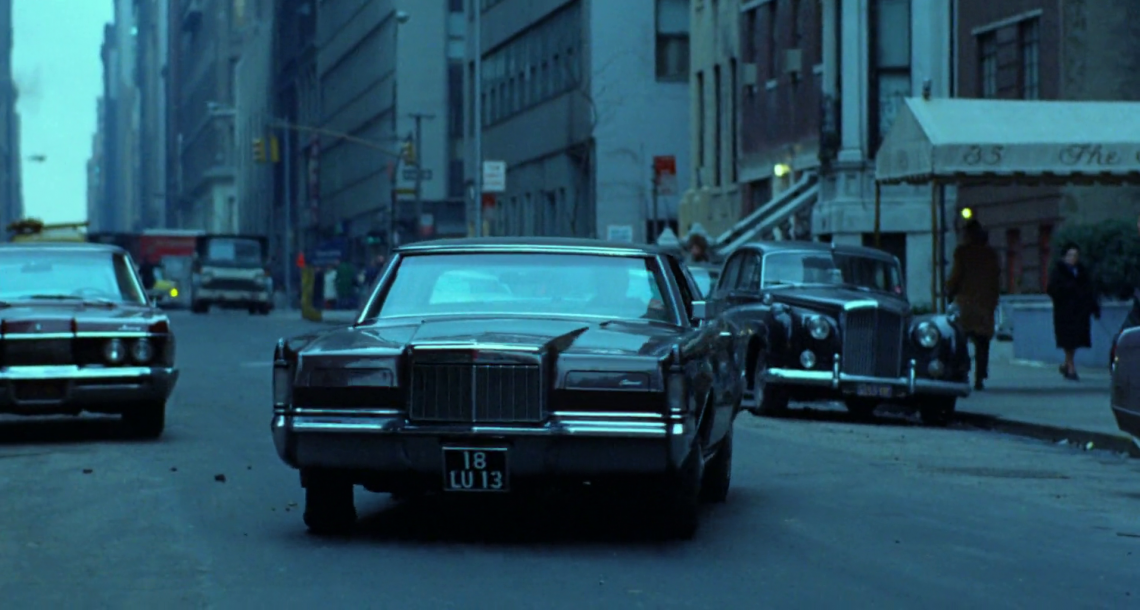
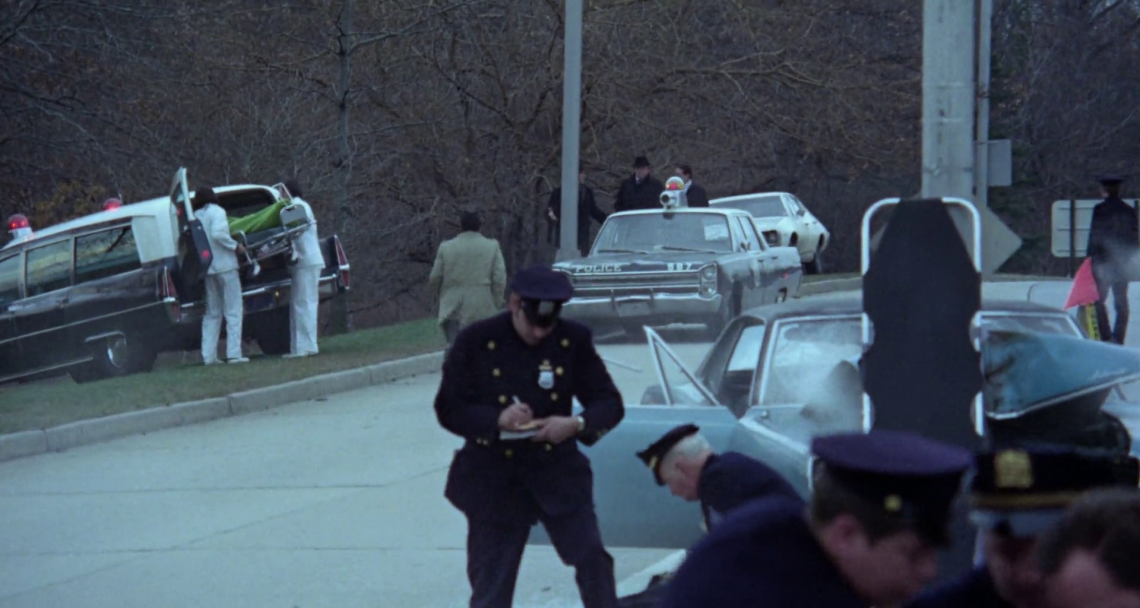
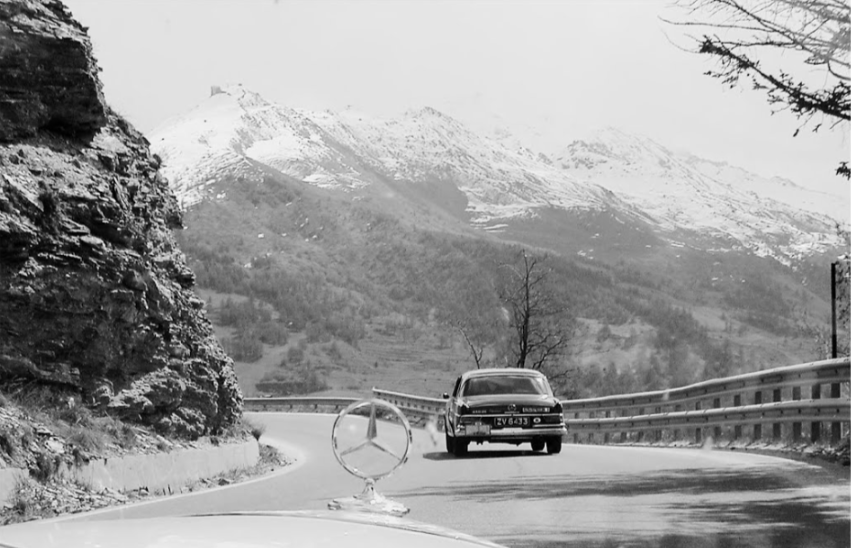
As I began this article with a snippet from the 1908 New York to Paris Race so does Clemens start his book.  He returns, delving into the details of the 1908 race several times as past circumstances often paralleled those of the 2001 event.  While I had some previous familiarity with the 1908 race the stories and photos were a welcome addition to this book not only as an effective literary device but the stories themselves often contained the drama and romance I felt lacking in his own adventure.  While Clemens and Rinkel certainly faced mechanical challenges that nearly ended their race several times, and suffered their own personal hardships, I found it difficult to compare to the gripping details of the great race of 1908.  To be fair, it’s tough to compete with stories of teammates drawing pistols and arguing about directions at gunpoint!  Clemens himself wrestled with the romance, the point of it all, and even the elitist nature of the event in his closing remarks.


From the outside it’s easy to be cynical about the whole endeavor, Who cares if a bunch of rich elitists drove their pretentious old cars around the world? …Was anyone saved? …it’s hard to see how driving across the (world) had much of a positive impact. 


In the modern world, we often have to invent our challenges as Philip Young had done with the Around the World in 80 Days event, but does that make the challenge any less romantic? …I’d wanted the romance, the excitement and adventure, but those things are at odds with the process of daily living.


I won’t give away how Clemens comes to terms with his internal conflict or how he ultimately found meaning in the event.  However I will say that his thoughts caused a second moment of personal clarity.  


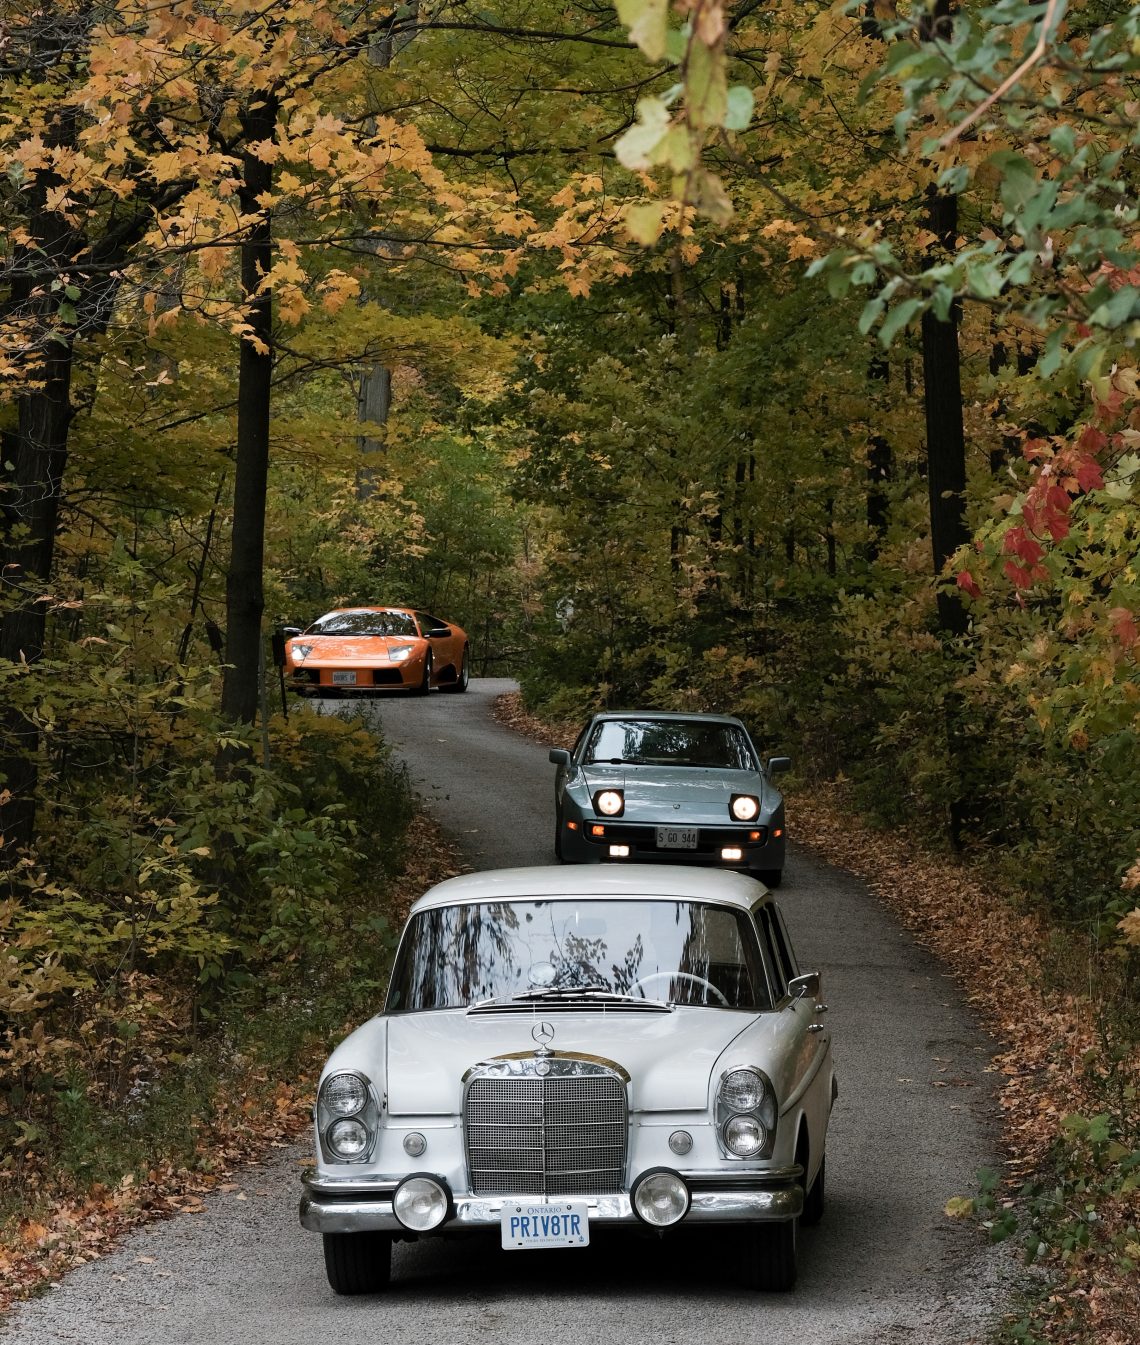
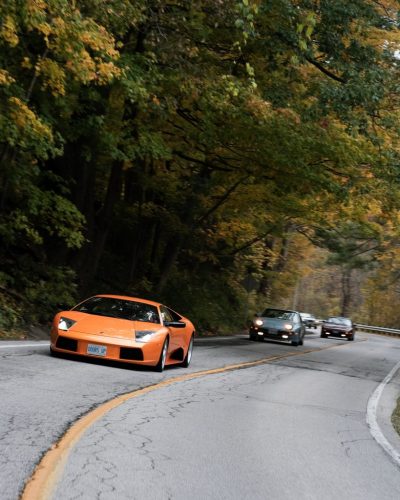
I have often wondered why I get such a kick out of people pointing, staring, and smiling at my vehicles.  Mysteriously that feedback seems to be amplified (for drivers and bystanders both) when driving in a convoy of like minded enthusiasts.  It’s not the attention, it certainly isn’t status I seek (or I wouldn’t be driving old beaters), yet something is strangely gratifying about the exchange.  I think A Lap of the Globe helped me figure it out.  Those looks, those reactions are born of wonderment and incredulity.  It’s not about inspiring envy, it’s about inspiring someone to follow their dreams and to seek adventure regardless of how romantic, or irrational.  Even if the adventure is little more than riding on empty through an unknown countryside.  The thought that I might inspire someone to do the same makes me smile.


2005 Dodge Magnum


Daily Driver Does it All


One of the regular features we hope to share on the site are vehicle biographies.  We have a number of them planned starting with the greater Frontseat Driving family and eventually encompassing our reader’s ride too.  Some of them are even written, unfortunately a busy schedule and uncooperative weather this past Autumn delayed the necessary photo shoots.  No one wants to read about vehicles without pretty pictures to look at.  Rather than delay this feature any longer we decided to start with the cars that sit in Frontseat Driving’s F-Bomb Studio.  Yes it’s a garage, but the by volume more swearing occurs than actual work, hence the moniker.  Meant to be funny?  Yes.  Absolutely true?  Also yes.


While the Frontseat Driving lineup has always been eclectic, it’s tough to deny that our automotive interests usually center on vintage vehicles. That said the need for a modern daily driver especially in the rust belt is a cold hard reality.  By modern, really we only mean something that doesn’t leak when it rains, and starts every time.  Another way we might differentiate our classics from our modern cars is that we’d jump into the modern car without forethought and drive to the opposite side of the continent without even packing tools or spares.  


When we last shopped for a daily driver, the need for utility led us to pickups.  However with a ‘76 K5 Blazer in the fleet as well as a beater Toyota, another truck really seemed excessive.  Given our long lasting love affair with ‘long roofs’, wagons seemed the next best contender.


If a wagon was going to be the body style of choice, it had to at least be something special.  Decent motivation, rear wheel drive and ideally three pedals. Unfortunately at the time the list was short.  The North American market doesn’t support the wagon market like some of us wish it would, often we are left salivating over ROW (rest of world) offerings that don’t make it to our shores.  Passionately and patiently waiting for the 25 year rule (20 in Canada) to come into play allowing these cars into the country is rarely a realistic option.


At the time the CTS-V wagon had not yet been released, and while we liked the idea of the Volvo V70R and enjoyed a couple spirited test drives, long term cost of operation seemed a risk.  Perhaps the biggest problem with the Volvo however, was… me. Being a single guy in his (at the time) 30s, driving a Volvo station wagon (even an R) seemed… well about 10 years or two kids premature.


It was on our way home from one of those test drives that I passed a Dodge dealership and while eyeing the Ram pickups once again, spotted a Dodge Magnum on the lot nearest the road.  While the Magnum had completely slipped my mind while shopping vehicles, I quickly recalled the witty commercial “Dude what do you got in that thing?”


It didn’t hurt that the ‘chopped roof’ hinted of hot rods and customs a genre we had lusted over but had (and have) yet to experience first hand.  While a Volvo station wagon may have brought ups images of tweed jackets with elbow patches, baby seats or Combat Auto Theft stickers, the Magnum was more my style.  As Dan Neil of the LA Times said,

“…the Magnum’s ideal demographic: a middle-finger-waving anti-establishmentarian, bad-beer connoisseur…The Magnum puts the “blunt” in “blunt-force trauma.”

Okay, to be fair it might be have been more the style I WANTED than the one I actually portrayed but that’s just about the same thing right?

The first test drive of the 6 cylinder model was surprisingly enjoyable, and that car got out of it’s own way quite easily.  Moving up the food chain I next drove the 5.7 V8 Hemi and was truly impressed, the sound alone was smile inducing. Logically the next test drive needed to be the 6.1 SRT however by that time the Magnum’s short tenure had already come to an end, forced off the line by the newly introduced Challenger. Magnum SRTs, already produced in limited numbers were nearly impossible to find for sale.


By that point I had become smitten with the Magnum’s signature paint, Inferno Red which appeared in every commercial, pamphlet and advertisement making the search even more difficult.  As the car was only meant as a daily driver I ended up sacrificing engine displacement for paint colour. Arguably not my most validating ‘car guy’ moment, but a decision I never regretted.

It wasn’t long before I had found a great virtual Modern Mopar clubhouse in the form of theLX forumsand became intrigued by the culture and the many, many modifications that other members were doing to their cars.  LX is the internal designation given to the platform shared by the Charger, 300, Magnum and Challenger. Those in the know will point out that officially the latter is an LC, but we’ll ignore that for the sake of this article.


In the early days, Hemi computer tuning wasn’t available, and aftermarket support was minimal.  The early days were a truly grassroots endeavour with enthusiasts having developed many of the best parts, and electronic work arounds right out of their own basements and garages.  While some of us got those parts cheap or free in return for being guinea pigs and helping to work out any kinks in the products.  It truly was a community effort.  Many of those parts, are today still the best available and some even have even been formally adopted by Dodge.


Without question the modern Mopar experience has been incredibly rewarding. The average owner is a mature, grounded middle class enthusiast, correspondingly the forums reflect a warm welcoming atmosphere with little drama and few online scams.  No one is pretentious, owners enthusiastically lend each other help and resources and actively travel together to races, and meets. We have a strong contingent of local enthusiasts, many of whom congregate on Facebook at the Ontario Mopar Owners Network and I have many Mopar acquaintances that although I only know them from the forums I truly consider them friends.

Dodge/Chrysler itself is incredibly receptive to it’s fans.  If it isn’t evident just by the absurdly high horsepower cars they continue to sell in a climate of self driving, rainbow powered, econo appliances – the SRT engineers have, many years in a row made it a point to drop by the guest hotel at events just to sit around the parking lot to shoot-the-shit over a few beers and answer technical questions, and perhaps drop the odd tantalizing hint on future product development.


The engineering team has also regularly participated in live online chats on LX forums for hour plus Q&A sessions.  All on their own time, with the only tangible reward being a couple pizzas to share during the session.


Many of us have personally met members of the hierarchy who have made appearance at some of the most unlikely venues in order to take part, shake hands, check out our rides and maybe share a yet to be released model in order to gauge interest.

The factory in Brampton has over the years opened its doors to us several times for tours and to expose the plant employees to the enthusiastic and appreciative customers.  Observing first hand how owners have pampered and personalized their cars after they left the factory surely instills a sense of pride in those that build them. The hallways of the factory are literally lined with photos of OUR cars.

The Magnum was supposed to be my appliance car, a tool not a toy. However the enthusiasm of fellow owners was contagious and it became evident that I was clearly going to be spending money on more than gas and insurance.   In order to retain some level of responsibility, I self imposed a rule on my spending; all parts must be bolt on (easily removable) and purchased used.  There were other cars in the garage that needed cash influx.  Oh and a house to renovate.  To my credit I’ve held true to that rule, although initially I only gave myself leave to alter the cars aesthetics making it fairly easy.


The aesthetic mods included some very pretty anodized billet parts under the hood, and a rear window wiper delete, the hole covered by a massaged and paint matched 300 SRT trunk lip.  Black pocket five spokes from a 392 Challenger came at some point. I love any wheel that harkens back to my days piloting Hot Wheels under the kitchen table. My love affair with Porsche Fuchs surely stems from the same place.  


Of course the wheels looked odd at factory height so the car was dropped via BCR coilovers.  At that point a case of while-you’re-in-there struck and it only made sense to add the stiffer front and rear Hotchkis sway bars that I had found for sale.  Out the window with the aesthetics only clause.

Slowly the car evolved; cold air intake, custom computer tuning, electronic transmission control (allowing engine braking and crisp manual gear shifts), electronic traction control override, Wilwood brakes up front, Brembos out back, exhaust (headers to tail pipe), Getrag rear end with LSD,  a two way radio for chatting with club members on the longer trips, and a CB radio – still the best ‘radar’ detector going on US roads and a full sized spare was added.  No point in driving thousands of kilometers to drive the worlds best driving roads to end up on a doughnut spare.    


Not only were the modifications adding up, but my need for utility, and to cart 3 or 4 employees or clients around changed.  When the opportunity to use the car in a less responsible manner finally presented itself, I jumped on it.  By this time the car was attending the drag strip less often.  I had discovered the road course and while many laugh at the thought of such a large car on the road course it isn’t as uncommon as most think.  With a 49/51 weight distribution, and braking and skid pad numbers matching cars MUCH sportier, the Magnum holds its own out there.  So the driver’s seat was replaced with a racing seat, the rear seats were deleted altogether as was the interior in the rear of the cabin.  A bolt in roll cage, and rear shock tower support was installed.  The result was something any child, monkey, or car guy would appreciate.  I don’t think the similarities of the three groups end there.

While a full supercharger kit – fuel pump to injectors – was purchased (yes still sticking to the used only rule) it has remained sitting in boxes in the F-Bomb garage for a few years now.  While the desire for more horsepower is always creeping around in the shadows, on the road course the only performance improvement needed is a driver mod.

Sadly the Magnum’s story is growing long – both this article and in reality. As the odometer creeps ever closer to 300 000 I am forced to come to terms with how the next chapter may unfold.  The car has been incredibly reliable, easy and affordable to work on and to keep running, and a great performer. This car as been driven hard, and fast from the quarter mile, to the road course, navigational rallies, extensive road tripping and spirited driving from Tail of the Dragon to Mount Washington.   The Dodge Magnum does it all – daily driver and race car.  All while looking damn good.


So what’s next?  Well a wrecked and rebuilt 2012 Porsche Cayman may take over some duties.  Clearly it’s the better car on the road course.  But the Porsche will certainly cost more to repair, and the Magnum is better than than the driver around the course so why move up the performance ladder?  Long distance road tripping will surely be taken over by the newer car, but maybe not daily driving, and probably not during the winter. Perhaps the motor will finally be cracked open and bored out to a 392 and topped with the supercharger that’s collecting dust in the garage.  Time will tell, in the meantime these discussions take place quietly and away from my beloved long roof for fear of breaking her heart.


If you liked this article please check out the others found to the right, and like and follow us on Facebook not only is it good for our motivation but you’ll know when new posts are released and what driving events we have planned for the future.  

A big thanks to Al Roberts for the photo of his Daytona at the Brampton plant, and to Alex Sears for the road course photos of our Magnum.

The OTHER Reason to Watch 


The French Connection


Every year come the dark winter months we suffer the same debilitating affliction.  It’s called S.A.D. Seasonal Automotive Depression and is brought about by the automotive void in our lives, caused by snow, ice and road salt.  While a sure fire cure would be to slip behind the wheel of our favorite rides for a spirited run on a twisty section of two lane, even the opportunity to view some cool vehicles would help ease the symptoms.


Sadly car spotting opportunities have run dry, especially for those of us located in the Rust Belt.   While we keep busy tinkering away in the F-Bomb Garage it can get tedious staring at the same vehicles every day.  


At Frontseat Driving we aren’t quite as smitten by high dollar super cars as most automotive enthusiasts so while the new season of Top Gear The Grand Tour is just about to be released it just doesn’t quite scratch that itch. We are more interested in quirky cars, the underdogs, and the obscure survivors, the mainstream cars of days past that one just doesn’t see on the streets anymore simply through attrition.


So while we wait (somewhat) patiently for spring showers to wash away the salt, and warmer temperatures to draw the cool cars out of the garages like they do buds from the tree branches we’ve begun to self medicate with a dose of vehicles found on the silver screen.

We’ve found that watching old 50s, 60s and 70s films is not only a great way to wile away the cold months ahead of us, it is also a pretty great opportunity for car spotting without flying to Cuba or even leaving the comfort of the couch that we are hibernating on. Many will have immediately noticed that we failed to mention the 80s.  As children of the eighties ourselves it’s painful to admit that it is entirely accurate to describe movies and cars from that decade as old vintage (nope can’t even type it yet).  


A couple years back we started making an effort to watch the great automotive themed classics.  Despite being classics, and having heard and read references to many of them often over the years, truthfully we had never seen them ourselves.  We started with the big ones like Bullitt, Vanishing Point, Two Lane Blacktop, and Dirty Mary – Crazy Larry. As huge Beastie Boys fans the latter had been eating away at us since Paul’s Boutique was released in 1989 – procrastination indeed. Slowly the list and the obscurity grew to include movies like Thunder Road, Thunder and Lightening, Duel, and Death Race 2000.  Of course they aren’t all winners but we’ll pick away at the list in future articles.


This winter we have started to turn our attention to movies that while not particularly of an automotive theme, feature seminal car chases.  So far we’ve knocked off The French Connection, To Live and Die in L.A., and revisited The Seven Ups while Ronin has been on frequent rotation for years.  Today as you probably guessed from the lead photo, we’ll take a look at The French Connection.  We’ll be covering films here more regularly in the future and thought that this film was the perfect segue way as not only do automobiles play a integral role, it is critically acclaimed and offers a great number of background vehicles to enjoy. 

The French Connection was released in 1971 and dominated the Academy Awards the following year. It took home Oscars for Best Picture, Best Actor, Best Director, Best Adapted Screenplay and Best Editing. It also received nominations for Roy Scheider for Best Supporting Actor, Best Sound, and Best Cinematography.


The story, based on true events centers on two hardened NYC narcotics cops, Jimmy “Popeye” Doyle (Gene Hackman) and Buddy “Cloudy” Russo (Roy Scheider) that ride the fine line between good-cop and dirty-cop while unravelling the biggest international heroin smuggling operation of the time.


This Academy Award winner was widely acknowledged for its innovative pacing, use of music, camera angles and most notably bringing a new approach to the police drama genre by depicting realistic, uncensored, and brutally violent police-criminal interactions. One thing to keep in mind while watching, is that it was THIS film that introduced today’s common tropes; the cop’s gut intuition, the FBI and city PD rivalry, and it was THIS film that first brought realism to the cop drama.  The French Connection was also unique in its ability to tell a story without spelling out each and every detail allowing a scene to unfold naturally like a documentary without a narrative. This was likely come by honestly as Friedkin a new filmmaker at the time, had as much or more experience filming documentaries than feature films. Friedkin is now well known for filming in this manner. While other directors would have the scene dumbed down for the viewer using explanatory dialogue that would never realistically be spoken, Friedkin has faith in his viewership and allows them to make the necessary connections on their own.

Frontseat Driving however is not a film blog but a driving blog and the reason it has made THIS blog, is the incredibly well crafted and still highly regarded car chase scene.  From a filmatic point of view, the car chase isn’t empty action filler common in film making these days. In fact the chase is a tool effectively employed to build tension and wholly engross the viewer emotionally right to the climax of the film.  While the end result is a fantastic viewing experience, it’s the backstory of filming the scene that truly unveil just how darned cool this movie really is.

The five minute chase scene, widely acknowledged to be among the genre’s best was executed by famous stunt driver Bill Hicks and produced by Philip D’Antoni and edited by Jerry Greenberg. All three had teamed up three years earlier to film Bullitt (Hicks drove the black Challenger) and would be brought together again a few years later to film another movie we’ll feature here, The Seven Ups.


The street scenes were filmed without permits.   The only permit acquired was to film on the train and that was a sketchy arrangement that, including cash and a one way ticket to Jamaica, was more payoff than official city business.  This is so unlikely in today’s lawsuit ridden environment that I initially doubted the veracity of this claim.  However it has since been publicly verified several times – amazing.

From the viewer’s point of view what differs from the typical car chase scene is that the villain is making his escape via a commandeered elevated train with the cop giving chase from the streets below.  


Assisting this novelty is the realism that could only have been captured by having been performed in real traffic, as Hickman drove the 1971 Pontiac LeMans at speeds up to 77 mph for 26 blocks.  While claims of speeds up to 90 miles per hour have been made in the past and are still quoted, some detailed analysis suggests the speeds, while still bordering possibly even crossing into insanity, likely a bit less than 80 mph.

The five minute chase scene, widely acknowledged to be among the genre’s best was executed by famous stunt driver Bill Hickman and produced by Philip D’Antoni and edited by Jerry Greenberg. All three had teamed up three years earlier to film Bullitt (Hickman drove the black Challenger) and would be brought together again a few years later to film another movie we’ll feature here, The Seven Ups.


The street scenes were filmed without permits.   The only permit acquired was to film on the train and that was a sketchy arrangement that, including cash and a one way ticket to Jamaica, was more payoff than official city business.  This is so unlikely in today’s lawsuit ridden environment that I initially doubted the veracity of this claim. However it has since been publicly verified several times – amazing.


“The car chase was filmed without obtaining the proper permits from the city. Members of the NYPD’s tactical force helped control traffic. But most of the control was achieved by the assistant directors with the help of off-duty NYPD officers, many of whom had been involved in the actual case. The assistant directors, under the supervision of Terence A. Donnelly, cleared traffic for approximately five blocks in each direction. Permission was given to literally control the traffic signals on those streets where they ran the chase car.

Even so, in many instances, they illegally continued the chase into sections with no traffic control, where they actually had to evade real traffic and pedestrians. Many of the (near) collisions in the movie were therefore real and not planned (with the exception of the near-miss of the lady with the baby carriage, which was carefully rehearsed).

At one point Hickman, with Friedkin manning the camera in the backseat right behind him, collides with another car in spectacular fashion.  Early reports stated that while unplanned the offending car had been driven by a fellow stunt driver who missed his point.  The scene was kept in the film by Friedkin as it added reality to the whole sequence.


Friedkin operated the camera himself because the other camera operators were married with children and he was not.”


Decades later it was revealed that rather than a crew member the car was actually driven by a civilian who had just left his house only a few blocks away on his way to work and escaped notice until driving right in front of the film car.  The producers later paid for the repairs to his car.


“The fact that we never hurt anybody in the chase run, the way it was poised for disaster, this was a gift from the Movie God. Everything happened on the fly. We would never do this again. Nor should it ever be attempted in that way again.”

While The French Connection is legitimately a great movie, and the chase scene expertly crafted and thrilling to watch, some of the real fun comes in the form of the countless car spotting opportunities arising from the busy New York City streets.  Whether driving by, or parked alongside, interesting vehicles literally fill the streets. An especially interesting scene is filmed at an automotive wrecking yard where vehicles in conditions that now would demand tens of thousands of dollars are on their way to oblivion having been unceremoniously given up on.  So frequent are the interesting spots that one has to show restraint in order to watch the film as it was intended to flow rather than constantly being punctuated by the pause button.

As the movie’s opening scene is set in Marseilles the viewer is treated to great selection of European makes and  it will come as no surprise that a decent selection of French cars make an appearance in the first few minutes of the movie including Renault, Simca, and  Citroën, and a very unique Chapron bodied DS2.  Oddly it is in France that we are introduced to the antagonist’s car a Lincoln Continental Mark III that later makes an appearance in New York.

There is no shortage of European cars back on North American soil however.  Some noteworthy European spots include an Alfa Romeo 1750 Berlina, ‘67 Fiat 124 both Coupe and Spider, BMW 3.0 CSi, Mercedes W110 Fintail, Volvos spanning 3 decades, countless Beetles, a couple VW split window buses (only 15 windows) and a 1960 Porsche 356.

Of course the mainstay of the spots are American makes.  No manufacturer typifies American cars of the time like Cadillac, and there is a good selection of Fleetwoods,  DeVilles (Coup and Sedan), and even an Ambulance to watch for.

Some pretty cool vans make roadside appearances including a a cool ‘67 Chevy van, a 68 GMC Handi-Van,  71 Dodge Tradesman and a Dodge A100.

Wagon lovers will notice a Ford Custom Ranch, and a good selection of Chevys including a 1960 Parkwood, a 1970 Kingswood and Townsman, and a ‘62 Chevy II

Perhaps in tribute to the multiple connections to Bullitt, a Charger makes an appearance, and Pontiac fans have no shortage of eye candy including not only the starring LeMans but also a 67 Firebird, and a GTO.

Ford’s famous Pony car made an appearance though we only spotted what is likely to have been a 6 cylinder notchback.  It seems unlikely that a V8 Fastback wouldn’t have made an appearance.  Perhaps we missed it if so drop-us-a-line to let us know.

Of course many of these cars can be seen all summer long at your average car show, so it’s always a real pleasure to see the stuff that has all but disappeared the workhorses that were used, abused and disposed of.  Delivery vehicles abound in the form of a Chevy C10 Panel, Step Vans, Grummans, and International Metros. Moving up the tonnage scale many buses, and transport trucks from GMC, White, Mack, International, and others, can be seen throughout the movie.

We spotted very few Japanese cars.  In fact the only one we spotted was pointed out to us.  Admittedly we don’t have a particular affinity for 60s/70s Japanese cars and so they may have gone unnoticed.  Can you find our one example? Did you find any yourselves? Please let us know down below or on our Facebook Page and we’ll add a few of YOUR spots to the article.

If this article prompts you to watch the movie for the first time, we’d love to know what you thought of it.  We’ll delve into more classic car films in the coming months so stay tuned.


Helphos Spotlights 


As many of you will know, our current love affair is a 1967 Mercedes W111, better known as the Heckflosse or Fintail in English.  As a rarely seen model it undoubtedly garners a lot of attention.

In period the Teutonic design was quite reserved, but these days the Mercedes star sitting atop the huge chrome grill, the flowing chrome adorned tail fins, and the vertical ribbon speedometer all attract a lot of interest.

It doesn’t take long though before the inquiring eyes fall upon the car’s greenhouse, and in short order the question always comes, “what’s that on the windshield?”


The Helphos “Eye of the Car” or “The Car Eye” is a German designed spotlight sold through the 50s and 60s that mounts directly to the windshield.  The above photos show the evolution of the packaging during that time.  The Helphos design was also rebranded under the names Polimatic, Polco (seen below), Les Leston, Marchal, and probably others.

Many cars as early as the 1920s sported spotlights, as road illumination was far less common and most signage didn’t use reflective materials.  These spotlights were often attached to the A pillar or the front wing (fender) and required reaching outside the car to operate.  While many were strictly spotlights, combination units with a spotlight facing forwards and a mirror facing rearwards were a common accessory for decades right into the 60s.  Eventually however, spotlights mounted on and through the A pillar made it to the market. These were controlled from within the cabin via a handle and linkage and while quite common on police and fire vehicles were less common with the average car owner as few owners warmed up to the idea of drilling through the A pillar.

While the infamous British automotive electrics company Lucas had their own solution to reaching outside the cabin, it was not nearly so elegantly devised.  Lucas sold a roof mounted light that looked and operated much like a submarine periscope.  The light was unsightly and (with a large handle invading the cabin) intrusive.  Perhaps the biggest drawback was that it required drilling a hole in the roof of the car.  As such it really was only popular with the most dedicated British rally teams, and was never adopted by the general public as the Helphos was.

The Helphos spotlight was novel as not only could their design be used from within the cabin, the light itself was inside the cabin.  Not only was the user protected from the elements while directing and focusing it but the light was protected from damage from flying road debris.  All this was accomplished without alteration to the vehicle. Not only could the end user install the light themselves, with installation being non-invasive the light could be switched from car to car in an instant.

While popular for many recent years with the aircooled Volkswagen folks (who adore their period accessories) the Helphos spotlight is really otherwise unknown these days but for a niche group of period endurance or navigational rally enthusiasts.  While the Helphos light was used by many rally teams, Mercedes was especially fond of them. In fact it is rare to find a period photograph of a Fintail rally car where the vehicle is without one. 

As we always envisioned building the Fintail into a ‘period’ rally car, it was practically essential to install one to complete the look.  We actually owned the light before taking possession of the car itself.  


The light is actually comprised of two main parts, a metal mounting ring with embedded glass that attaches to the windshield and the light body itself that hangs from the mounting ring.  The early version of the mounting ring seen above was a simple design as the flat windshield screens of the time posed little challenge to adhesion.  However as curved glass became common the mounting design (seen below) necessarily became more complex.

The later mounting ring is actually two separate hinged rings, with a rubber seal that is placed against the glass.   Numbered levers along the circumference of the ring are swung in consecutive order while the rubber seal (smeared with a dab of included glycerin) is pressed against the windshield.  A thin wire is included that is placed under the edge of the rubber gasket.   

The wire allows the air trapped between the windshield and the mount to escape as the glass of the mounting ring is pressed towards the windshield.  The ventilation wire is removed and the levers are thrown pulling the two halves of the ring apart.  The result is an incredibly effective vacuum mount.

The main body of the lamp hangs from this ring and can be removed independent of the ring.  With the freedom provided by the included generous length of electrical wire,  the Helphos is effectively used as a handlamp for roadside repairs. Clearly this was another added bonus over most other available spotlights of the time.

While mounted on the windshield the light beam can be used to illuminate street signs, markers or roadside features.  The Helphos had another design advantage over most other spotlights as the beam itself could be focussed from narrow to wide beam simply by rotating the main body in a clockwise fashion.  Directing the chosen beam to the target was as simple as moving the handle.


While generally uncommon, the Helphos lights are still readily available in enthusiast circles, and eBay, even NOS (new old stock) lights are fairly common.  For the best prices, avoid any Volkswagen enthusiast sites, and German specific parts houses which tend to soak the eager enthusiast. Using some creativity in search terms and locations (these lights are far more common in Europe) along with some patience can save you enormously.  Ours came from England and even with the added cost of shipping we came a hundred or more dollars under the price of most North American sources.


While it’s best to confirm the electrical operation before purchase these are simple in construction, and easy to rewire if necessary.  While many Helphos lights now have male cigarette plug adaptors, in period they were sold with bare wire to install as the customer saw fit.  


Any potential buyer needs to ensure that the reflector and especially the rubber gasket are in good order.  A dried, torn gasket will absolutely prevent the light from adhering to the windshield, while a peeling or tarnished reflector will greatly reduce the light output.  


The bulbs, while still available, aren’t common and tend to range greatly in price.  Confirm that a bulb is included and working and consider combining the cost of shipping with a spare if the seller has them available.  The least expensive bulbs, lack the blackout painted end however this is easily replicated with some spray enamel.

The following are the Helphos installation instructions, explaining the mounting of the ring to the windshield, basic operations, and bulb replacement.

This article requires a couple acknowledgements.  First to Elliot Alder for the lead photo of our Fintail, one of our absolute favourites. 

Second a special thank you to Mercedes Benz that permits access to and use of the historic racing photography you see in the article.  

© Daimler AG.
All data and content are protected by copyright. Use of the data and content requires the source to be stated.
The global copyright remains the property of Daimler AG.

As always, comments and questions are welcomed.  We strive to provide accurate info however if you have spotted a mistake, or simply have more to add please let us know.  All our articles are perpetually updated and revised as needed.  

We’ll leave you with another historic Fintail rally photo – cars complete of course with Helphos lights.


Finding the Road Less Traveled


Recently on a Frontseat Driving event I was asked how I had found such a great collection of backroads.  I simply answered with a laugh that I drive a lot. While that IS true, and while I do oftentimes simply steer the car up a road simply because I’m not familiar with it, truthfully there is a lot more to finding great driving roads especially when travelling abroad.


Before you can travel the road less traveled, you have to find it.  Today’s mapping technology, along with the proliferation of GPS has made navigation a breeze.  Getting from point A to point B has never in history been so easy, and so terribly boring.


These days finding your way is as easy as plugging in your destination, you don’t even need to include your current location, the magic box in your hand knows precisely where you are.  Instantly this results in typically two or three routes being mapped out, one is the route with the shortest distance, perhaps a toll free route, and even one avoiding construction or traffic delays.


That’s fine for getting to the airport, or finding the nearest Starbucks but when it comes to enjoying the narrow, and twisty backroads and the small towns that dot them, today’s tools are nearly useless.


While new technology has it’s place, when it comes to finding great driving routes we use old technology, usually books.  Instantly you likely think of atlases and folding paper maps, as they are certainly invaluable tools of the trade.  While we’ll cover both shortly they aren’t our first choice in fact it’s history and geography books that we have found to be the most useful.  No we don’t read them before every outing, but once you’ve read a few they become the single greatest source of reference.  The knowledge contained within them provides the foundation that the rest of our efforts rest upon.


Seems a stretch, I know so let’s quickly dispel your incredulity with a quick explanation. Understanding how man got around, and how the land was settled and the first roads developed through time, provides some insight into finding great routes.


Regardless of where you live, who was there first, or who tamed the wilderness to build communities as we know them, following the steps of the first explorers and those that followed will always lead to great driving roads.


I think we can all agree that the best roads, are the winding and undulating roads.  And those roads are usually the oldest roads. This isn’t by chance. The earliest roads evolved from foot paths, that were in fact worn by hunters following (usually) deer, as a result nearly every locale in North America has a Deer Run road.  Later many roads simply followed the European settlers’ footsteps as they puddle jumped from lake to lake along rivers as they made their way inland.  Here again put Portage Road into Google maps and see how many hits you find.


Man has always relied on water.  Whether as routes of travel, to feed their crops and livestock, or run their mills that ground flour, cut lumber, and eventually produced electricity.  So as the settlers made their way upriver eventually deciding to put in roots along the way, towns sprung up. The roads connecting these towns simply followed the path of least resistance, alongside the river.  And rivers rarely run straight.


While rivers rarely run straight they always run in the lowlands, often in the valleys of hills or even mountains.  While building a road upriver was pretty easy the need to build roads from one valley to the adjacent valley required greater engineering.  These roads followed the topography for ease of construction, which of course was very rarely straight, instead often climbing and curling around these same hills and mountains.


Of course as trade and industry increased, and before trains spanned great distances with ease, ships were the transportation mode of choice.  Ships relied on the depth of oceans, the deepest rivers, and large lakes, which is of course where you find the world’s largest cities. These large cities usually built up on vast flat areas at the mouths of rivers, became the greatest sources of employment and thus settlement.  This left the smaller hamlets, towns, and villages on tributaries, and valleys upriver to grow more slowly, and to resist industrial growth all the while becoming increasingly charming and quaint.  While some of these early roads were eventually flattened, straightened and paved smooth, in most cases that was impracticable and they remain twisty two lane roads to this day.


So through our history and geography books we’ve learned that the best roads follow rivers, and valleys running upstream from the big cities.  We’ve learned that mountain passes (also called gaps in the American south) connecting valleys are equally twisty in addition to offering great views.  And since the largest cities are usually found further downstream at the mouths of these rivers, the most charming small towns and villages are often found along these same roads.


In many cases the towns, villages, and hamlets of past are long gone made redundant by evolving technology.  But often vestiges of their industry are left behind.  Towns as mentioned earlier often sprung up alongside a creek or river often at the site of a waterfall or set of rapids where the rushing water could power a mill.  Often those mills remain as historic monuments, fancy restaurants, antique shops, or maybe just a decrepit foundation of field stone.  Sometimes the memory is so faint that one has to rely on the road’s name, but rest assured most any Old Mill Road will be a decent driving road or in the vicinity of some.


Some other vestiges of times past, are kilns and quarries, dams, bridges, tunnels, school houses, and of course churches.  Sometimes the features are right in the street name, but searching for any of these features is a good tactic.  There are even entire websites dedicated to just historic bridges and if an old bridge remains, it’s likely a narrow road with little traffic, and we know bridges cross creeks and rivers – sounds like a good recipe doesn’t it?


One usually thinks of dusty western deserts when the term ‘ghost town’ is used,  however the truth is ghost towns exist all over the continent.  While they may not appear readily on a map, these towns of past still intrigue us and are extensively covered in books and websites online.


So we are nearly ready to refer to mapbooks.  But before we go to the obvious resources, lets cover a few more less obvious ones.  While I haven’t actually used the word yet, what we’ve been discussing so far relies heavily on topography, the actual physical contours of the land, the elevation differences. While we could refer directly to topographic maps they aren’t readily available at the auto club, or gas station, and they certainly aren’t easy to read on the side of the road. However there are hints to topography found in more readily available resources.


Sadly humans consume and use every square inch of land that we can unless it is cost prohibitive. Generally speaking we avoid building on the sides of mountains or large hills, landslides, avalanches, or just the sheer cost of building are some obvious reasons why.  Added to that is that we heavily rely on agriculture. The best arable land is flat receiving sunlight all day, expansive, and fed by rivers.


It is for that reason that our Provincial, State, and National parks and Public Land are either extremely remote, or in areas otherwise too expensive to build on or to farm.  Usually because of the proliferation of mountains, hills, lakes, swamps and marsh land.


Locating these parks or federal lands is a sure fire method of finding good driving roads.  Finding the parks is straight forward, they are the green areas on the map however finding federal lands requires a bit of effort.  In the United States these lands are governed by the BLM the Bureau of Land Management and maps are available from them. In Canada maps showing Crown land are available online at each province’s website.


These same areas are also the destinations of skiers, sport fishers, rock climbers, kayakers, canoeists, mountain bikers, hunters, ATVers, 4×4 offroaders and many others.  In most cases the roads leading to these destinations are great driving roads, so investigating where these outdoor sportfolk are active will surely lead you to good driving roads.


Okay time to finally discuss the obvious tool of the trade, the atlas or mapbook and folding maps.  As a reminder we are still discussing the finding and planning stages of the process.  For that reason size wins. Size in this case meaning big pages not many pages. Using a large easily legible atlas or folding map will make your work easier and likely will show ALL road whereas smaller versions omit the smaller backroads.  In order to get the most detail, it’s advisable to purchase an atlas covering as small a geographic area as possible for your needs. For example you’ll likely get a more detailed map in an atlas covering your province or state than you would an atlas showing an entire country or continent.


To get the most out of your atlas or map take the time to learn the legend, differentiating between freeways and two lanes highways, or our absolute favorites recreational roads is essential.  As we have been reminded a few times recently identifying gravel roads is also important when planning routes others will be travelling. While we don’t have paint jobs worth worrying about many others do!


If you are using an atlas or map that includes topography, learning how to read the contour lines, and associating the colours used with the grade will be an invaluable asset.


The Frontseat Driving atlases of choice for planning routes in Canada are by Backroad Mapbooks.  While our preference would be for even larger maps, truthfully they are of a size more conducive to bringing along in the car.  Being spiral bound makes them even easier to use in the tight confines of the cabin, if you choose to bring them along. More importantly they include an incredible amount of info. Topographic contour lines, roads of all sizes, even deactivated roads, snowmobile routes, and motorized trails are included.  


As was mentioned earlier, knowing where outdoor enthusiasts go to have fun is a good clue to where the good driving is.  The BRMB mapbooks include info on hunting, fishing, paddling, ATV, and camping destinations among other pursuits all adding to their usefulness.


In the United States our go to resource is Mad Maps.  Mad Maps produce water and tear resistance folding maps made for the tough life on the road.  What is especially unique about these maps is that they have already compiled the best driving routes around the nation and made them easy to follow.  With roadside sites of interest, restaurants, rest stops lodging and gas stations along the route already marked there is little to do but follow along.


What’s in a name?  Well often a description.  A road or place name with the physical features we have identified as associated with good driving is a bit of a no-brainer isn’t it?  Scanning the index for river, riverside, lake, pass, gap, rise, ridge, gorge, falls, mountain, hill, valley, rapids, crook, bend, and let’s not forget one of the most common descriptors – snake, is an excellent method of identifying good driving roads.


Finally, simply pouring over a map, looking for the blue squiggles of a river or creek, that cut through a block of green forested land, and the fine curvy lines of a backroad following alongside it can be not only informative but with relaxing music on in the background and your favorite beverage within reach also quite enjoyable itself.  Or maybe it’s just me which could explain how I ended up with a website about driving.   


As great as books and maps are, there is no denying the value of the internet.  Like most things in life consulting with others is an unparalleled resource. The internet is a phenomenal tool to this end.  Likely you are a member of at least one vehicle related forum frequented by folks from all over the country, the continent, maybe the world. Reaching out to others for driving route suggestions is a great opportunity to take advantage of, one we regularly use when planning routes abroad. Probably the single most active group of drivers going, are motorcyclists.  They are also very active on the internet, regularly sharing their favorite routes online with maps, photos, and even updated road conditions. There are websites that are solely focused on a single driving route or even a single stretch of road.


Of course we don’t only rely on paper maps, in fact we usually refer constantly to street views on Google while pouring over our atlas.  Coming soon we’ll look at some of the online resources that are out there, as well as apps and route mapping tools.  In the meantime if you have some tips of your own on finding good driving roads or just want to share your favorite drives, we’d love to hear from you.  Contact us, comment below or use our Facebook Page.


Today we return with part two of Fire Safety for the Automotive Enthusiast.

In Part One we covered the requisite building blocks of fire protection including the types of fires, and the many fire hazards associated with the hobby both in the garage and the car.   In this installment we will cover fire detection and suppression, including the choosing and use of fire extinguishers. 

Parts one and two were written at the same time, and initially the intent was to release the two parts only a week apart.   With the release of part one we had as many of you know, been made aware of a new type of fire extinguisher.  While we were able to contact the company to learn more in short order, our busy driving schedule conflicted with the need to further investigate and apply that new info to part two.   In the meantime however we decided to cover this new extinguisher in an article of it’s own.  Watch for that article coming soon.

Fire Detection


Smoke Detectors 


We’d like to think everyone has smoke detectors in their homes already. If not, be aware that in all likelihood you live in an area where they are required by law.  We simply cannot stress enough the importance of smoke detectors in the home.

Unfortunately completely covering the topic of smoke detectors would be an article of its own.  Here we will simply outline a few considerations as they uniquely apply to hobbyists.

Fire detection in the garage is invaluable.  Assuming a fire would only occur while you were present and hard at work would be a mistake. However there is a real challenge in providing appropriate protection while avoiding nuisance false alarms.

Unfortunately much of the work we perform in our garages can confuse the simple technology found in smoke detectors.  Exhaust, aerosols, spray paint, dust, welding fumes, particles from grinding wheels and many others contaminants can set off a detector.  While using a detector that has a ‘hush’ feature that temporarily silences alarms while you perform your work is strongly advisable that alone may not be effective at reducing nuisance alarms.

There are two basic technologies utilized;  photoelectric and ionization. The first is best at detecting smoldering fires, while the latter is best at detecting fast flaming fires.  As one could never anticipate the type of fire they might suffer experts generally recommend the use of a combination unit. However combination units may not be the best choice for the garage if it is used as a workshop.

While placing a detector right above your work bench, or above the cardboard box you use as a makeshift paint booth (we aren’t alone in this are we?) is probably pretty obvious it may take more effort than that.

Each type of technology is more sensitive to certain contaminants than the other so for the auto enthusiast using only one type, or both types placed separately may be a more effective approach. By experimenting with the two types, and their placement in relation to the type of work you perform you may find that false alarms can be eliminated. 

If you find that you simply cannot avoid false alarms, smoke detector dust caps are available.  These are coloured bright red to remind you that they are in place. While not ideal, they are a better solution than pulling the batteries which you WILL forget about when you leave the garage.  Remember while these caps are in place you have no fire protection in that area.

If the garage is attached to the home another solution though offering far less fire protection, could be placing the detector immediately outside the door connecting to the house.  Of course the best solution though pricey is to have a professional install a heat detector.

Whether or not the garage is detached from the home, the detectors should be connected to those inside the home so that if one goes off, they all alarm.  These are available in both hardwired as well as wireless forms.

While it’s a going joke that no one reads instructions, this is a case where we really need to resist that cliché.  Read and keep the instructions that came with your detector they will describe how and where to mount the detector.  Take note of the description of the various alerts such as the low battery alert which is distinctly different from the alarm.  Knowing the difference will avoid unnecessary calls to the fire department, especially in the case of carbon monoxide alarms with no obvious outward signs to confirm the alarm.  Most detectors have a limited lifespan and some batteries now last up to ten years.  The instructions will outline these timelines.

Some basic maintenance will extend the life of your detector including avoiding subjecting them to unnecessary humidity and contaminants, and periodically giving them a light vacuuming with a brush attachment. And remember to replace the backup battery twice a year when you change the clocks for daylight savings.  You did that this weekend riiiight?


While on the topic of detectors, and since it is Carbon Monoxide Awareness Week we’d be remiss if we didn’t address the risks of carbon monoxide (CO) poisoning and the appropriate use of CO detectors. 

CO or carbon monoxide is a colourless, tasteless, odourless gas that comes from incomplete combustion of fuels (liquid, gas, or wood, coal etc).  Carbon monoxide replaces the oxygen in blood and can result in death. Early signs can include dizziness, headaches, nausea and flu like symptoms.  While high doses can kill in very short order, CO is accumulative, meaning regular moderate doses can build up in the bloodstream over time and symptoms may take days or weeks to appear.

Again, like smoke detectors, we’d like to think you all have at least one CO detector in the home.  Generally most sources advise that carbon monoxide detectors are best left out of the garage.  Even brief exposure from pulling into or out of the garage is enough to set most detectors into alarm. Such frequent exposure will shorten a detector’s lifespan.  That advise is directed at those that keep their daily driver inside the garage, but likely don’t spend much time in the garage.  That generalization may not apply to we enthusiasts.  

We trust you know better than to run a combustion engine in an enclosed area such as a garage.  If during inclement weather an engine must be run inside the garage, it should be for brief periods, the exhaust should be vented outside the structure, and plenty of fresh air available. If your garage is heated any sources of heat, that use combustion should be properly vented and installed following local codes. These codes were designed over time and sadly after many deaths to keep you safe, abide by them.  For the record an open garage door does not necessarily equate to appropriate ventilation. Depending on the direction of the wind, and without a cross breeze fumes are just as likely to accumulate within the garage as not.  

Different jurisdictions will have different laws dictating the use of CO detectors so it is best to consult your local fire department for advice. That said, most put priority on placing them outside sleeping areas rather than near the CO sources themselves (gas furnaces, fireplaces, garages etc.).  While having an additional CO detector in the garage may offer some security it is NOT a replacement for one or more within the home.

The F-Bomb Garage – Frontseat Driving HQ, is as much a club house as it is a workshop.  With a TV, couch and beers close at hand, it’s not uncommon to spend long hours in the garage. With a gas furnace running in the corner, a carbon monoxide detector was a must-have. The odd false alarm, or higher rate of replacement is a fair trade off for our safety.   For great information, tips and downloadable resources please visit this site, or contact your local fire prevention department.


While the preceding was certainly far more info on fire detection than you had anticipated there simply is no more important link in the fire safety chain than that of early detection.  Early detection allows you and your loved ones to escape safely and that is our primary goal.  


Fire Suppression


Fire Extinguishers

Everyone should have at least one extinguisher in the garage. And more inside the house!

Referring to the fire classifications in can help you   In general for most people a class ABC extinguisher is an adequate choice.

As mentioned extinguishers are rated by the type of fires they most effectively extinguish.  The same nomenclature (A, B, C) used to describe the types of fire is used for extinguishers. For a recap of the types of fire refer again toPart One.  Choosing the appropriate extinguishing agent is essential to safe and effective operation.

An AB extinguisher is only for use on type A and B fires.  An ABC extinguisher can be used on type A, B, and C fires. While uncommon a water extinguisher would only be rated as A as it would be unsafe to use for burning liquids or energized electrical equipment.

Additionally a numerical rating is used to designate the potential size of type A and B fires that the extinguisher can be expected to suppress.  This system is not employed for type C fires.  While there is meaning behind the numbers used, for simplicity sake understand that the larger the number, the larger the fire load (of that type) that the extinguisher can potentially extinguish.  Following is an example of both systems in use; 5-A 10-B C.

The most common extinguishing agents can be grouped into three categories: clean agent, dry chemical, and water.  A forth though generally less common in portable form is actually fairly common in the automotive world.  Most race car plumbed fire systems employ foam.

Selection of an effective extinguisher is not limited simply by the type of fire being extinguished.  Numerous factors specific to your situation can come into play, especially any motorsport governing regulations.  Professional consultation can be a real asset here.  Reaching out to your fire department, race scrutineers, and even fellow hobbyists can be great sources of information. There are however a few general considerations that we can cover here.  Let’s look at each of the agents and their respective advantages or disadvantages.

Carbon dioxide, Halon, or Halotron type extinguishers work fully or in part by displacing oxygen, which of course we need to live so discharging one in the occupied enclosed cabin of a car can be extremely dangerous.  Even a brief lack of oxygen can cause unconsciousness or death.  While realistically, our first course of action would be to evacuate the car this is still worth consideration.

That said, used safely from outside the car they can be very effective at extinguishing cabin fires without the terrible mess of dry chemical extinguishers.  For this reason they are often referred to as clean agent extinguishers. 

While these same agents are effective for energized electrical fires and especially useful with sensitive electronics their effectiveness in a deeply routed Class A fire is limited as they have little ability to cool the fire.  The risk here is that extinguishment is only temporary as the retained heat can quickly cause a rekindle.  As such they may not be the best choice for a typical garage fire and is why they are often only rated BC.

Carbon dioxide extinguishers are built of thick steel and the contents are liquefied thus these extinguishers are quite heavy, and generally only available in larger sizes not conducive to automobiles or hanging on a garage wall.

Water extinguishers aren’t terribly practical.  The first drawback is that while they are very effective, they are limited to Class A fires.  To be of any real use the water is generally combined with a source of pressurization, without which you are left with the option of a manual pump.  That brings us to the second draw back – the weight and the size needed for effective fire extinguishment just isn’t suited to a vehicle, nor are they easy to source. 

While a water extinguisher isn’t easy to find, a garden hose in the garage certainly is so let’s quickly discuss using water for fighting fires.  While water as an extinguishing agent can be effective on class A fires, using water to extinguish an energized electrical fire, or a fire involving liquids (gas, oil etc.) is terribly dangerous. 

While the danger of mixing electricity and water should need no explanation, many fail to understand that water can spread a flaming liquid not only driving the fire into contact with other combustibles but even dividing the fire into multiples.  NEVER use water to fight an electrical or flammable liquid fire.

In general ABC rated dry chemical extinguishers are the best all around compromise for car fires.  However while they are effective in the cabin, you may want to keep in mind that they create a terrible mess that will linger for months in the crevices of your vehicle and many agents are corrosive to metals especially the delicate metal electrical connectors.  While a lingering sprinkling of powder on your legs from under the dash while driving is preferable to a torched car you may want to consider one of the clean agent alternatives mentioned earlier for use inside the cabin. 

Dry chemical extinguishers are a great option for fires in the engine compartment.  Not only are they usually appropriately rated ABC there are sizes and weights available for the car.  An engine fire, builds heat quickly,  while ideally dissipating that heat would be part of the suppression technique that isn’t always possible.  While dry chemical extinguishers don’t reduce heat they can leave a lasting layer of powder that cuts the oxygen chain hopefully until the engine cools down.  If this connection isn’t immediately clear please consider reading Part One again to review the brief description on fire science. 

A disadvantage of dry chemical extinguishers is that to be most effective they require a direct line of sight to the fire, which can be tricky in the case of an engine fire where the hood is too hot to lift. 

The ranges of sizes and weights and (usually) ABC rating make dry chemical extinguishers an appropriate choice for use in the garage as well.


2 – 2.5 – 5 – 10 – 20 lb extinguishers(duct tape for size reference)

As mentioned earlier the effective fire load that an extinguisher can potentially extinguish is denoted with a number as in this example (5-A 10-B C) and is too technical to appropriately cover in this article.  To effectively address this issue, one should consult their local fire prevention department.  However – given the appropriate choice of agent – there is generally a correlation between size and effectiveness.  Generally the safest fallback is to choose the largest physical size that remains practical. 

It is common to see extinguishers described by the weight of the extinguishing agent contained therein.  Over time these weights, have unofficially become somewhat of a standard method of denoting the SIZE of the extinguisher more so even than the actual amount of agent within.  The photo above depicts the various common sizes in comparison to each other.  While using this weight terminology to determine the size you need is far from technical, it will assist us in discussing practical sizes for the average enthusiast.

Though common a 2.5 lb extinguisher is the very smallest size that should be used.

For automotive use, nothing below a 2.5 lb extinguisher is likely to be effective.  In practice an engine fire would likely dictate at LEAST a 5 lb extinguisher.  Our practice at Frontseat Driving is to run a 2.5 pound clean agent BC extinguisher for cabin use, and in the trunk a 5 lb dry chemical ABC extinguisher.  Both extinguishers are very securely mounted to avoid accidental discharge and to keep secure in case of a collision. 

In the home or garage our opinion is that a 5  lb extinguisher is the bare minimum.  It’s moderate size means ease in portability and use, and it is easily mounted on the wall beside your exits.  That said the 10 pound extinguishers that you see on the walls of offices and the halls of high-rise buildings were enforced by experts for a reason and taking their lead is recommended. 

The F – Bomb Garage is equipped an odd assortment only because of how they were acquired.  One 2.5 lb, and one 5 lb dry chemical ABC extinguisher is found at each door.  A couple 5 lb extinguishers or a single 10 lb extinguisher would be a more typical arrangement.

Extinguishers should be mounted near exits.


Ideally extinguishers should be located at the doors of the home or garage.  Mistakenly people often mount their fire extinguishers close to the stove, or tucked away in a nearby cupboard, while they should be located AWAY from the fire.

In the case of a fire your FIRST reaction should ALWAYS be to escape. ALWAYS!

Once you and any other occupants are safely out of the structure (or away from the car), you can safely call the fire department.

Calling the fire department is number two after evacuation. Fire grows and spreads far quicker than most imagine.  Extinguishers have limited capacity and without training, attempts at extinguishment often fail and can actually spread the fire.  The size of a fire is never used to determine whether or not to call 911.  ANY fire is reason to call.

AFTER calling the fire department you can take the time to better evaluate from a distance whether you feel comfortable in attempting to extinguish the fire.

Hopefully now the placement of fire extinguishers makes better sense.  Having them at the exits, not only promotes safe evacuation, it provides a safer place to evaluate.  Furthermore if the decision is made to attempt to extinguish the fire, the individual is automatically establishing a safe route of retreat.


NEVER ALLOW THE FIRE TO GET BETWEEN YOU AND THE EXIT.


Remember your priorities are ESCAPE and CALLING 911.


There are often some other options available when a fire does start. Referring above to the science of fire, removing one or more of Heat, Oxygen, or Fuel will extinguish a fire.


Pot on the stove or garbage can on fire?  Protect hands, place the lid on.


Puddle of fuel on fire? Smother in kitty litter, or soil.


Electrical appliance on fire?  Unplug or cut the power at the breaker.


Carburetor fire?  Starting the car often extinguishes the fire.  A wet rag tossed over the carb is also effective.


NEVER USE WATER TO EXTINGUISH A BURNING LIQUID OR AN ENERGIZED ELECTRIC APPLIANCE!!!


Never turn your back to a fire, even after the fire is extinguished there is a strong likelihood that the fire will retain enough heat to reignite.

Even if you successfully extinguish the fire, it is best to let the fire department confirm extinguishment and ensure that there hasn’t been any fire spread.

Do NOT be embarrassed to call the fire department.  Calling them as soon as possible keeps you, your family, your neighbours, your property, and THEM safer!

Car Fires


Okay, so what if you suffer a car fire on the road?

Just like in the house or garage the first priority is escape. 

To do that you first have to remain calm.  Observe traffic and signal as you would in the case of a flat tire and pull safely over to the side of the road.

Remain calm. Unlike on TV the odds of your vehicle exploding are slim to none, especially with modern vehicles with plastic fuel tanks.  For interest sake any ‘explosions’ heard at car fires are usually the tires popping.

After safely pulling over to the side of the road (away from other cars and buildings) place the car into gear, or park, and set the parking brake.  Turn the ignition off, and quickly remove your family.  If you really have your wits about you, pop the hood release.  Make sure you take your clothing if it is cold and or raining, and keep yourselves as far from the roadway as possible. Your greatest risk is no longer the fire but an ensuing collision.

Keep upwind of the vehicle. The plastics, and upholstery release EXTREMELY dangerous smoke.

Keep uphill of the vehicle, often the gas tank will melt, and if it does flaming fuel will run downhill.

Once you and your family are safely distanced from the vehicle, uphill and upwind, just as before the second priority is to call 911.

If you are driving along and discover that you have a fire under the hood the chances are that by the time you safely pull over the fire ,fueled by the rush of air the fire will have grown beyond the ability of a handheld extinguisher. 

Additionally there is a very good chance of burning your hands and face as you attempt to open the hood.  As mentioned you need to approach from upwind, and uphill.  If the flames are escaping the engine compartment or have spread from the engine to the cabin the fire is beyond your abilities, and the danger has grown substantially.  Keep these facts and the roadside dangers in mind as you decide whether or not to attempt to extinguish the fire. 

If you drive a vehicle from the early 80s to in some cases the early 90s a significant additional risk is posed by the compressed gas safety bumpers.   It is certainly worth knowing if your vehicle is equipped with these frightful devices before being thrust into the situation.

An under dash fire caught early is most effectively dealt with by closing all the doors and windows but the one you fight the fire from.  Direct the extinguisher as best as possible under the dash, discharge the extinguisher then close the door.  The closed doors and windows contain the agent within the car.  This is especially important if using a clean agent and on a windy day.

Once again, while we hope to present an informative, and educational article, brevity has to play a significant role.  If you feel that more information or greater detail would be beneficial we’d appreciate that feedback as well.

If you have any need for additional information or have any questions please don’t hesitate to ask.  If we don’t know the answer we WILL find it for you, or at the least direct you to an appropriate resource.  The article has been directed to fire safety for the automotive enthusiast which necessarily neglects most of the home.  As we have mentioned many times, your local fire department (usually the fire prevention division) is the first ‘go to’ resource.  Not only is the information reliable, but it is specific to your local laws and regulations.

Please take the time to talk to your family about the risks and danger of fire.  Plan routes of escape, and agree on a safe meeting spot away from the house for all to meet.  When the fire department shows up the first thing they need to know is that everyone is out of the home.  Please consider the tools at your disposaland again more are available through your fire department.

While we have taken great care in gathering and presenting the information, mistakes happen, and editing can be faulty.  If anything in this article seems off to you, or you simply disagree, we want to hear from you.  

Finally, let’s be clear, this is the internet.  NOTHING in this article or anywhere on the interwebs replaces professional consultation or training.  Conduct yourself within the limits of your own knowledge and skill.


We love Autumn.  We love driving. We love driving with friends.  

We especially love Autumn driving with friends.

We did just that Sunday past.

Some of our favourite roads and a few squiggles we weren’t familiar with were thrown into Google maps, a last minute invite was posted onto Facebook and before you knew it a cruise was happening.  

It never fails to awe how a machine can bring people together as the automobile has managed to do, for over a 130 years.

Our unlikely cast came from all walks of lives.  Quite a few decades separated the youngest from the oldest .  Several of us have only known each other for a few weeks, and most only met that day.  Yet when you throw the love of cars and driving into the mix any differences quickly faded into the background and a bond instantly solidified.

It is perhaps ironic that in an age where there seems so much strife due to differing political, religious, and social values the attack on the automobile is at its height.  Maybe rather than attack car ownership we should celebrate it, and encourage driving events, and car club membership to bring unity and fellowship.

Okay so admittedly we’re romanticizing a bit and straying dangerously near politics but the point is, it’s pretty cool how a machine can bring folks together.  Heck, for all its importance to society you don’t hear about refrigerator clubs, or refrigerator meets do you?!

Enough words.  Here are some pretty pictures.

The route snaked up and down the Niagara Escarpment in southern Ontario between Burlington and Orangeville.  Whether weaving your way up, flying down, or approaching from a distance the escarpment provides a brilliant backdrop at this time of year. 

Despite the ‘seat of our pants’ planning that was employed in organizing the cruise at least some effort was expended in choosing the route.  Some roads were hit from the direction providing the best driving experience, while others were approached with the best view in mind.  

The route took us through a number of quaint towns and hamlets including Limehouse, Glen Williams, Terra Cotta, Cheltenham, Boston Mills, Inglewood, and Belfountain where we stopped for coffee and some treats.

A big thanks to everyone for making it out, it’s always more fun cruising with others, we appreciate the company. 

This coming Sunday October 28 Frontseat Driving will be hosting yet another cruise, this time in the Niagara Region.

Expect a great variety of rolling country roads, tight winding technical driving, riverside and lakeside views, several waterfalls, and along the entire route a beautiful autumn backdrop. We’ll stop for lunch and drop into a couple of wineries worth the stop even if you aren’t a wine drinker. We’ll roll through many small hamlets, and towns and stop to explore several unique neighbourhoods along the way.

A very special thanks to Larry Strung not only for all the car photos seen in this article, but also for the great company in the Fintail.  The best backseat driver Frontseat Driving has experienced yet!  You can reach Larry at Larry.strung@me.com

We’ll leave you with this beauty – perfectly curated with autumn themed paint and a rolling ribbon of asphalt behind it.


For the past two years, a humble but hugely fun auto event has been foremost on our driving itinerary.  We have attended the Cobourg Lions Club annual poker run – car rally two of the three years they’ve held the event.  This year marks the 4th and it is fast approaching.

The “humble” part comes through the fact that these are just some good folks enjoying their vehicles and taking in the countryside.  This is truly a run-what-you-brung event, no pretense to be found. 


Each year while remaining beautiful, the route changes and some new ideas are presented to challenge and delight not only the driver and navigator but even the crew in the backseat.  This is truly a fantastic family event.

So what is a poker run?  Like a navigational rally each team is presented with a route book that provides written directions that often require diligent attention as not every instruction is straight forward.  It’s during events like these that you realize how many intersections aren’t properly marked!


Along the way, you will be presented some challenges to prove that you have accurately stayed on the prescribed route.  These challenges provide an opportunity for the whole family to get involved as you all pile out of the car to search for a hidden cache of treasures, or perhaps record dates or details from a roadside historic plaque!

The poker run is about accuracy not speed, so these challenges offer a great opportunity to not only stretch the legs but grab a coffee, and a snack from a local bakery, hit the washroom, or grab a bit of gas if you left the house a little rushed.


The route will cover stunning landscapes, charming towns and villages, rolling hills and fun driving roads.  You will find no shortage of camera worthy views, it was a challenge to narrow our collection of photos down to just those in the post.

Along the roughly 150 kilometers, if you accurately stay on route you will encounter 5 checkpoints along the way.  This is where the poker comes in!  At each checkpoint you will choose a card that will make up a hand which back at the hall might score you one of the many shockingly impressive prizes.  Don’t worry, if your hand is looking light, there are chances to do some wheeling and dealing at the end!

The route leads back to the Lions’ Hall where a wonderful hot lunch awaits, with enough choices to please even the pickiest of eaters.  Here among the laughs, the war stories, and finger pointing (it’s always the driver’s fault) take the time to enjoy the warmth that stems not only from living in a small town, but being part of a COMMUNITY like that of Lions.


All that while you are supporting the countless community projects that the Lions are actively engaged in.  A truly worthwhile event for all!  This year the 4th Annual Cobourg Lakeshore Lions Club Poker Run is on October 20.  Email cobourglakeshorelions@gmail.com or call Christine Bayer at (905) 269-8505


It is truly with a heavy heart that we have to miss this years event. Please help us live vicariously through your adventures. Post up any photos of the event on our Facebook page.


Fires happen every day.  In significant urban settings they are happening all over the city every day.  It may seem unlikely but it is absolutely true.


Right now, you may be scrunching your brow, pursing your lips and thinking, “Okay if that’s true why don’t I see or hear about them?  


Well for one, heavy population density and shift work mean fires are being spotted sooner at all hours of the day.  Add electronic fire detection and protection systems, fire resistant construction, and quick fire department response to the mix and most urban fires these days are more effectively contained than in years past.


While most fires of yesteryear resulted in a fully involved house fire, often today’s fires are restricted to a single room (kitchen, bedroom, garage), a single part of the structure (chimney, porch), or even reduced to a single item (oven, mattress).  


Another reason that you aren’t hearing about these fires is that in large urban centers all these fires become commonplace to the media outlets. Only the multiple alarm fires with devastating scenes of billowing smoke and balls of fire make for good news.


So why are we bringing this up?  Well it seems in general, people have become complacent. Not only do most people doubt the likelihood of a fire, they fail to recognize the hazards, and truly have no idea of the true destructive potential of fire.  While fires can and do happen to anyone, the average auto enthusiast often engages in activities or habits that put them at significant risk, often unknowingly.  Read on for some tips on fire safety for the auto enthusiast.


Even a fire detected early, and contained to a single room, is going to result in terrible property loss.  Smoke infiltrates entire structures ruining clothes, carpeting, and window treatments, and causes staining of walls and ceilings.  Water damage ruins electronics, flooring, drywall, books, and artwork not only in the location of the fire but often the floor below and rooms adjacent to the fire.  Of course fire itself consumes nearly everything in its path.  Cleanup and repair will almost certainly displace you and your family for days to weeks, even longer if a structure fire is suffered. 


So now that we’ve hopefully convinced you that fire is a real risk, how about we talk about some fire prevention and suppression strategies, as they pertain to us as auto enthusiasts; the garage, and your car itself.

There is a LOT of info to cover, and it’s a challenge to appropriately cover this topic and keep it as concise as contemporary attention spans demand.  We have divided the topic into four main sections in the order that they should be addressed;  Background Info, Fire Prevention, Fire Detection, and finally Fire Suppression.  Part One that you have in front of you will cover the first two.  We’ll cover detection and suppression in Part Two, coming soon.  Grab a beverage, get comfortable and hit it in one go, or perhaps take a section at a time.


The photo above reflects the beauty of a flickering flame that the results (below) don’t.

Science (just a bit)…


Likely you have heard of the fire triangle. This is the concept of the three requirements of fire;

Heat (or ignition source)

Oxygen (found in the air we breath)

Fuel (what is burning)

Removing any one of these elements will extinguish the fire. And yes you keeners out there will be muttering something about the Fire Tetrahedron to your computer screen, but let’s not unnecessarily complicate matters.  Instead let’s look at how we can remove each of these elements.


Heat is most often controlled by adding water.  It works well, it’s cheap, and it’s plentiful.  Heat in the form of ignition sources can be controlled through prevention.


Oxygen is most often controlled by displacing it with another non flammable gas such as carbon dioxide (CO2) or Halotron.  Another method is to separate the oxygen from the fuel with a blanket of fire fighting foam used by firefighters or a powder as found in most commercially available ABC handheld extinguishers.  Of course the most common example that many have probably experienced, is simply putting the lid back on the pot.


Fuel can be taken out of the equation as easily as pinching the fuel line, or as we see most summers, cutting swaths through forests ahead of the windswept forest fires.


Fires are classified into types reflected by the materials that are burning.  This classification is important in order to match the best extinguishing agent to the material burning.   


Class A

Ordinary combustibles such as wood, paper, cartons, textiles, and PVC.


Class B

Flammable liquids and gases such as, gasoline, oil, paints and propane.


Class C

Energized electrical equipment such as motors, appliances, electrical outlets and fuse panels.


The keeners will again point out a fourth type of fire.  Class D fires are rare as they involve exotic metals that are rarely found in a hobbyist’s garage, however you may see it referenced while researching extinguishers so to satisfy any curiosity we’ll include it.


Class D

Combustible metals, such as sodium, magnesium and titanium.

You’ll notice that fire extinguishers are rated using the same nomenclature, symbols and often colour coding.  Certain extinguishers will most effectively extinguish certain types of fires.  More on that later.

Fire Protection


Fire Hazards

Countless hazards exist in every garage. The key is eliminating as many as possible.

Most of us aren’t lucky enough to have a dedicated workshop. This space is often just as likely to be the wood shop, as it is the auto garage, paint booth, games room or even a holiday craft and scrap booking studio.

Without a doubt your garage pulls double duty as the default storage area.

Our garages are home to plastic kids’ toys, and lawn furniture, out of season clothes, cardboard boxes of ‘who knows what’ that never managed to get unpacked from the last move, lumber, sports equipment, lawn mowers, BBQ’s, winter tires, the list is exhaustive and much of it highly flammable. 

Vapours from gasoline, gas/oil mix, natural gas, propane, acetylene, paints, varnishes and many cleaners, degreasers, and aerosols are all highly flammable/explosive.  In terms of the fire triangle the fuel load in a typical garage is tremendous.

Many homes often have the hot water heater, and clothes dryer (often with piloted ignitions) in the garage.   Many hobbyists have a source of heat such as a furnace, space heater, or a wood or oil stove.  Again referring to the fire triangle the fore-mentioned are all sources of heat or ignition.

So we have already identified a ton of common fuels, and a few sources of ignition found in the average garage and we haven’t even addressed, any heat produced by the vehicles or the work you are doing, within the garage.  Heat from the engine and exhaust, sparks from grinding or cutting metal, welding, soldering are all common sources of ignition.

To make all this even worse, most newer homes are built with the garage attached which adds significant risk to the entire structure and your family both from the vapours of stored chemicals, and Carbon Monoxide, but also the spread of smoke and fire.

Let’s look at some of the more common hazards a little closer.

Rags and Spontaneous Combustion


Spontaneous combustion is a significant concern for many hobbyists not only because of the high risk but because of the lack of knowledge.  Spontaneous combustion occurs as certain types of oils naturally decompose, in turn creating heat.  If the heat can’t effectively dissipate it can build to the point of self ignition.

Rags, with these oils, paints, or wood stains (even cooking oil) on them are perfect combustibles and when piled together, can provide not only the fuel but the ignition source.  Safe storage and disposal is imperative. 

While gasoline, and automotive oil aren’t at risk of spontaneous combustion they are only an errant spark away from catching fire.

A good method of dealing with used rags, is to hang or lie your rags flat to dry outside the garage followed by storage in a metal can such as an unused paint can. This is particularly practical with volatiles that evaporate quickly and less so for oil saturated rags. 

A couple rags here and there quickly disposed of according to your local regulations is easy to manage however if you are accumulating rags at a steady rate, using a specifically designed metal rag bucket with a gravity-closing lid is a good idea.  These cans are built sturdy with integral ventilation below the can to prevent heat build up however they are quite expensive as they are tailored to industries forced to follow health and safety policies. 

Watch your favorite classifieds, junk stores, and the such for good deals. Ours was generously gifted to the F-Bomb Garage by a good friend’s mother looking to clean out her own garage.  Before we acquired ours we used an old galvanized steel water cooler.  Any metal can with a tight fitting lid can work as a decent substitute, a steel waste can with a self closing lid is ideal.  

Dispose of the rags according to local procedures and frequently so the collection is kept to a minimum and keep the can away from sources of heat.

On a related note, NEVER throw work clothes that have been in contact with oil, fuel, etc, into the clothes drier EVEN after washing. NO washer can take all traces out of the clothing and the heat from the drier can ignite a fire.

Flammable Liquids


Obviously storing chemicals and gases is a common issue in any shop or garage. Gasoline, two stroke fuel, camp fuel, oil, lubricants, propane, degreasers, cleaners, paints, stains, epoxies, glues, and resins are all just a few of an exhaustive list of common flammable products kept in the average garage.

The first step of safely storing them is to keep them in approved containers, whenever possible the same container it was sold in, with the lid tightly affixed.

An approved flammable liquids cabinet is a slick piece of gear that is designed to insulate the contents from fire while venting vapours outside the storage area. Unfortunately these cabinets are cost prohibitive for most of us.  However a good source of more affordable cabinets is government auctions.  For deeper cost savings there are some clever ideas for DIY cabinets online.

While not insulated or vapour proof, a salvaged metal locker is spark resistant and can make for decent storage.  At the very least ensure that the storage area is placed away from ignition sources, and any areas that you may find yourself doing any hot work such as cutting, grinding or welding.

Keeping containers clean of over-spill, and keeping them well labelled is another good course of action.  Gasoline should never be stored indoors.  Surely everyone has seen a bulging plastic gas can due to heat fluctuations.  Gasoline vapours are far more flammable than even the gas itself.  Should any leak out of the can they can easily be ignited.

The most common single source of flammable liquid in the average garage is a parts cleaner.  Resist the temptation to use a makeshift parts cleaner.  A decent parts cleaner is very affordable and readily available used for even more savings.  Most importantly a good parts washer has a fusible link that automatically drops the cover should a fire start.   

If you have a parts washer keep the lid closed when not in use and avoid use of it (and any chemicals) without appropriate ventilation especially if an ignition source is present. Don’t forget any pilot lights! 

While we have yet to experiment with it ourselves there are now non flammable cleaning solvents on the market.  Try one of those and report back to us!

Hot Work


Hot work is any work that can create a flame, heat, or even sparks.  Welding, brazing, soldering, grinding, cutting of ferrous metals and many alloys, even striking steel with steel (hammering) can cause a spark capable of igniting a fire.

The first defensive action against ignition is to keep a tidy work area.  Ensuring that there are no combustibles (paper, boxes, rags, dust, wood, etc.) in the vicinity is essential.  Common sense  here plays a big role.  The direction of sparks will change with the required  

cuts.  Anticipate the direction of those sparks and contain and direct them using physical barriers such as a fire blanket, welding screen or an appropriate makeshift barrier, such as sheets of metal or drywall. 

Wear the proper attire while performing hot work.  Frayed jeans, go up in flames in an instant, synthetics melt to the skin just as fast.  Cuffed pants, and open boots catch and trap sparks.  Finally plan any hot work to end well before leaving the work area.  That increases the likelihood of being present should any unseen smoldering material burst into flame.  Be aware a smoldering nearly undetectable fire can last for many hours before finally igniting.  

Other Hazards


Some hazards unsurprisingly revolve around the vehicle itself.  The two biggest hazards are the electrical and fuel systems.  

Ensure that your battery is mounted securely, and both positive and ground connections are tight, and in good condition. 

While most people are afraid of electricity and few would consider rewiring their own homes, it seems their vehicles are a free-for-all.

If you plan on doing any wiring on your vehicle, make sure you truly know what you are doing.  Start by disconnecting the battery. 

Switches can often be negatively or positively switched.  Know the difference and when each should be employed.  All switches should be used with an appropriate relay if you don’t know why, you probably shouldn’t be doing your own wiring. 

Circuits should be appropriately fused and rarely need to be ‘hot’.  The appropriate gauge wire should be used.  If you don’t know how to choose the correct fuse or wire gauge once again, you probably shouldn’t be doing your own wiring.  Seek assistance. 

Tidy and secure connections free of loose strands, and bare wire should be ensured.  Whenever possible protect wire from abrasion and the elements.  Any added devices should be mounted securely and connections prevented from inadvertently shorting or grounding. 

Before welding on the car, disconnect the battery.

Before working on the fuel system, disconnect the battery.

Never place your tools on the top of the battery, one slip can result in a short capable of starting a fire or causing you to jump and strike your head on the car’s hood.  Don’t bother asking how we came up with that scenario.  

Fuel filters should should be metal, perhaps glass, but not plastic.  They should be located in a manner that prevents any leaks from falling onto a hot engine or exhaust components.  

All fuel lines should be made of approved fuel line, routed away from hot surfaces whenever possible and connections should be appropriately secured and protected from abrasion.

If you are going to work on your vehicle’s fuel system, ideally pull it out of the garage first.  If things go awry, losing a car, and not the garage or house is clearly preferable.

Finally never cut or drill into your vehicle without knowing for certain what is on the other side of the work surface.  Compromising hidden fuel and brake lines, fuel tanks, wires, or compressed gas cylinders (bumpers, seat belts, air curtains, hatch struts, fire extinguishers – you know who you are LOL) will result in a dangerous situation at worse and a bad day at best.

We could never appropriately cover all possible hazards you may encounter so we will move on from fire protection to fire detection and suppression in Part Two.  If you have some hazards you think we should have included here please let us know, we’ll do our best to address them quickly.  

While the utmost care has been taken in compiling this post, mistakes may have slipped through editing.  If something doesn’t seem right bring it to our attention, or ask a competent expert. 

For the sake of brevity much detail has necessarily been reduced to generalizations,  however for more info on anything covered in this post ask in the comments below or on our Facebook page Frontseat Driving.

This article specifically addresses fire safety for the auto enthusiast while leaving many home fire risks uncovered.  Your local fire prevention department is always happy to provide resources and answer any of your questions, and is the single best resource for info regarding your local codes and best practices.


Click here for more info on Oily rag safety

Click here for a Home Fire Safety Plan


Repairing a W111 Mercedes Fintail Fuel Pump


Returning home to Frontseat Driving HQ in the daily driver, we were surprised to see a puddle under our Fintail Mercedes that had been sitting idle overnight.  The bigger surprise was that it turned out to be fuel not coolant.

It isn’t often a vehicle is generous enough to break down in the driveway.   Perhaps it was her way of thanking us for the fun, and doting she’s enjoyed so far.

Driving a vintage car can be a unique experience, maintaining one a challenge, and finding parts to repair one nearly impossible.  So far we’ve been shocked at the availability of parts for the Fintail.  In fact Mercedes Classics carries nearly every part we’ve inquired about – nearly every part.  

While our immediate assumption was that a line had ruptured it quickly became evident that the pump itself was leaking from the weep holes, a sure sign that the diaphragm was damaged.

In normal operation the fuel enters and leaves from the same side of the pump.  The holes worn through the diaphragm however were allowing the fuel to spill out the backside of the pump casing and out the weep holes and onto the hot engine clearly a dangerous situation.

The entire pump splits into three pieces.  The part circled in red remains bolted to the engine block.

The part circled in blue is still attached to the fuel lines and is left hanging in the engine bay.

The diaphragm that needs to be repaired is found but not shown in the section of the pump highlighted in yellow. 


Mercedes exploded diagram of the pump.


Weep holes on backside of pump body (yellow in above diagram).


Pump housing (yellow in above diagram) showing diaphragm.


A hole through both layers of the diaphragm proves to be the culprit.

Okay so the problem had been found, now came the time to find the replacement diaphragm.  Unfortunately unlike many fuel pump diaphragms our unit doesn’t disassemble any further than pictured, so the spring, seal, rod, and diaphragm must be replaced as an entire unit.  Not only is it not offered by Mercedes Classics, it doesn’t even appear on the exploded Mercedes fuel pump diagram.  

While a new replacement pump is available it isn’t cheap, and it’s shiny.  Ideally we want this car to retain as much of it’s dirty original parts and patina as possible. 

A couple years ago, before the Fintail was even purchased we came across a forum post claiming that Fiat part number 0009918453N was a suitable replacement and that factoid was filed away for future reference.  Going with that vague info, we found and ordered the part from C. Obert & Company in Santa Cruz, California.

The Fiat diaphragm is a more typical example of a replacement part in that it disassembles to it’s component parts which can be individually changed out.  That said, the Fiat part is by no means a suitable replacement as can be seen in the following photos.  


Here the similarities of the Fiat part, on the left are obvious.


Here the differences, again Fiat part on the left are obvious.


Length of the Mercedes pump rod vs…


…the Fiat pump rod.


Here the diameter of the Mercedes pump rod is compared to…


…the diameter of the Fiat pump rod.

Initially it occurred to us that perhaps with a bit of minor surgery we could adapt the Fiat pump rod to the Mercedes.  It quickly became clear that the required alterations would be much more than minor surgery.  For now the idea of altering the rod has been shelved while we investigate an easier approach.  

Our revised approach involves disassembling the Fiat part, and using the diaphragm material on the Fintail pump.  At this point you might be saying, “But wait, didn’t you say the Mercedes part didn’t disassemble?”

Yes we did.  


The Fiat diaphragm disassembled.


Socket used to carefully cut the diaphragm.


Fiat diaphragm with hole carefully cut.

While the diaphragm material looked to be about the same size and the bolt hole pattern the same, it really was tough to tell.  We took one of the layers of the Fiat diaphragm and using a hobby knife and an appropriate sized socket as a cutting guide we cut a hole in the material big enough for it to fit around the Mercedes’ spring.

Fitting the newly cut Fiat diaphragm over the spring and between the two layers of the Mercedes diaphragms it proved to be a near perfect match.

By now the secondary plan of attack is probably becoming clear.   While the new layer of diaphragm fit well, it alone wouldn’t be capable of preventing fuel from travelling to the other side of the pump because it isn’t sealed along the inner diameter.  The next step then was to try gluing the old diaphragm to the new diaphragm.  While the diaphragms looked like butyl rubber and smelled like it too, were they?  An experiment with a couple of scraps, seemed to confirm it.


Near perfect match.


Sticking together but will fuel dissolve the glue?

The result, as suspected that the glue did not hold up to the effects of gasoline.  Tomorrow, we will try a glue known to be gasoline resistant.  We will update this post as soon as we have results.  Rather than wait to post this blog entry until the project was completed (successfully or not) we thought we’d publish it now to solicit some input.  Perhaps with the above details you might imagine a good approach.  Maybe you have repaired one yourself, or better yet you have a lead on a replacement.  Feel free to comment below with any ideas, or questions, and stay tuned for the update!


This cement is fuel resistant, and currently curing.


Both surfaces were scored.


Glued and clamped

After a couple days of glue, clamp, and repeat the finicky job of gluing the two diaphragms together was complete.   It looks promising folks!  That said, we have a new mechanical pump in transit.  While we aren’t thrilled with the replacement (more on that when it shows up) we found it much cheaper than that we first sourced.  If nothing else the replacement will serve as good research. 


Time now to reassemble the OEM pump;  


  • the spring plate slips into the actuator lever.
  • the open spring end fits over a post in the pump body.
  • the pump seal is fit into place on the pump body.
  • the spring is compressed while the pump rod is extended.
  • the rod mates to the actuator simultaneously. 


From left to right the parts are assembled.


The yellow circle shows the placement of the spring.


In the center of the pump the fork of the actuator lever is visible.


This shows how the diaphragm rod mates to the actuator fork.

So our repair worked!  For a week.  While we would have liked to continue the experimenting with glues our schedule of events was just to busy to continue.  By the time the repair failed we already had the replacement pump in hand.

As mentioned we resisted replacing the pump as we really would prefer to repair or renew old parts rather than simply replacing them with new.  Not only was a new pump against our philosophy, strictly speaking it wasn’t a direct replacement with the OEM part.  Yes it worked, and was nearly a bolt on replacement but it clearly was of a newer design.  The new pump is still non-rebuildable as it doesn’t even disassemble. 


Visually the replacement pump design is different enough that it was only with the full assurance of Mercedes Classics that we ordered it.  The new pump does away with the intermediate mount as seen in the exploded diagram above circled in red and numbered ’60’.  The new pump bolts directly to the engine block thus the plunger of the diaphragm is activated directly without the rocker mechanism seen highlighted in yellow and numbered ’20’.  The following photo shows the significant differences.   


As mentioned the new pump is ‘nearly’ a bolt on replacement.  The pump base seen below shiny and still attached to the engine block needs to be removed along with the rod, which is a straight forward task.  


Additionally the new pump doesn’t use a threaded fitting for the pressure line as seen below.  A few options are available here.  The entire line can be replaced which means significantly altering the look of the engine and requires finding the appropriate hardware to mate back up to the Zeniths.  This option was deemed as too much trouble and sacrifice for us.  Another option would be to cut the line at the end nearest the pump.   Not a bad option but we wanted a flared end for safety.  Likely the line could have been flared easily enough however we thought we could skip a step, and we were right.  We cut the OEM captured threaded fitting off of the line itself, leaving behind the factory flare.


After that, it was truly simply a matter of bolting the new pump, still using the original bolts, directly to the engine block.  The new pump has been working flawlessly for many, many thousands of miles since.  

As always if you have any comments leave them below.  We are still searching for the correct diaphragm replacement, if for no other reason than to have a spare pump on hand.  If you have any leads we’d appreciate hearing about them.